¶ Introduction
Advanced Case Management is a tool used to record, update, track, follow up on, and close issues raised by employees or customers. This functionality can be integrated across multiple modules in D365 Finance and Operations.
Axnosis has extended Dynamics 365 by introducing functionality to support advanced case management. To create cases, go to Organization Administration. For detailed guidance, refer to the test script titled Advanced Case Management.
¶ Navigation
¶ Specific Setup
Assumed setups include
- Employees
- Departments
- Number sequences
It is necessary to complete the following specific setup for cases:
¶ Step 1: Set up Case Category
- To setup case category, navigate to Sales and marketing>Setup>Case categories

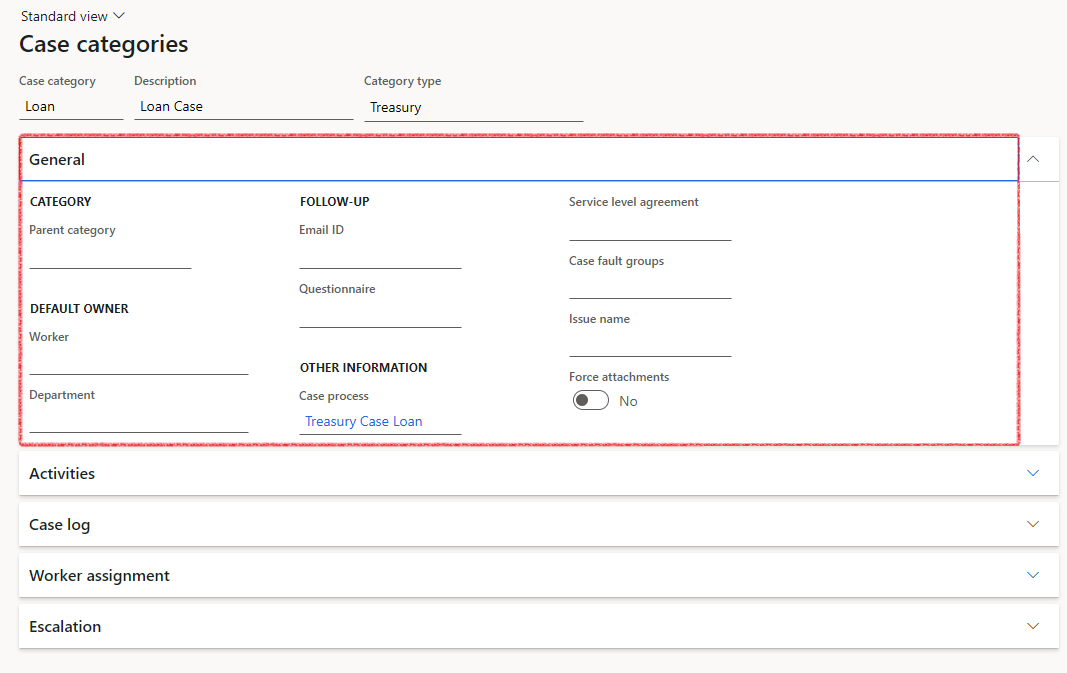
¶ Step 1.1: General FastTab on Case categories
- Expand the General FastTab
- Select a Case Process from the dropdown menu
- Complete all other fields
¶ Step 1.2: Activities FastTab on Case categories
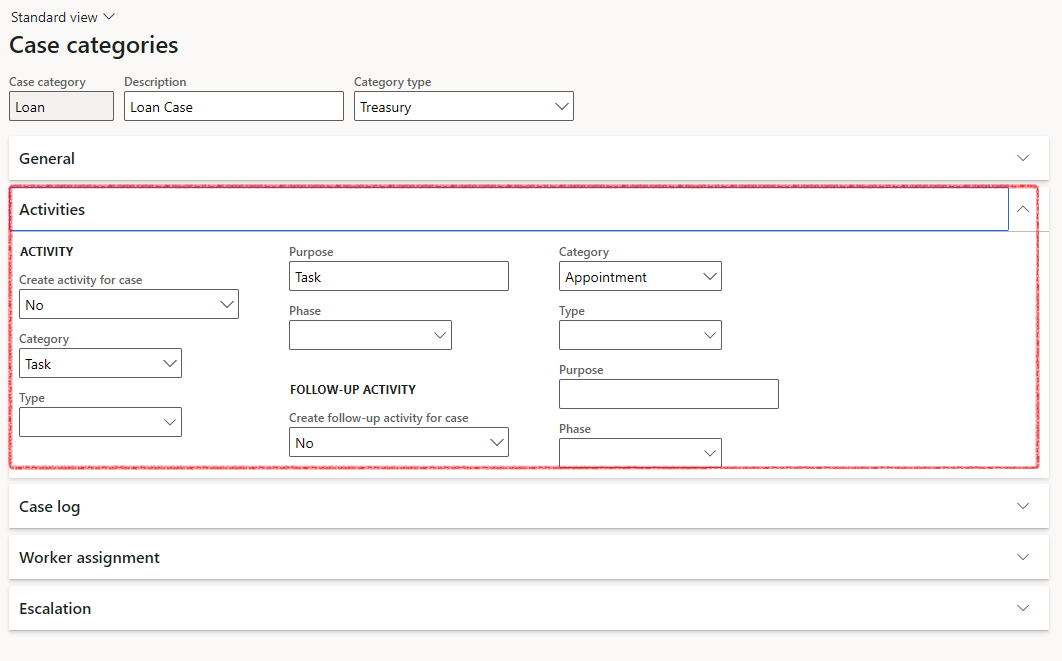
- Expand the Activities FastTab
- Select Yes or No to indicate whether an Activity for a Case needs to be created
- Select a Category
- Select a Type
- Type a Purpose
- Select Yes or No to indicate whether a Follow-up activity for the case needs to be created
- Choose a Phase
¶ Step 1.3: Case Log FastTab on Case categories
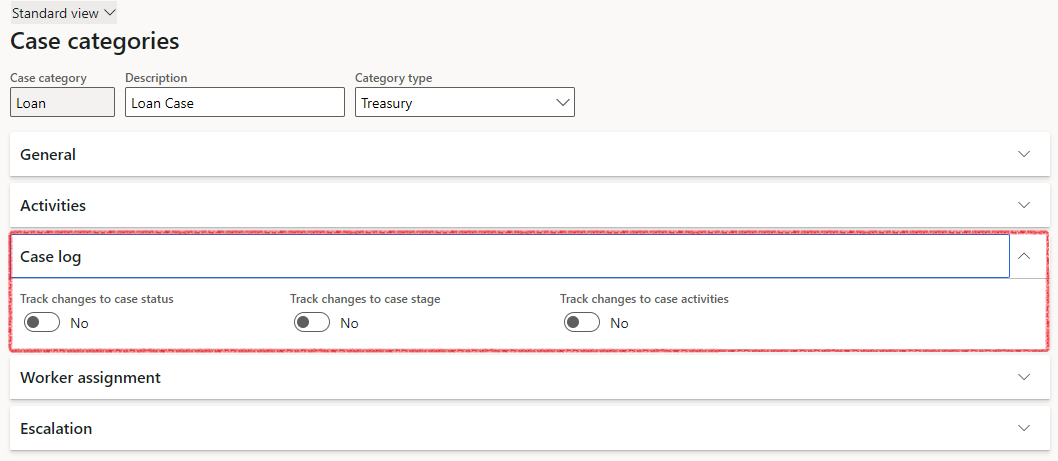
- Expand the Case Log FastTab
- Select Yes or No to indicate the following:
- Track changes to case status
- Track changes to case stage
- Track changes to case activities
¶ Step 1.4: Worker assignment FastTab on Case categories
- Expand the Worker assignment FastTab
- Click on Add
- Select an Asset type
- Choose a Model for the asset type
- Select an Allocation
- Select a Team

¶ Step 1.5: Escalation FastTab on Case categories
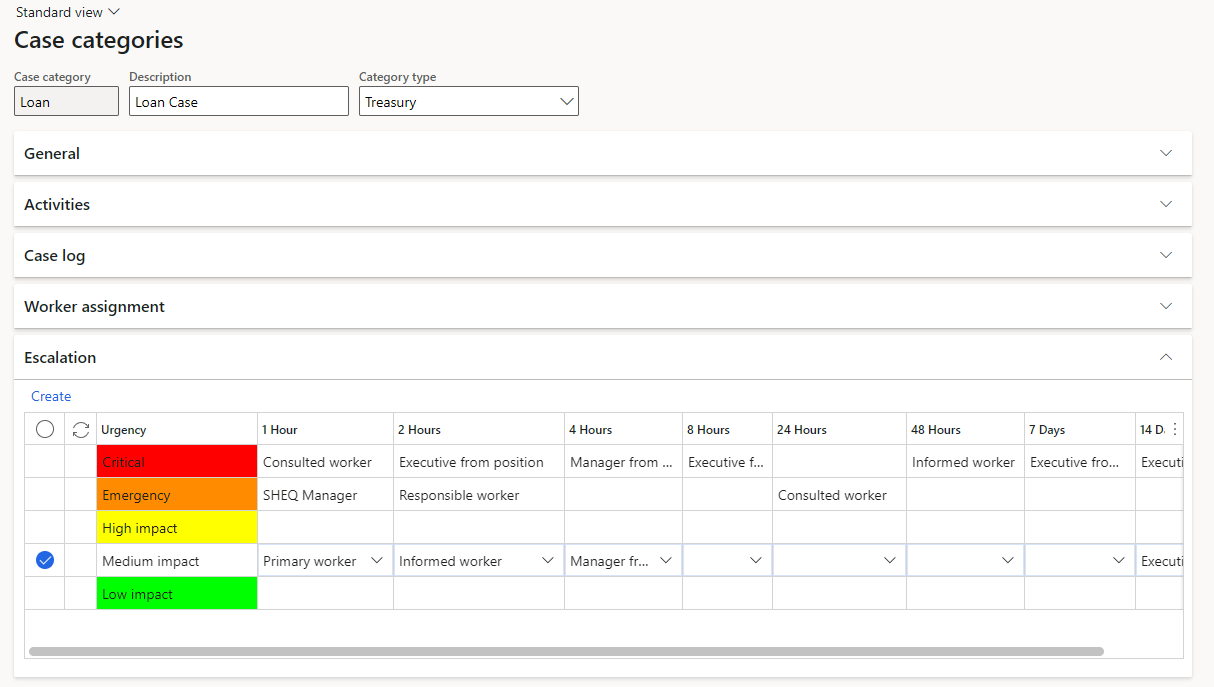
- Expand the Escalation FastTab
- Choose accountable parties for each stage of the escalation procedure
¶ Step 2: Set up Case processes
- Case processes can be set up by navigating to: Sales and marketing>Setup>Case processes
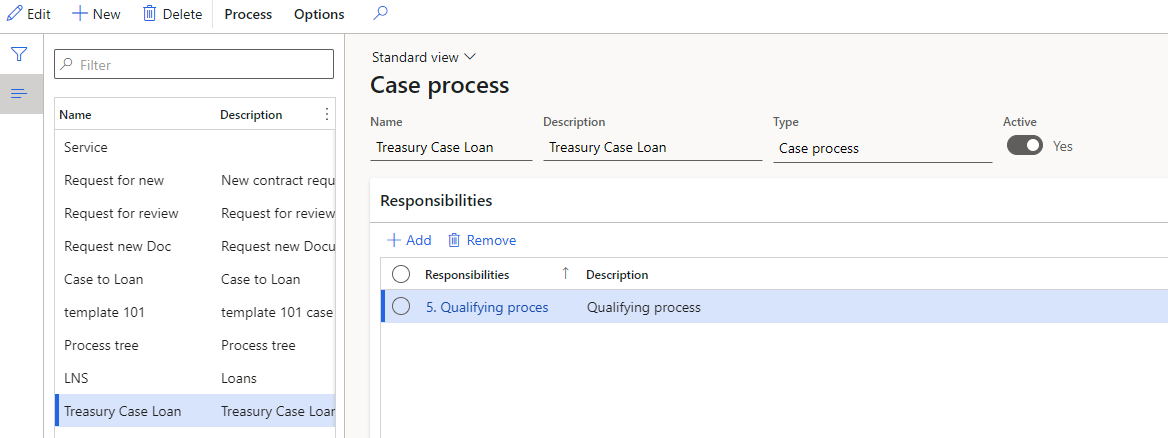
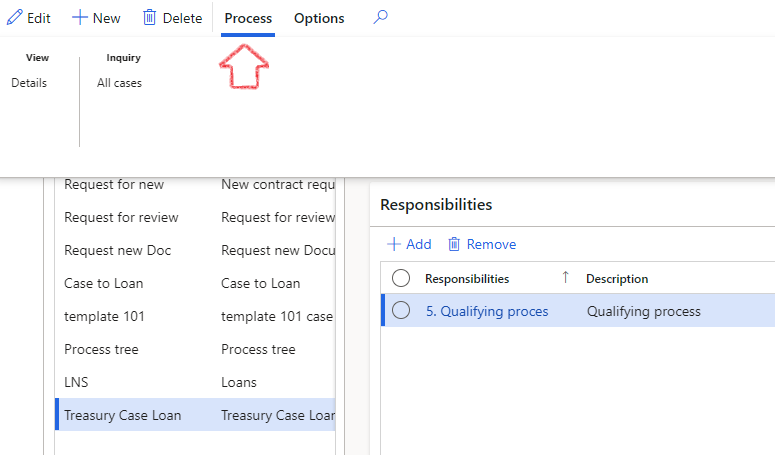
- Click the Process button on Case processes
- Under View, click on Details
- The following Details will display on the Process
- Activity number
- Purpose
- Required (yes/no)
- Category
- Responsibility
- Responsible
- Priority
- Notes
- Calculated Start and End days

¶ Step 3: Set up Priority
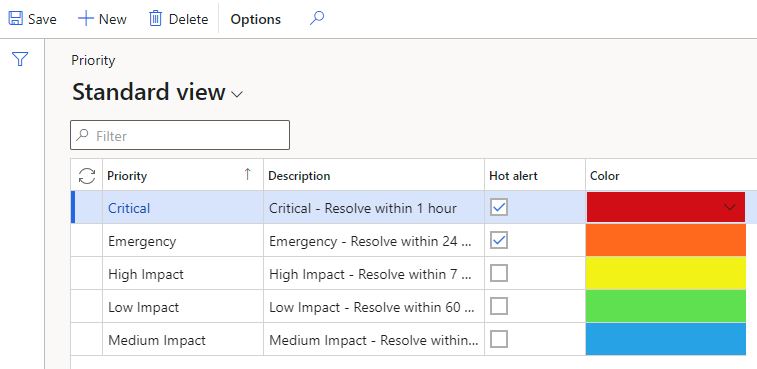
- To set up priorities for cases, navigate to: Governance, Risk and Compliance > Setup for governance > Priority
- Click on the New button
- Enter a Priority (name)
- Type a Description
- Tick or leave blank the Hot alert selection box
- Choose a Color
- Click the Save button
¶ Step 4: Set up Service level agreements
- To set up Service level agreements:
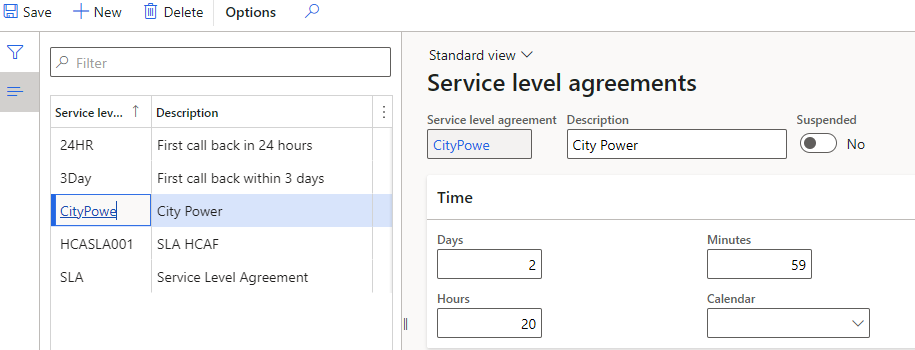
- Navigate to Service management > Setup > Service agreements > Service level agreements
- Click the New button
- Enter a Service level agreement name
- Type a Description
- Indicate if the SLA is suspended or not by moving the slider
- Enter the time applicable to the SLA
- Select a Calendar from the menu
- Click the Save button
¶ Daily use
¶ Step 5: Create a new Treasury case
To view all Treasury cases, or create a new case
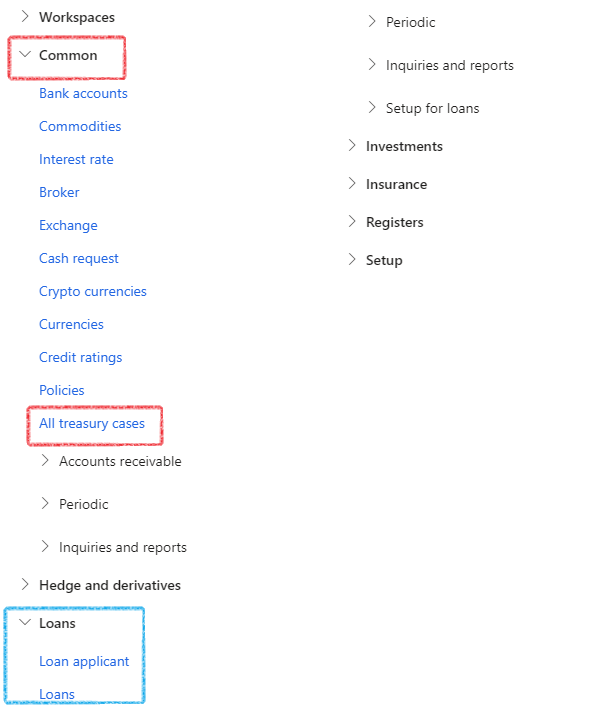
- Go to Treasury > Common > All treasury cases.
- Click on New and indicate if it is a New Case or a Dependant case

On the General tab, complete the following information:
- Name
- Status
- Description
- Case category
- Priority and
- Parent case (if applicable)

On the Other tab, complete the following information:
- Name
- Status

¶ Step 6: Case to Loan process
To create a new loan from within an existing case,
- Go to: Treasury > Common > All treasury cases
- Click on the Case that you want to add a Loan to
- Expand the Treasury FastTab
- On the Loan tab, enter the following information:
- Loan amount
- Currency
- Start date for the loan
- Loan interest interval
- Loan group
- Loan payment terms
- Interest payment date
- Posting profiles
- Click on Save
- In the ribbon bar, click on Functions Add to treasury


The Add to treasury button will create a Loan and add a line on the Associations FastTab
¶ Step 7: Create a Claim from a Case
Claims can be created from within the Case.
- In the ribbon bar, click on Functions > Create Claim
- A Create claim dialogue will open
- Enter a Claim number
- Type a Description
- Select the Claim type from a drop-down menu
- Select a Policy
- Indicate if a Premium is related (Yes / No option)
- Select a Vendor or Customer account
- Type an Invoice number
- Enter an Amount
- Enter a Currency
- Enter the Created date
- Indicate if the claim is closed or not (Yes / No option)
- Do the same for the Approval and Payment sections of this form
- Click OK

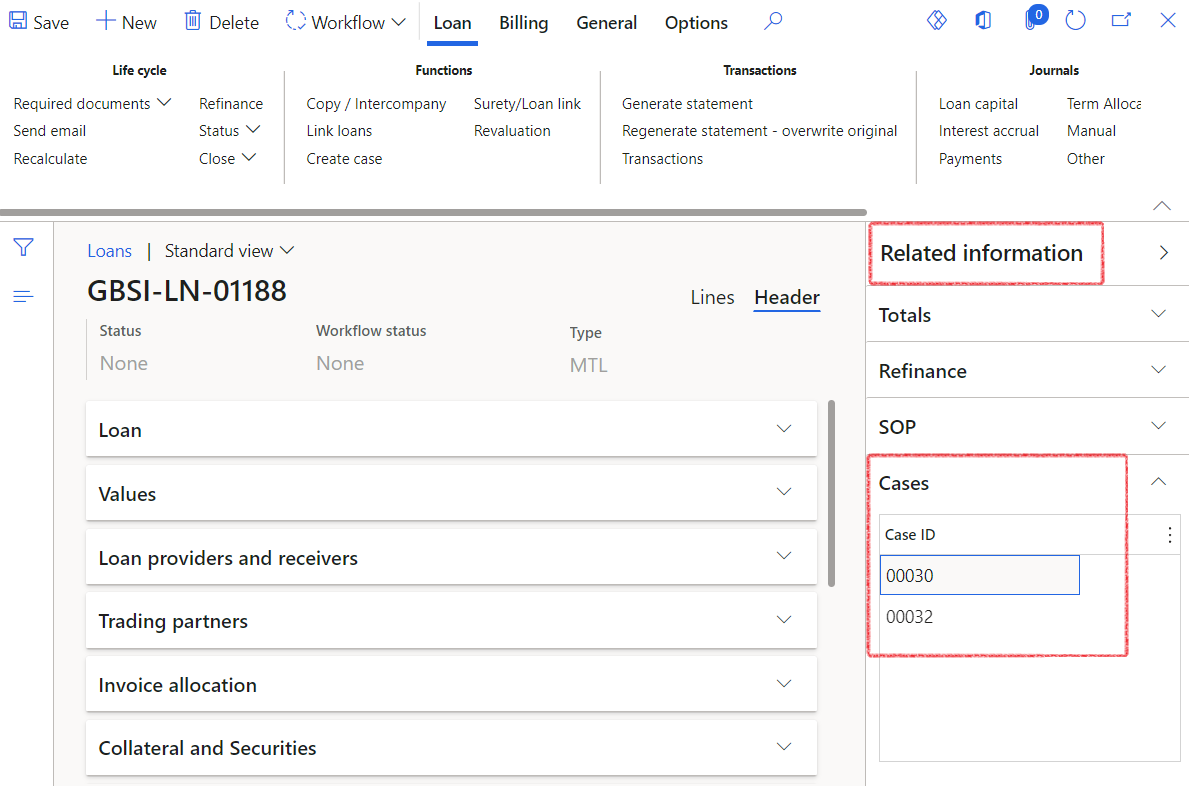
¶ Step 8: Create a Case from a Loan
To create a new Case from within an existing Loan
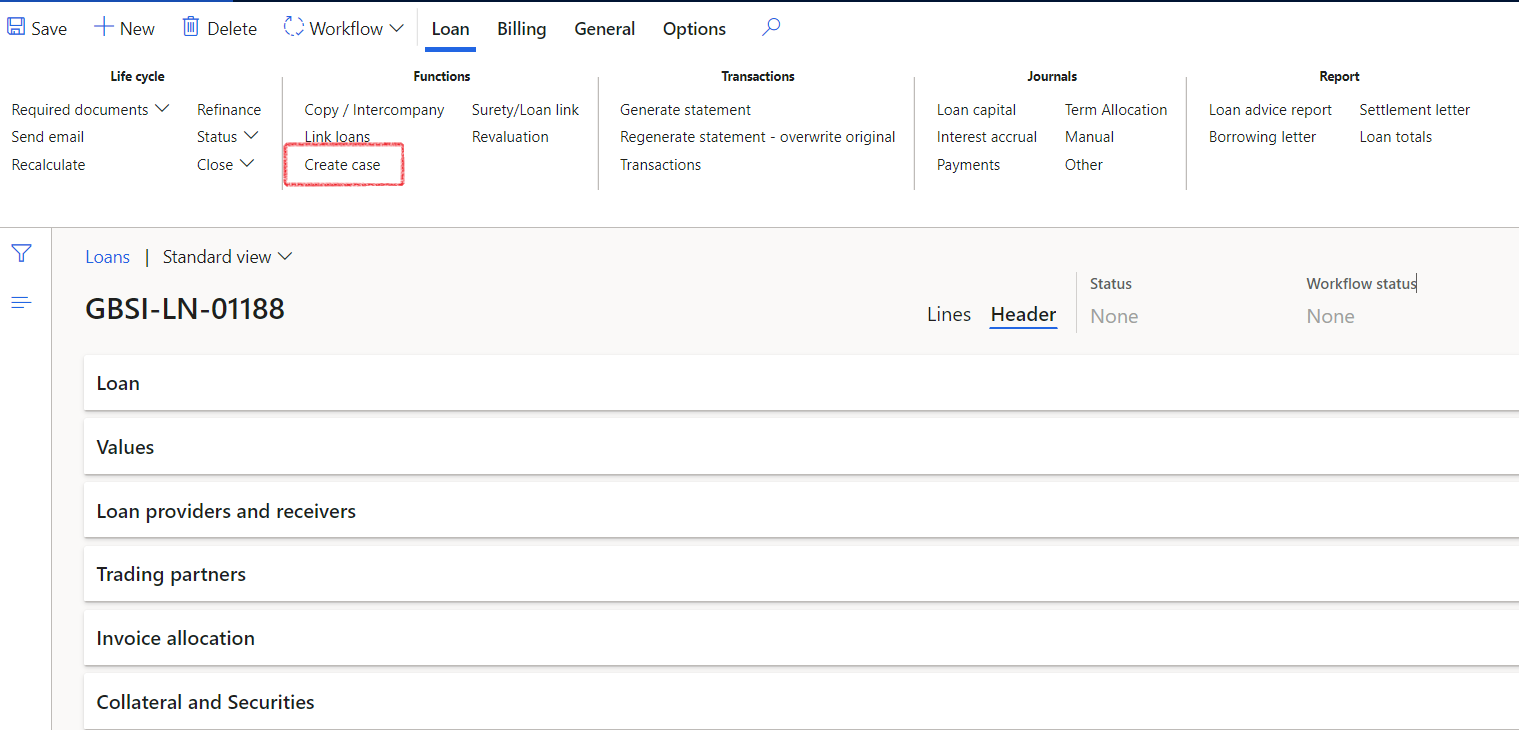
- Go to: Treasury > Loans > Loans
- Click on the Loan that you want to add a Case to
- In the ribbon bar, under Functions, click on Create case
Complete all the relevant fields to create a new Case. On the General tab, complete the following information:
- Name
- Status
- Description
- Case category
- Priority and
- Parent case (if applicable)
When done, the related Case / Cases can be viewed on the Fact box under Related information:
