¶ Introduction
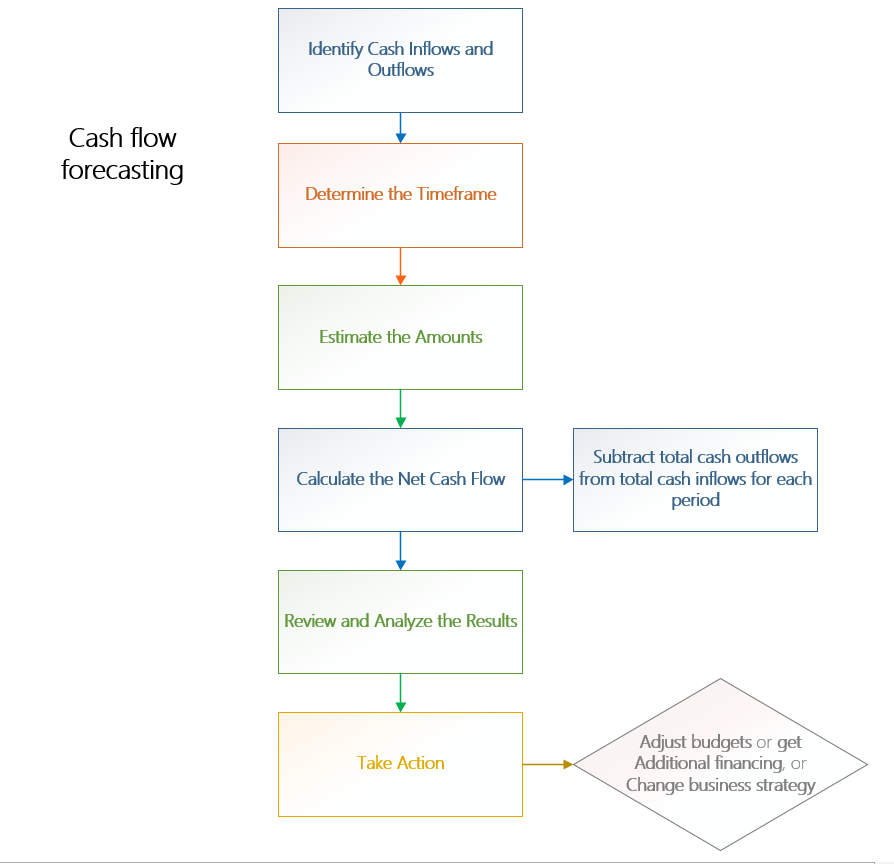
Cash flow forecasting is a standard feature in Microsoft Dynamics Finance and Operations, designed to provide insight into a company’s future cash position and liquidity.
Cash flow forecasting is the process of predicting the amount and timing of future cash inflows and outflows for a business or organization. The purpose of cash flow forecasting is to help businesses and organizations better manage their finances by identifying potential cash shortages or surpluses in advance, so that they can take appropriate actions to address them. Cash flow forecasting typically involves analyzing historical financial data, market trends, and other relevant information to create a projection of future cash flows. The resulting forecast can be used for a variety of purposes, such as developing budgets, securing financing, and making strategic business decisions.
¶ Navigation

¶ Specific setups
¶ Step 1: Set up overview
To obtain a forecast of the cash flow, you must complete the following tasks:
- Identify and list all the liquidity accounts
Liquidity accounts are the company's accounts for cash or cash equivalents
- Configure the behavior for forecasts of transactions that affect the company's liquidity accounts
- After you've completed these tasks, you can calculate and analyze forecasts of the cash flow and upcoming currency requirements
¶ Step 2: Cash flow forecasting setup
To configure the cash flow forecasting process:
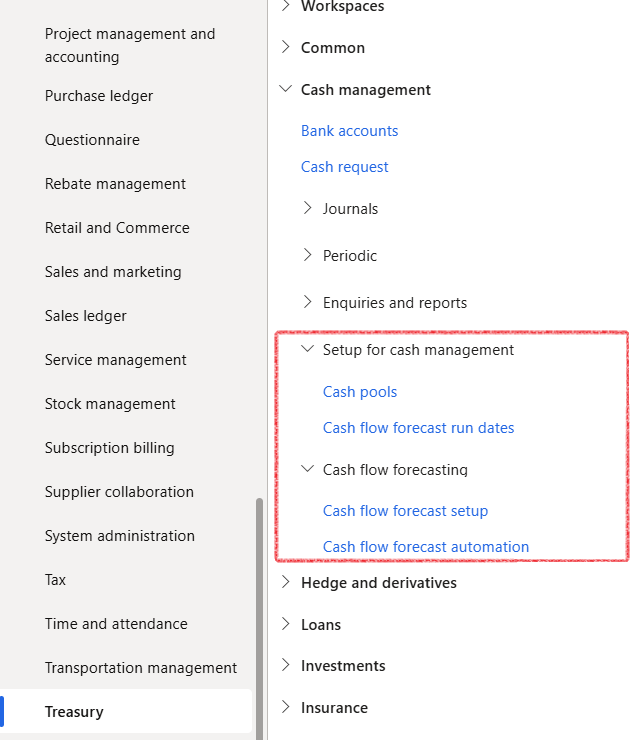
- Navigate to Treasury > Cash management > Cash flow forecasting > Cash flow forecast setup
¶ Step 2.1: General ledger tab
- Navigate to Treasury > Cash management > Cash flow forecasting > Cash flow forecast setup
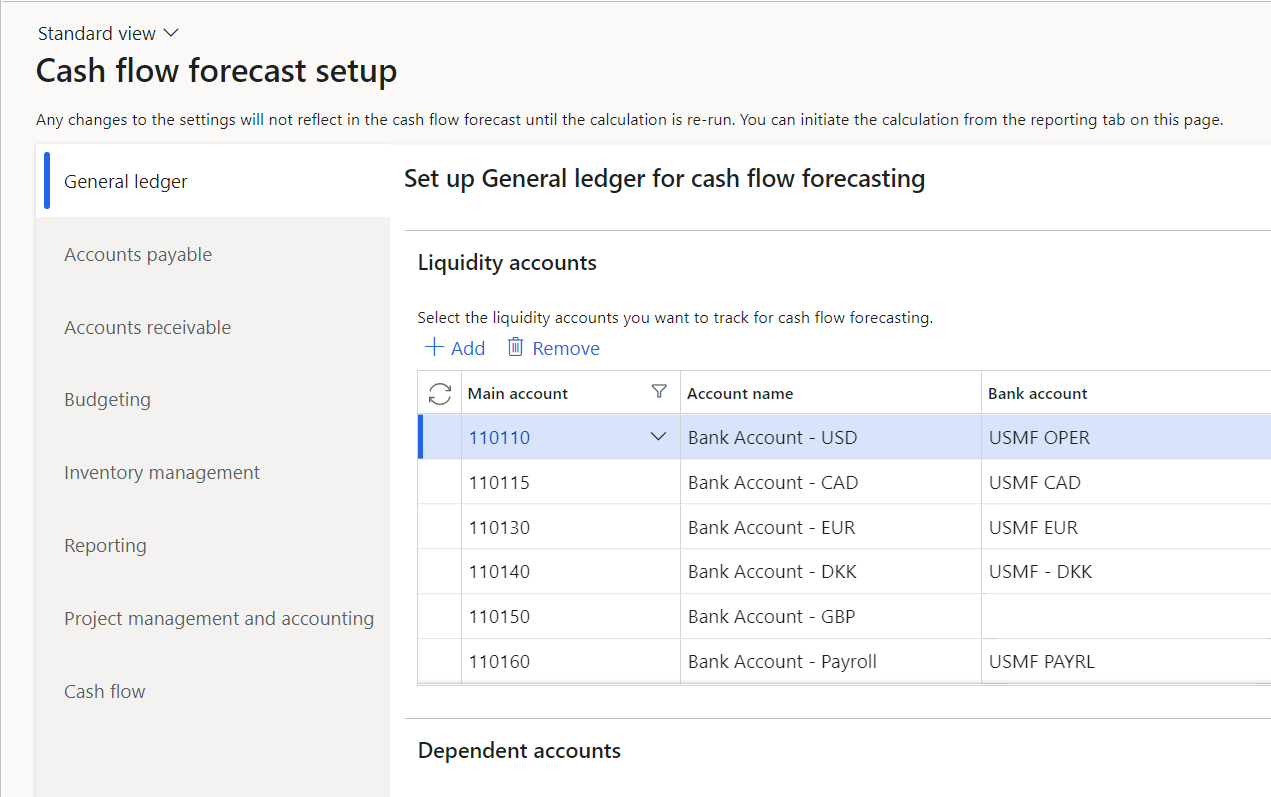
- Go to the General ledger tab and select the liquidity main accounts you want to track for cash flow forecasting
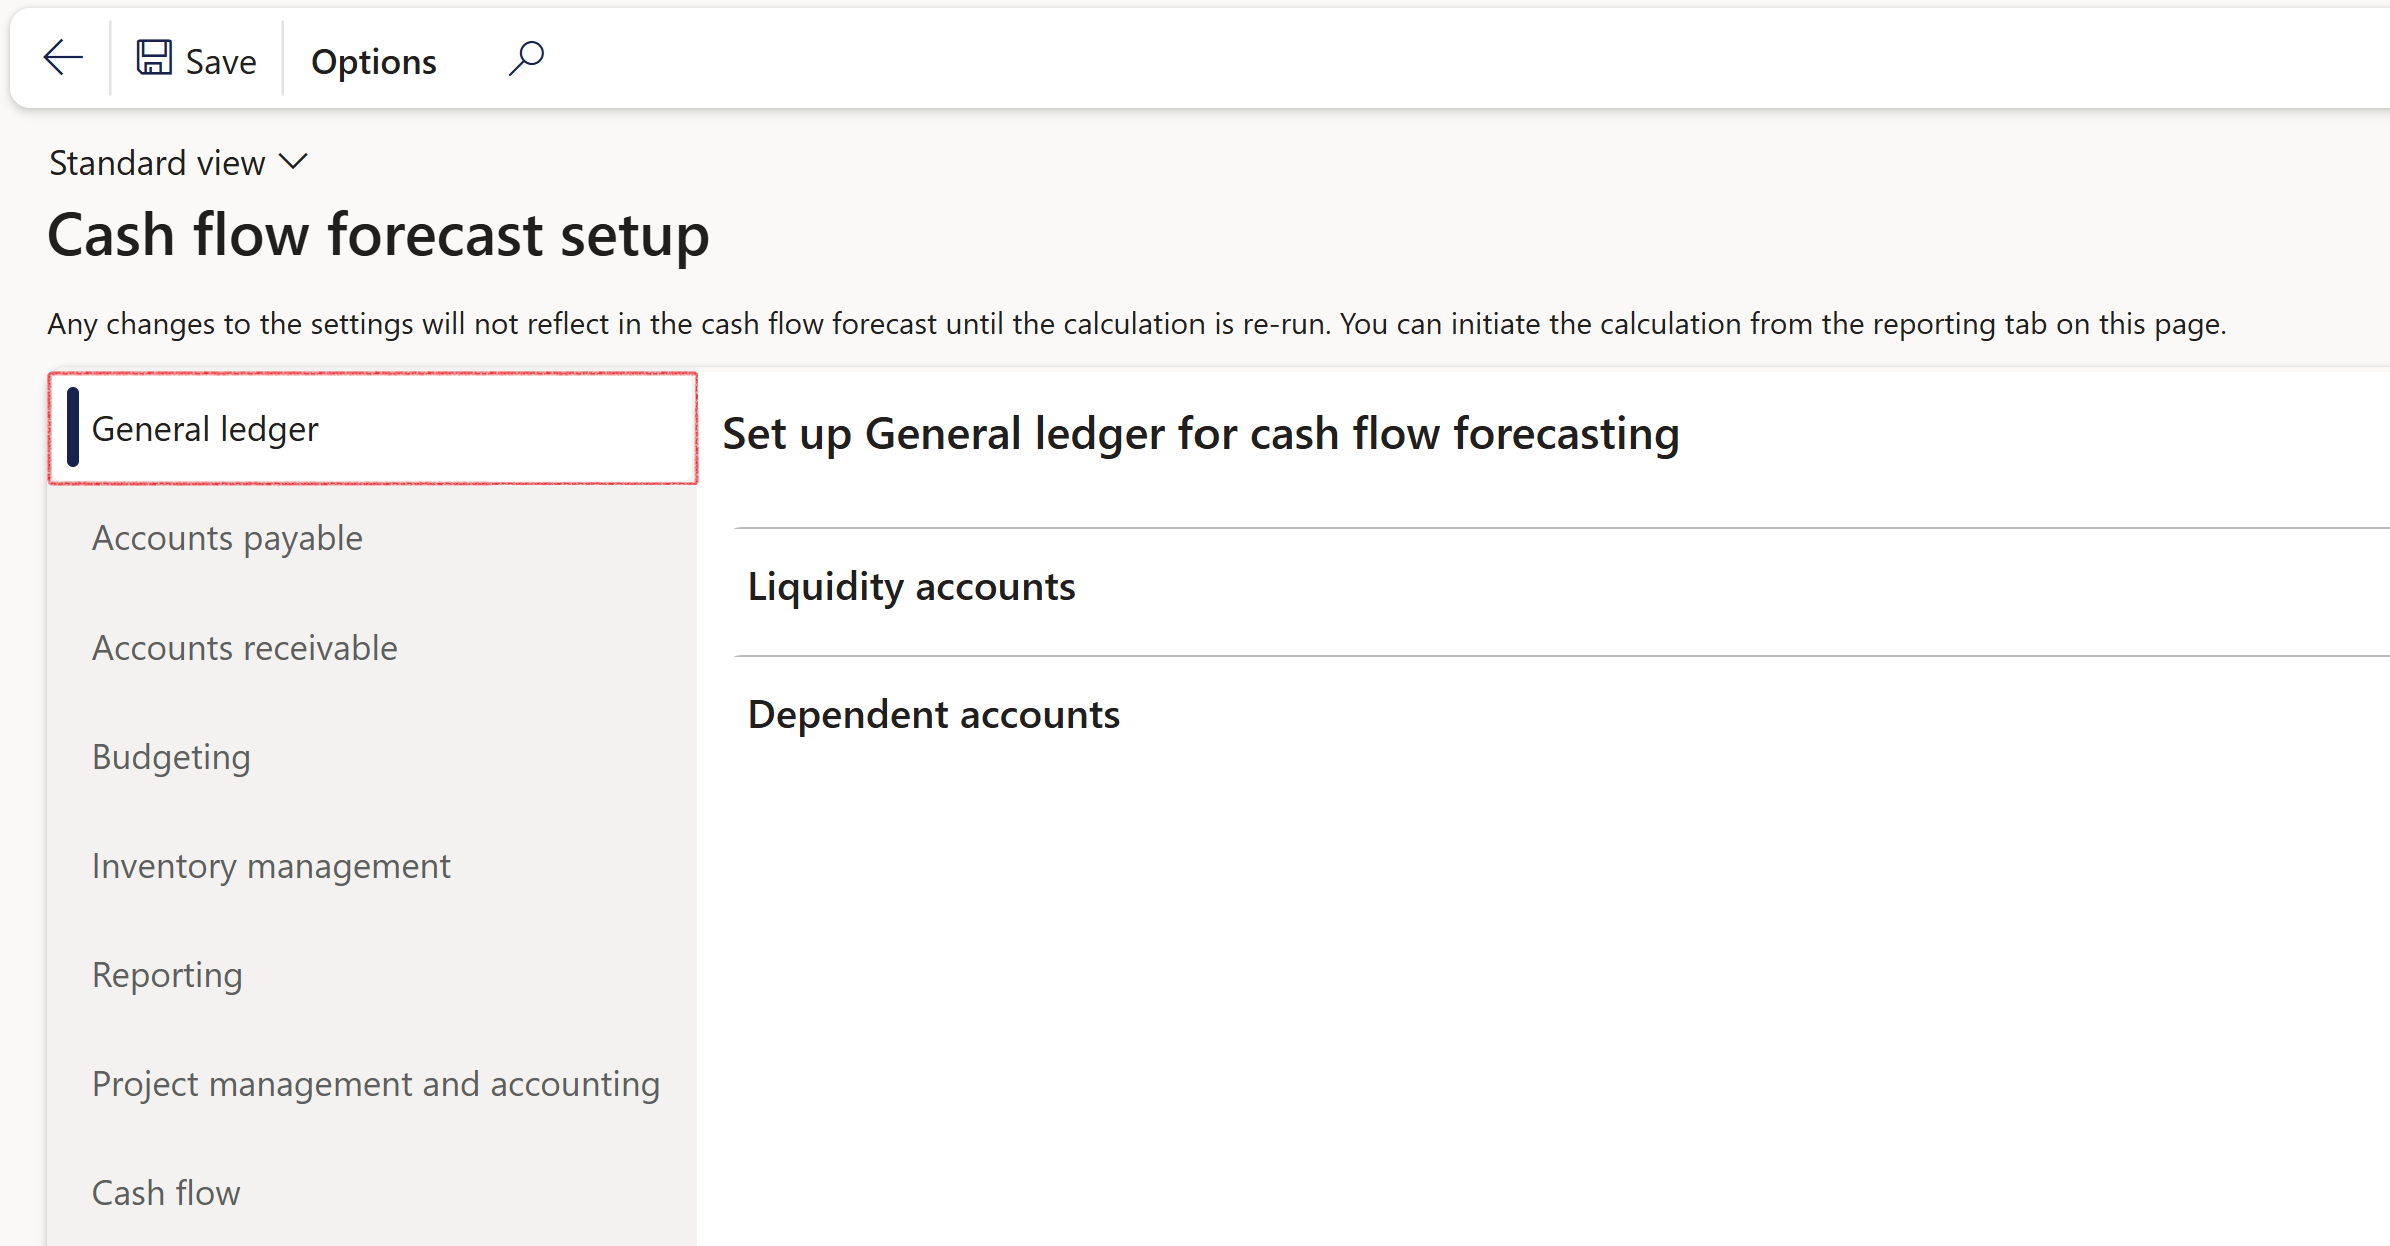
If a specific account is not selected, then the specific account will not impact the cash flow forecast
¶ Step 2.2: Accounts payable and Accounts receivable tabs
- Navigate to to Treasury > Cash management > Cash flow forecasting > Cash flow forecast setup
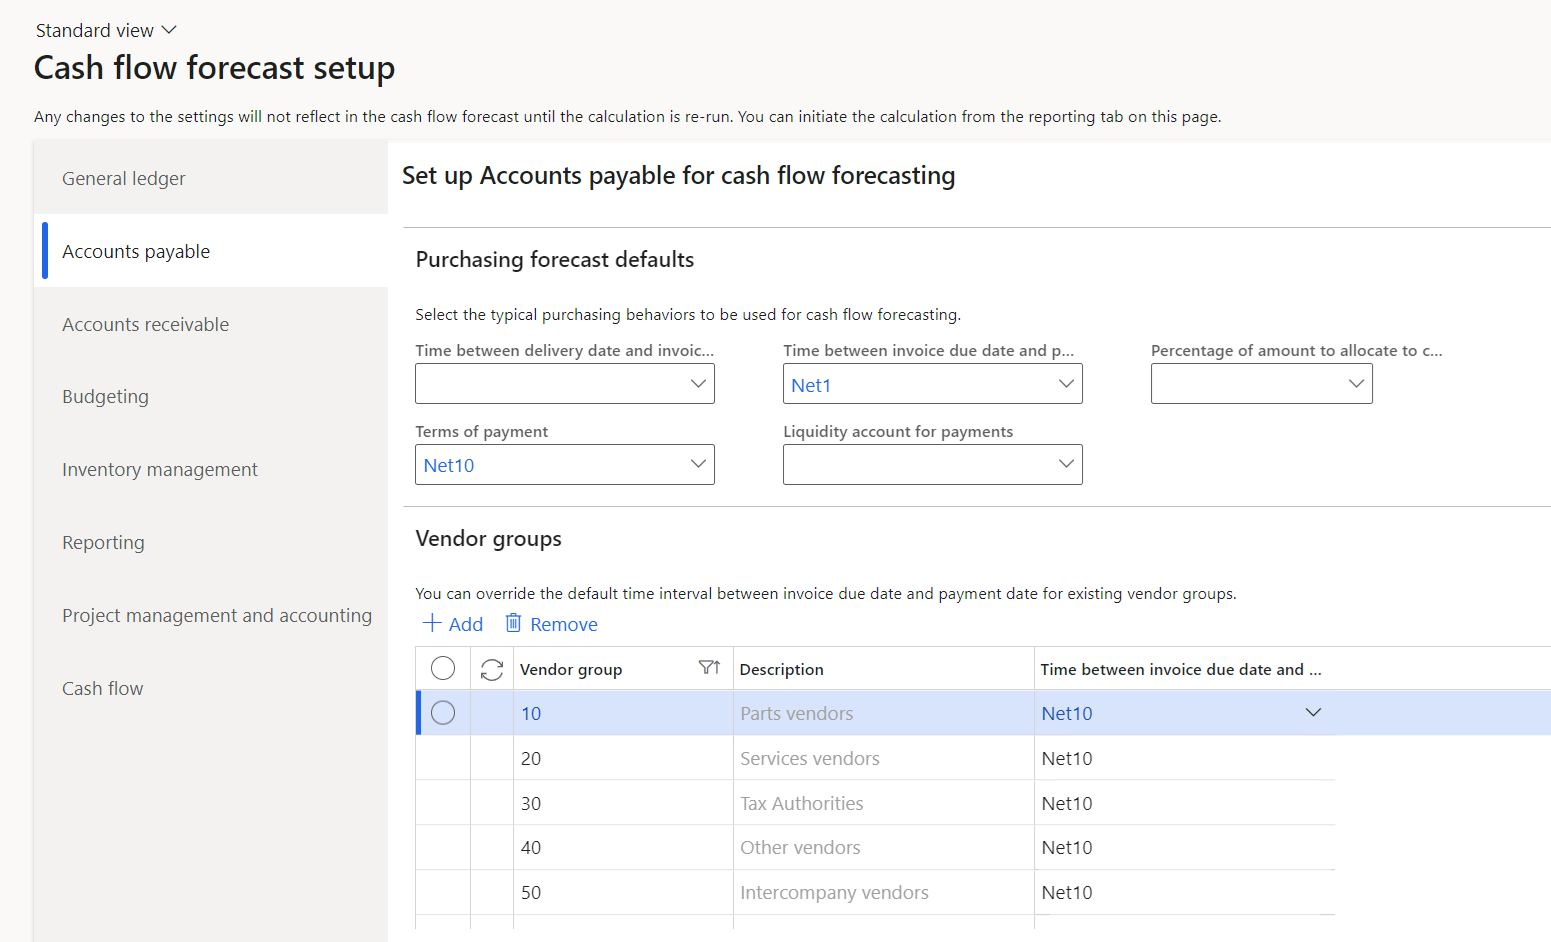
- In the Accounts payable and Accounts receivable tabs it is possible to set up typical rules that the cash flow forecast will use to perform calculations.
An example of this is the Terms of payment in the Accounts payable tab.
These Terms of payment will then override the default terms of payment of the Vendors.
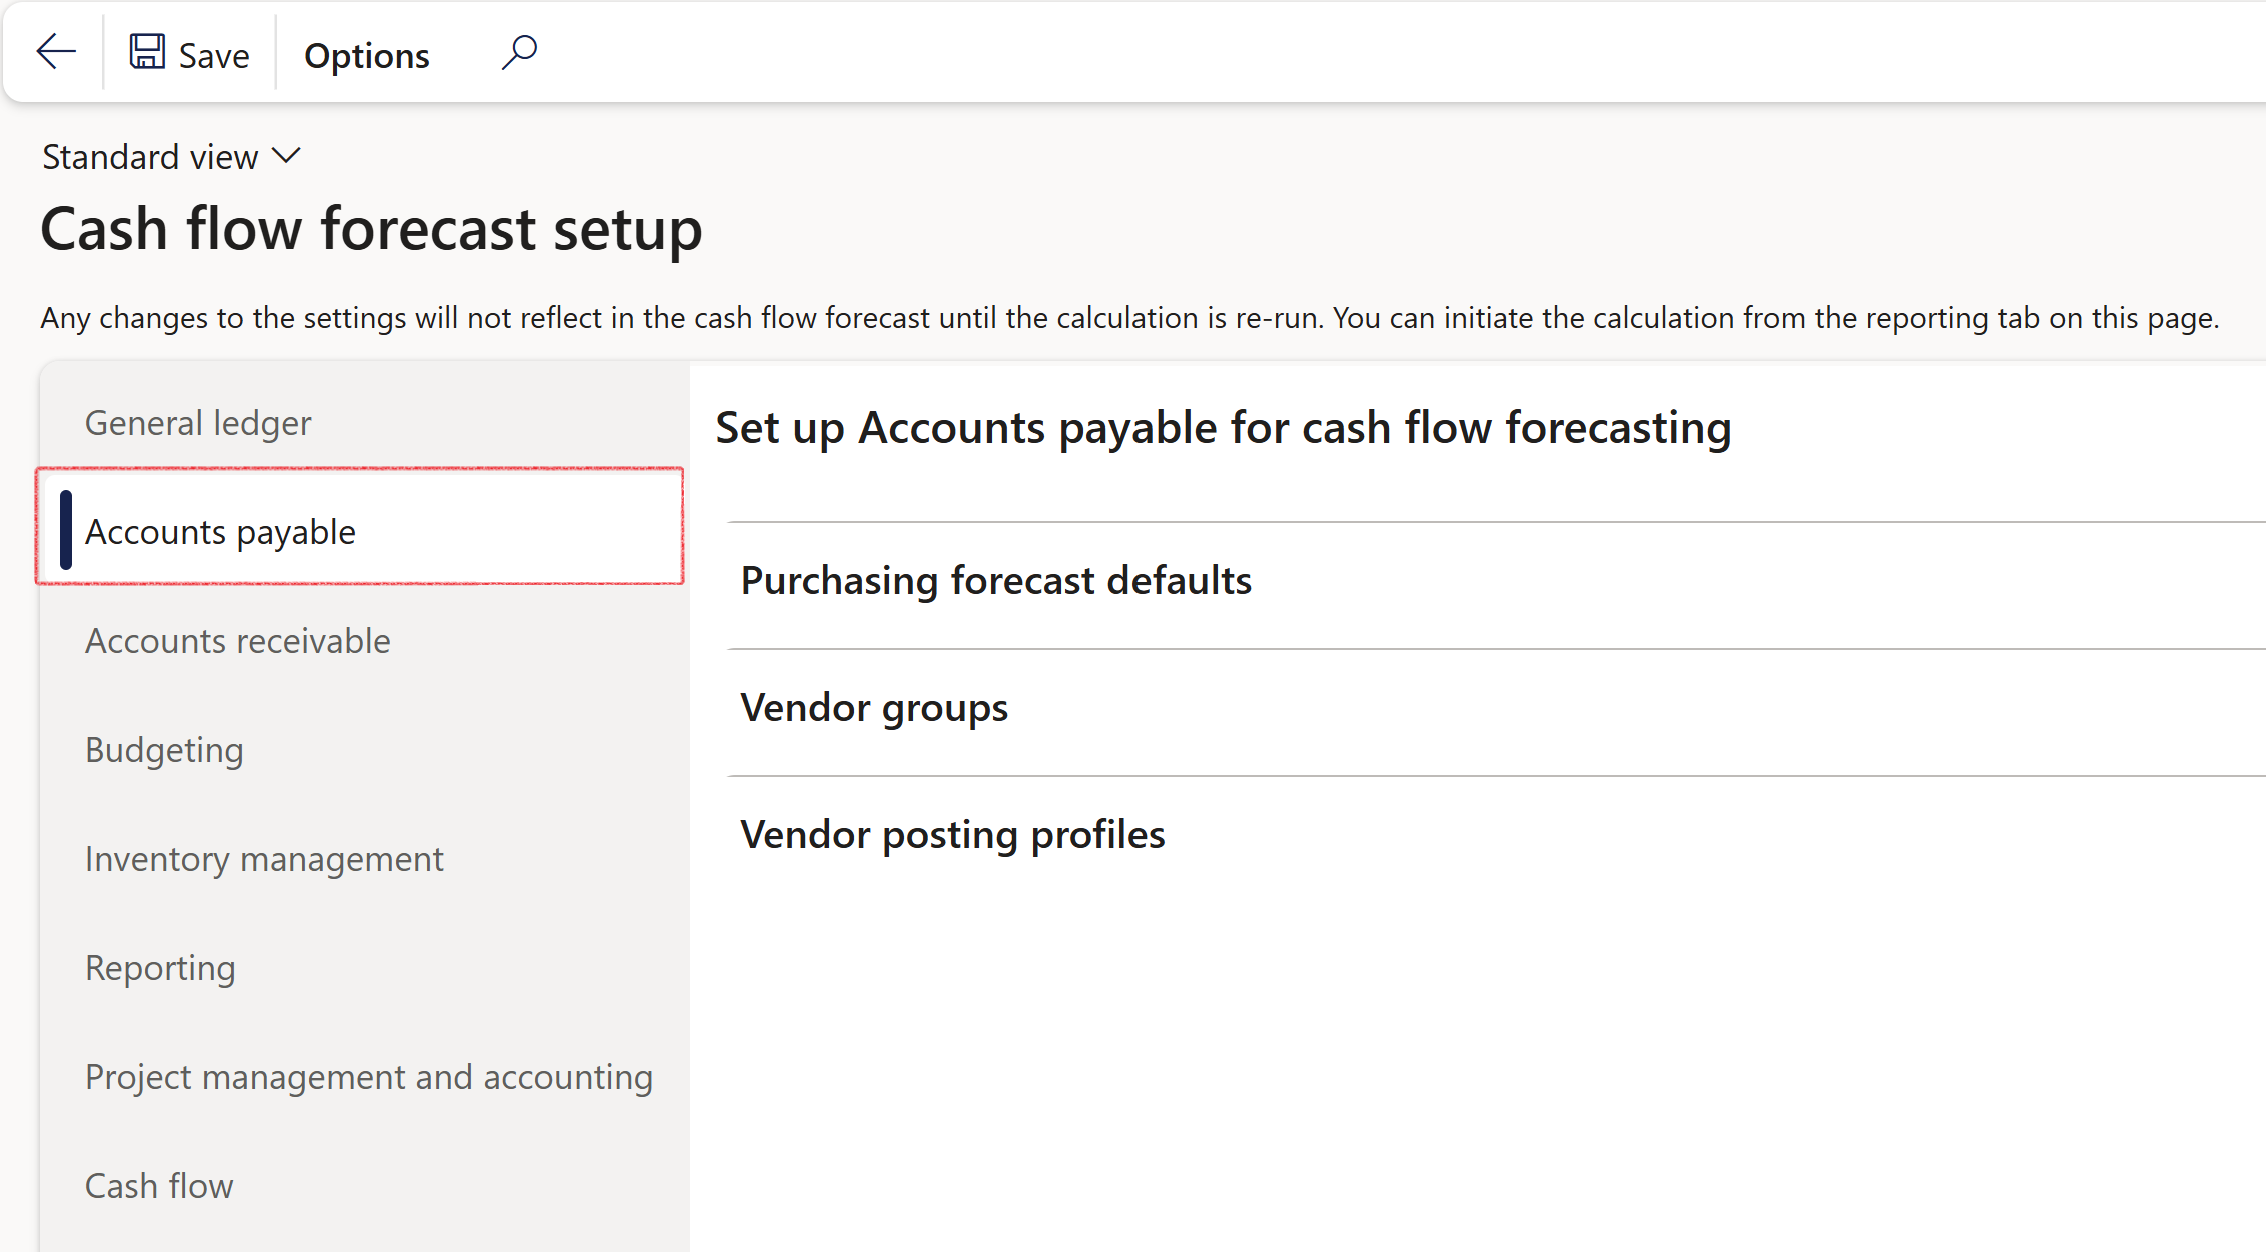
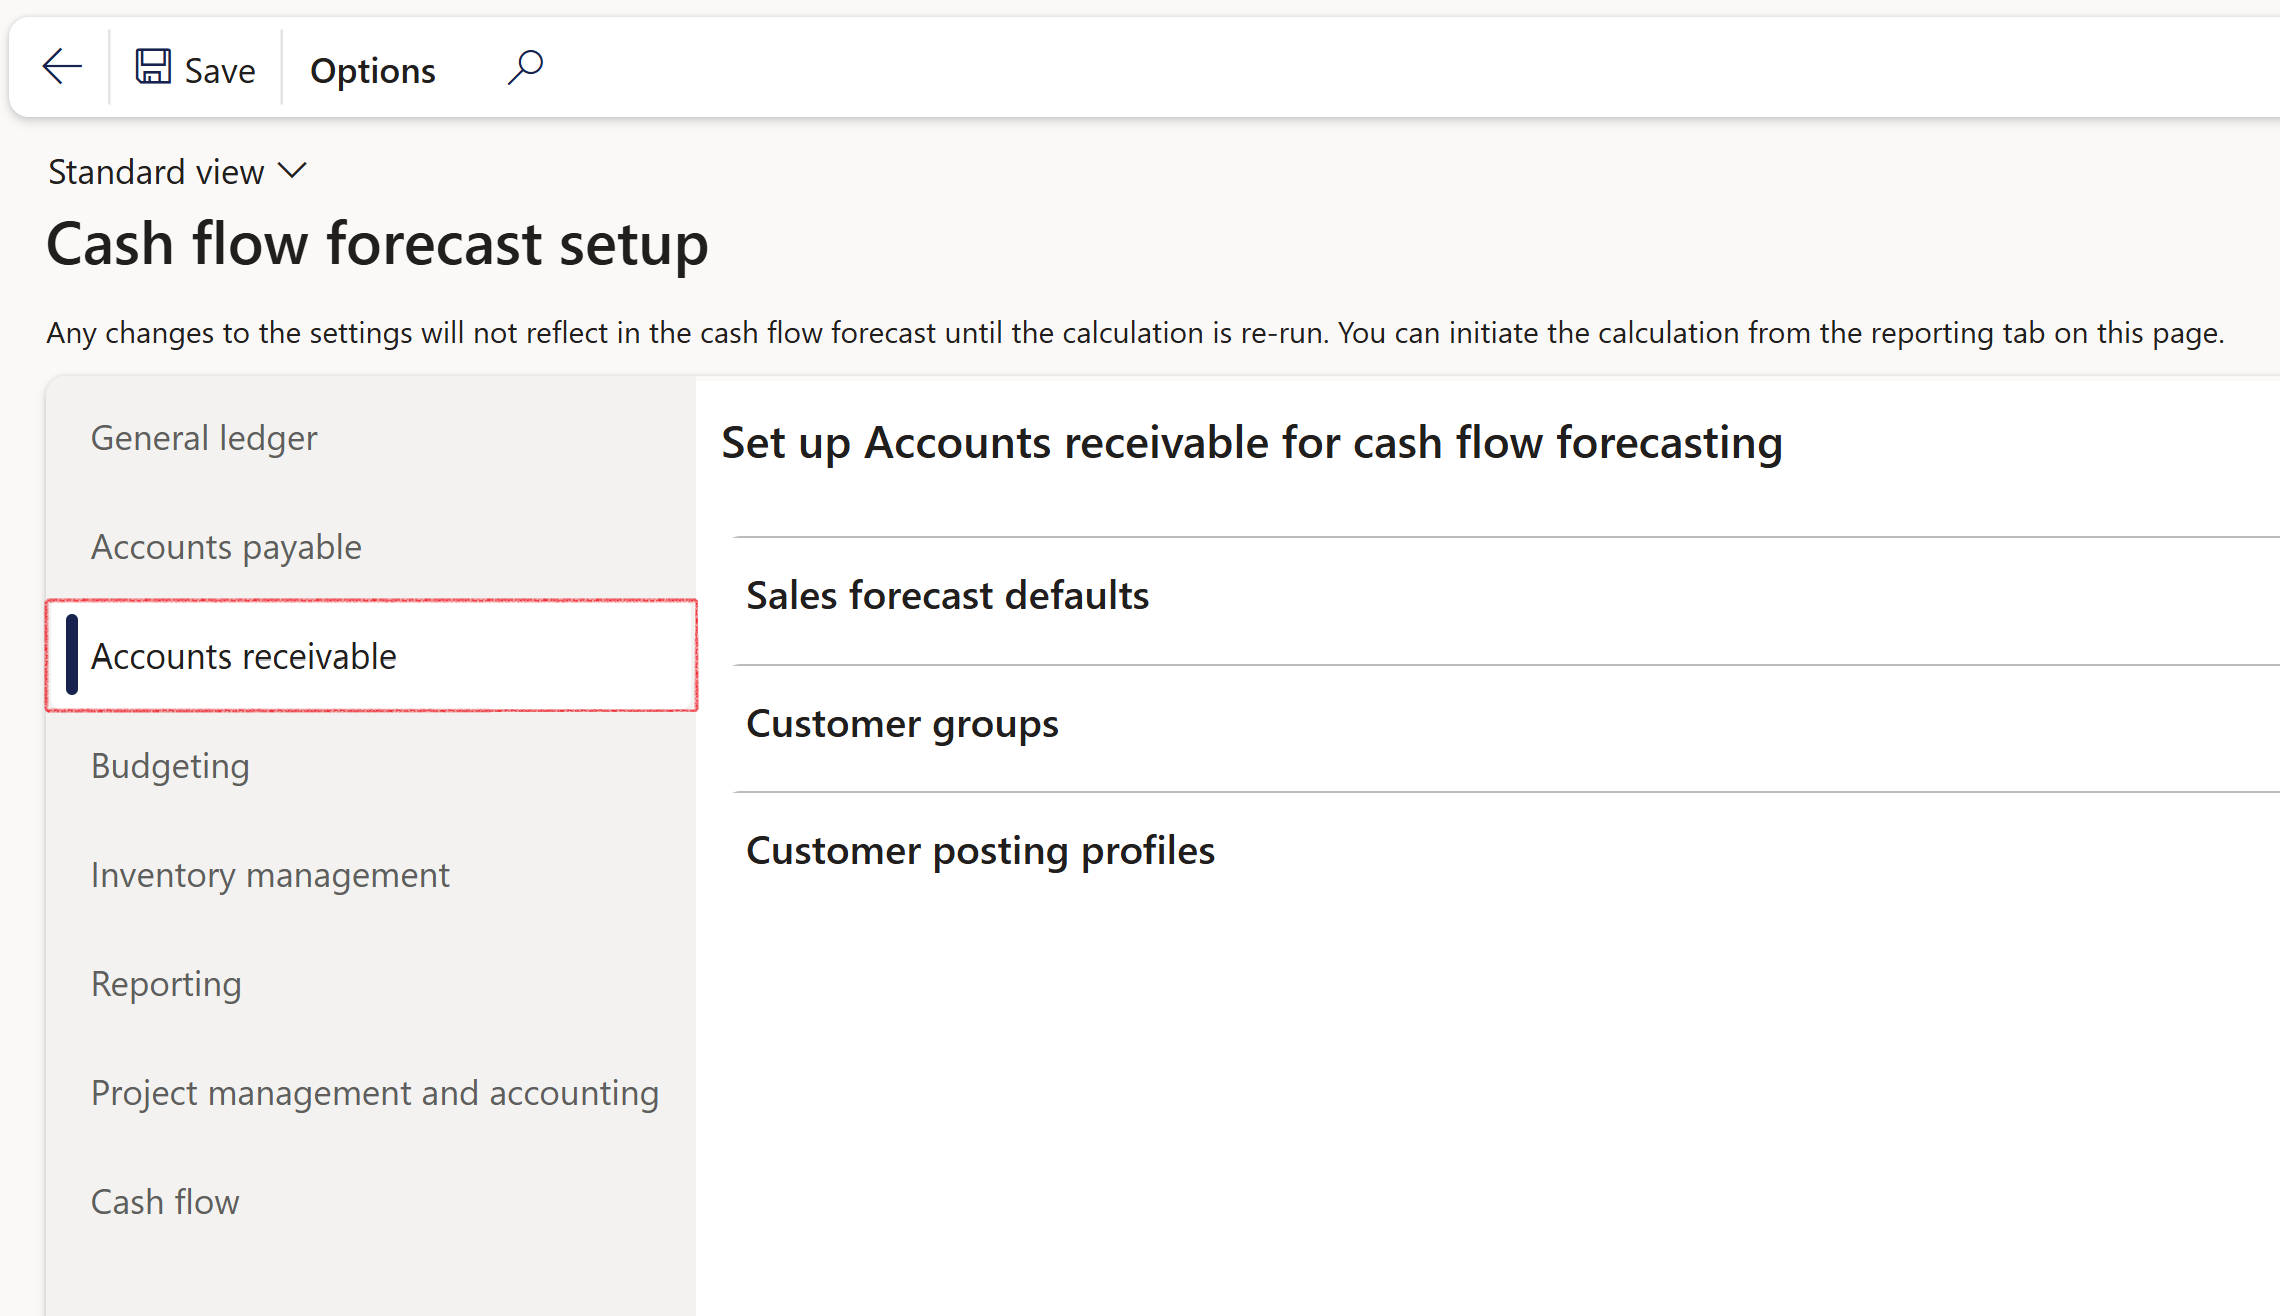
It is also possible to override some other default rules such as the Vendor group to change the Time between invoice due date and payment date and the Vendor posting profiles to override the default liquidity accounts.

¶ Step 2.3: Budgeting tab
- Navigate to Treasury > Cash management > Cash flow forecasting > Cash flow forecast setup
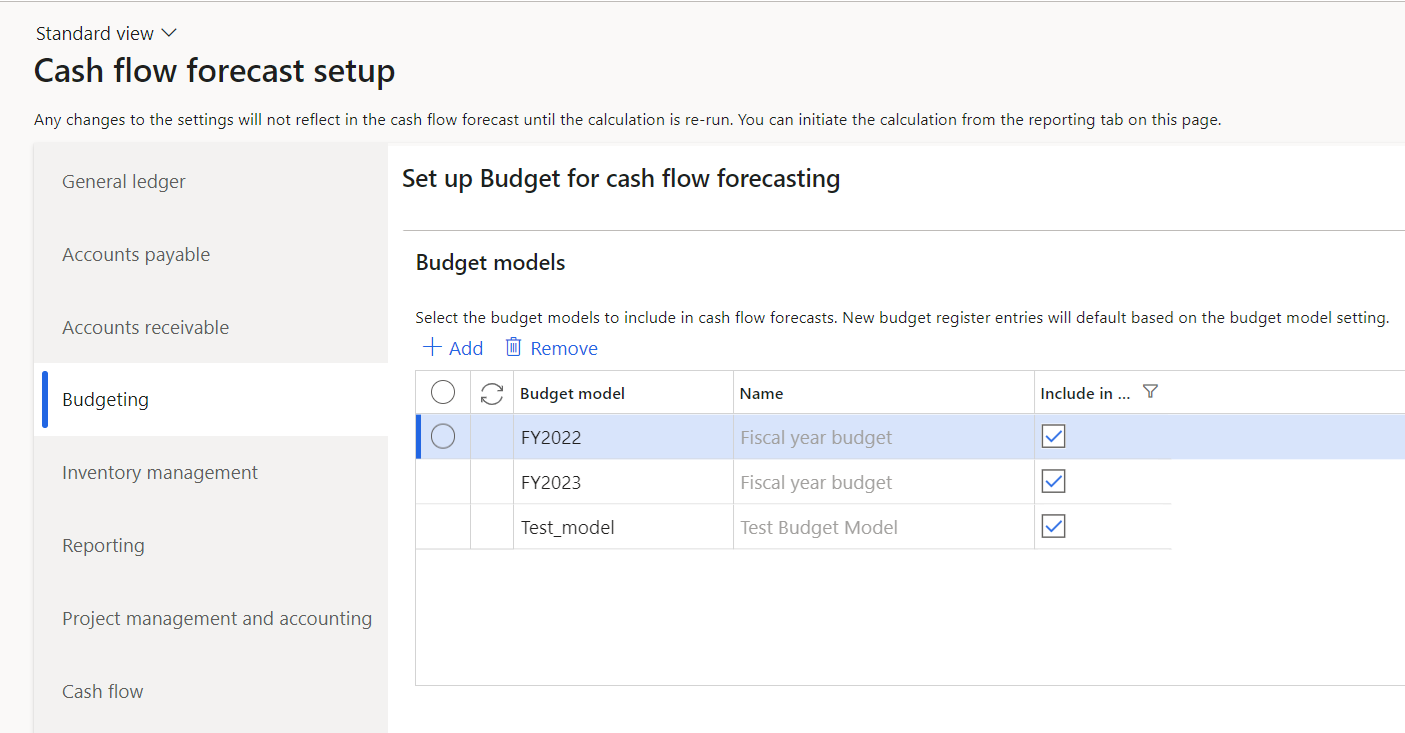
- In the Budgeting tab you can select the Budget models that will be included in the cash flow forecast. This usually relates to a date range and is useful if we only want to include or exclude specific budgeting years for the cash flow forecast
¶ Step 2.4: Inventory management tab
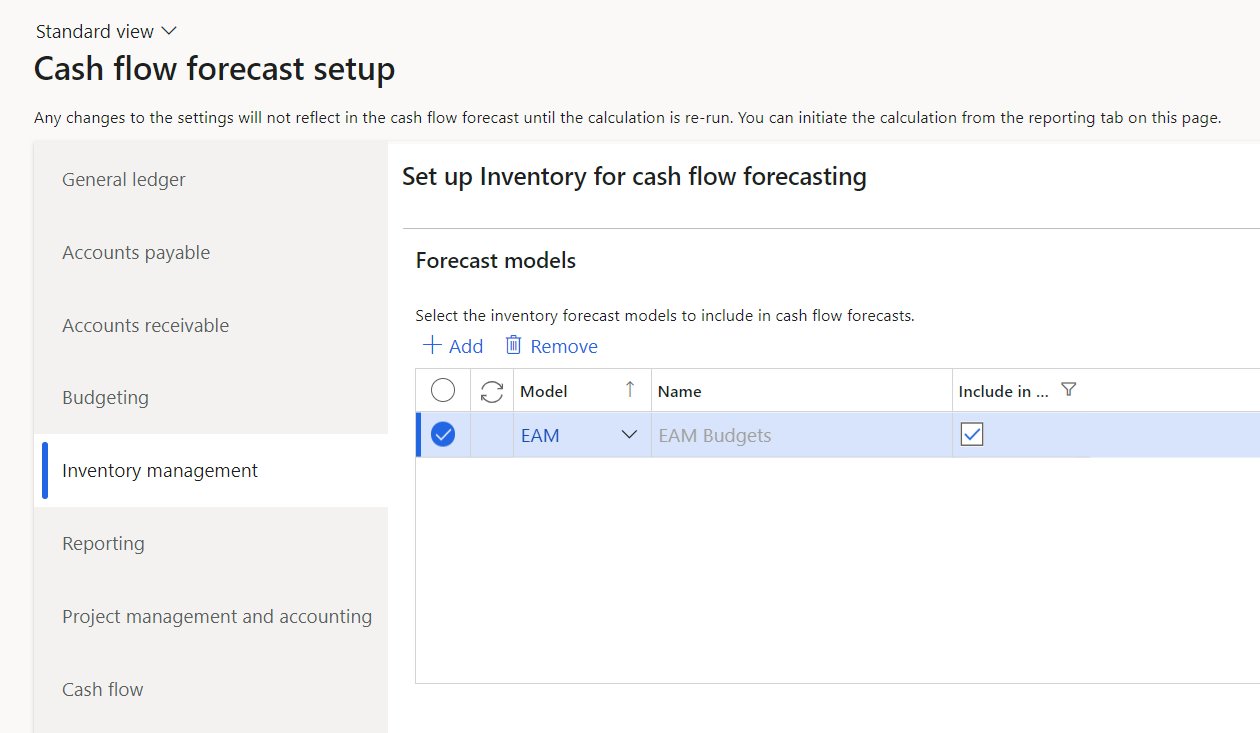
- Navigate to Treasury > Cash management > Cash flow forecasting > Cash flow forecast setup
- In the Inventory management tab, you can select the Inventory forecast models to include. These inventory models relate to Work in progress and Inventory forecasts.
¶ Step 2.5: Reporting tab tab
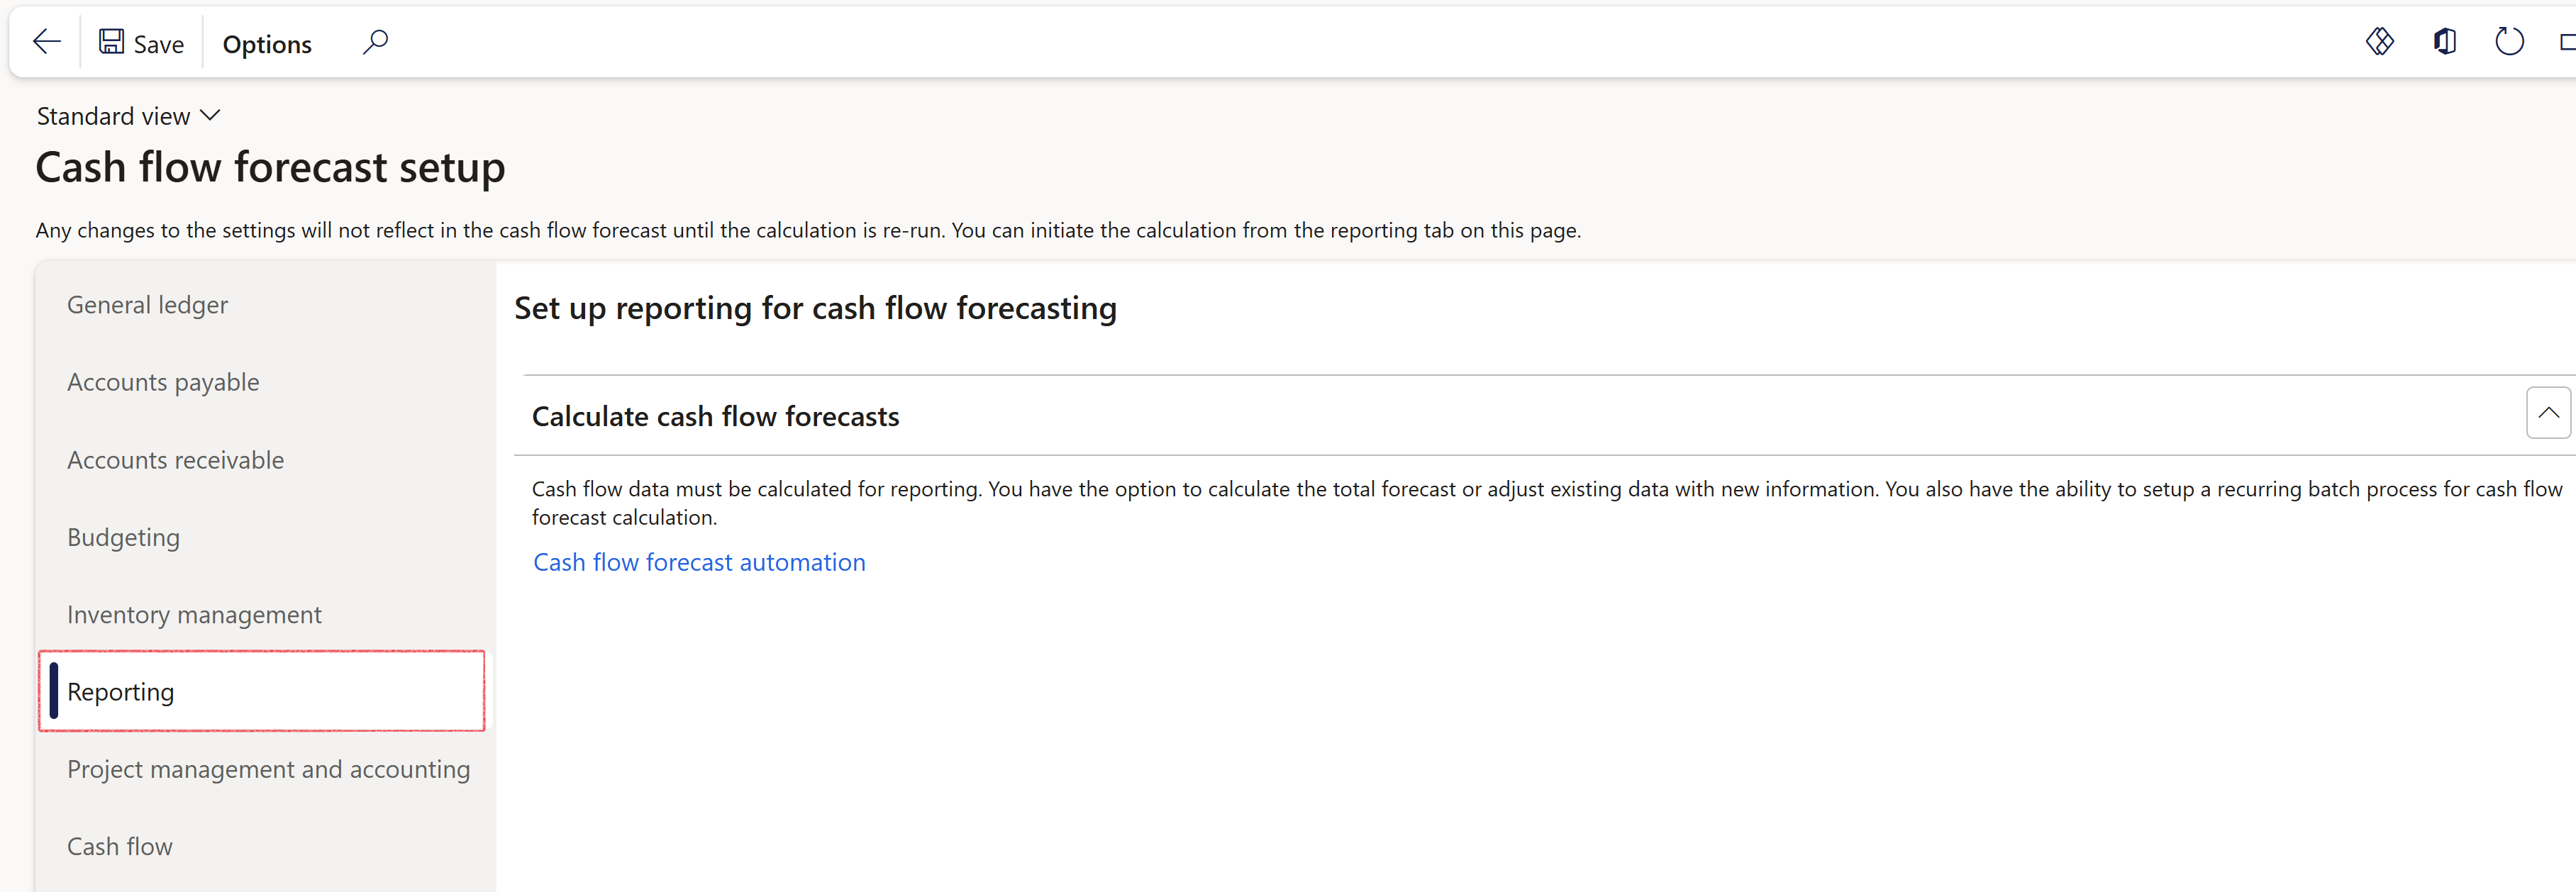
- Navigate to Treasury > Cash management > Cash flow forecasting > Cash flow forecast setup
- The Reporting tab allows you to set up reporting for Cash flow forecasting, which includes Cash flow forecast automation
¶ Step 2.6: Project management and accounting tab
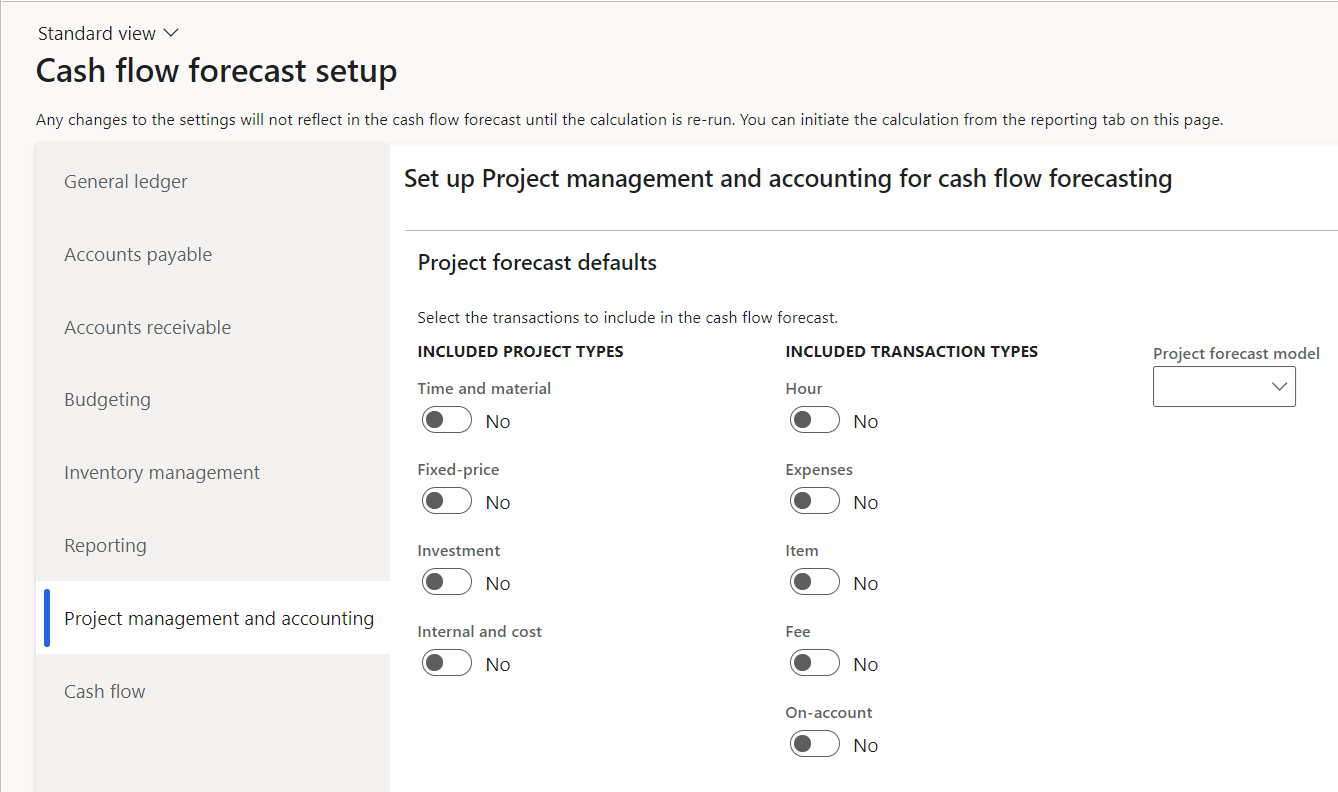
- Navigate to Treasury > Cash management > Cash flow forecasting > Cash flow forecast setup
- The Project management and accounting tab allows you to specify rules for the Project management and accounting module. Here you can specify the Project types as well as Transaction types to include in the cash flow forecast.
¶ Step 2.7: Cash flow tab
- Navigate to Treasury > Cash management > Cash flow forecasting > Cash flow forecast setup
- In the Cash flow tab, you can enable Advance overdue transactions.
- This allows you to specify advance days for the liquidity accounts. This adds the specified number of days to the liquidity account opening balance date.

Note that any changes to the settings on the Cash flow forecast setup page will not reflect in the cash flow forecast until the Calculate cash flow forecasts periodic job is run. (Blue format)
¶ Step 3 Cash flow forecast run dates setup
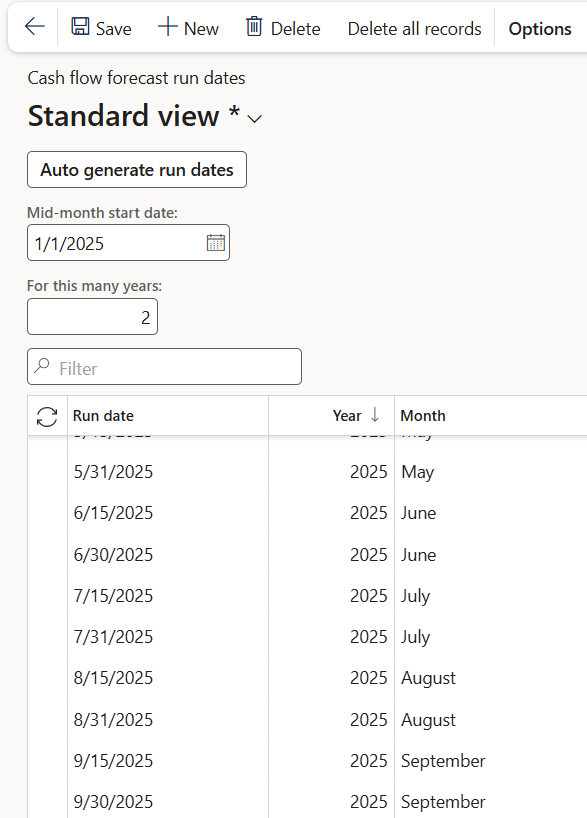
- Navigate to Treasury > Cash management > Setup for cash management > Cash flow forecast run dates
- Select a run date
- Enter a year
- Select a month
¶ Daily use
¶ Step 4: Run the Calculate cash flow forecast periodic job
To run the Calculate cash flow forecast periodic job:
- Navigate to Cash and bank management > Cash flow forecasting > Calculate cash flow forecasts
- Select Total or New in the Cash flow forecast calculation method field
- Total will update all cash flow data
- New will only consider changes made and new cash flow forecast data
Optional: As with all periodic jobs in Microsoft dynamics, you can create a batch job to run the periodic job in specific date increments as required
- Click the OK button
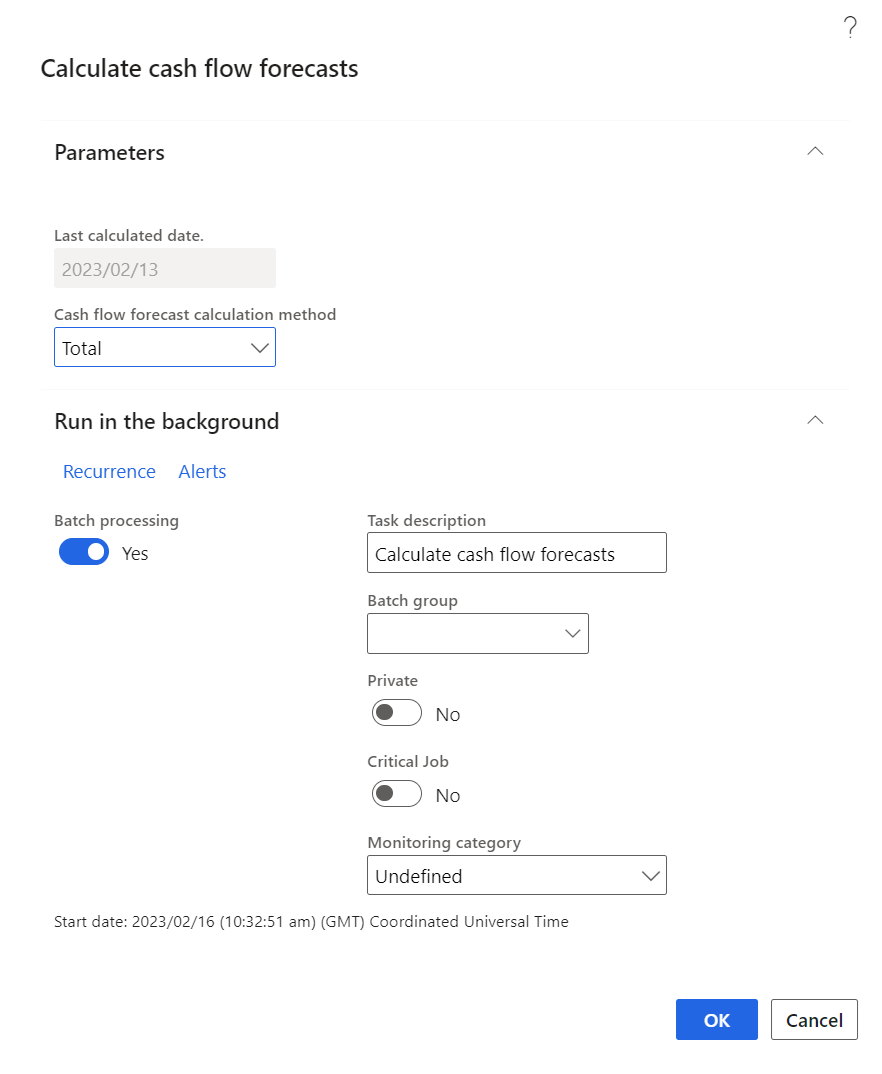
This periodic job needs to be run at least once, otherwise the Cash flow display pages will show no data. (Blue format)
¶ Step 5: Including TMS data in the cash flow forecast.
TMS related data is not automatically included in the Cash flow forecast. This allows flexibility as to whether to include or exclude TMS related data in the cash flow.
¶ Step 5.1: Including Loan installments in the cash flow forecast.
- Navigate to Treasury > Loans > Periodic > Calculate loan installment cash flow forecasts.
- Select Total or New in the Cash flow forecast calculation method field.
- Total will update all cash flow data
- New will only consider changes made and new cash flow forecast data.
Optional: As with all periodic jobs in Microsoft dynamics, you can create a batch job to run the periodic job in specific date increments as required.
- Click the OK button
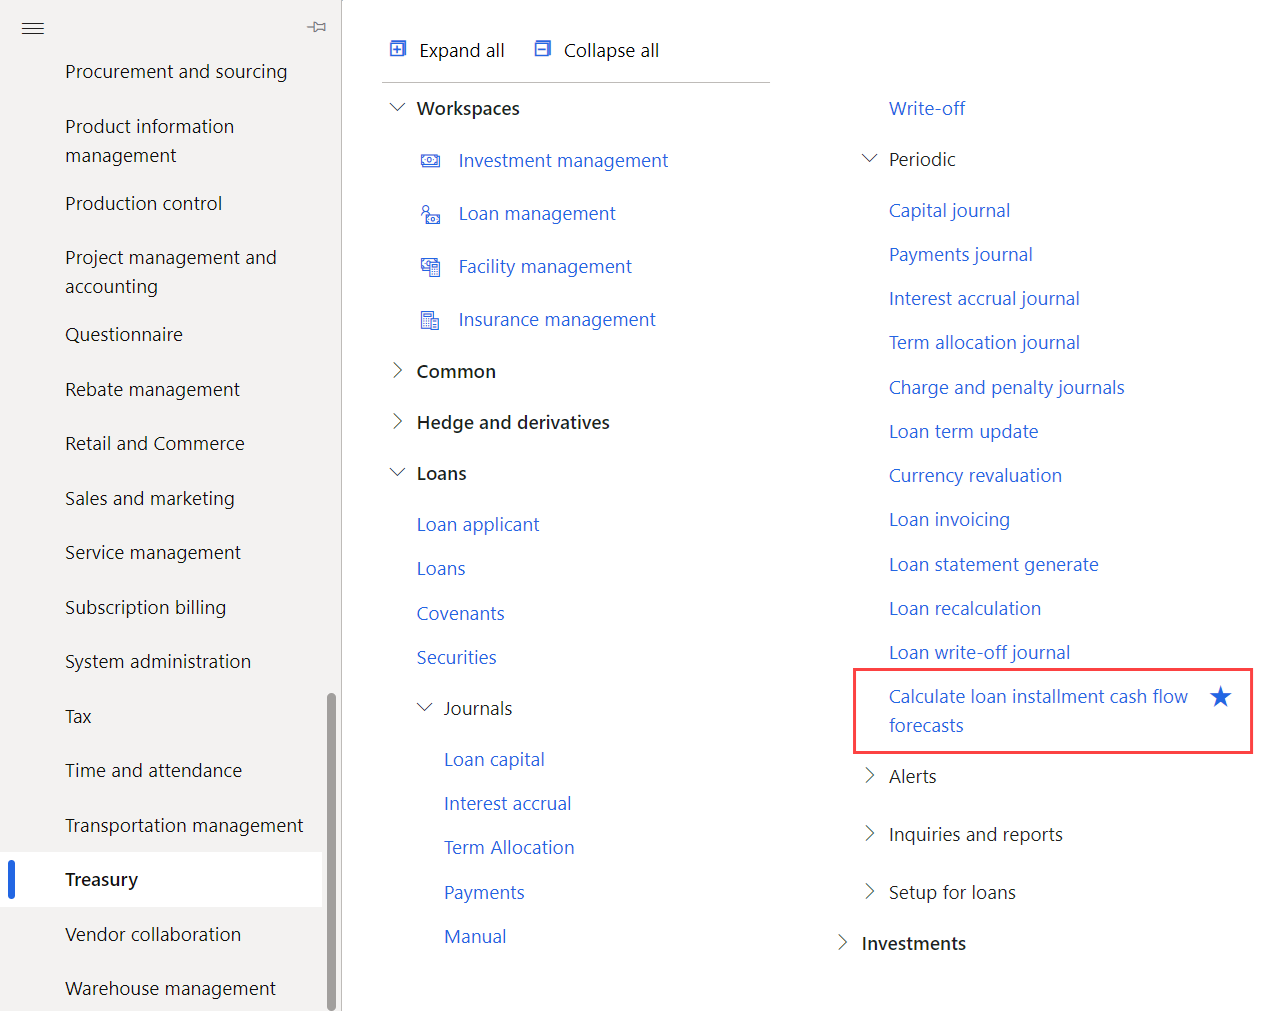
This periodic job needs to be run at least once for loan installments to be considered in the cash flow forecast. (Blue format)
¶ Step 6: Cash overview - all companies
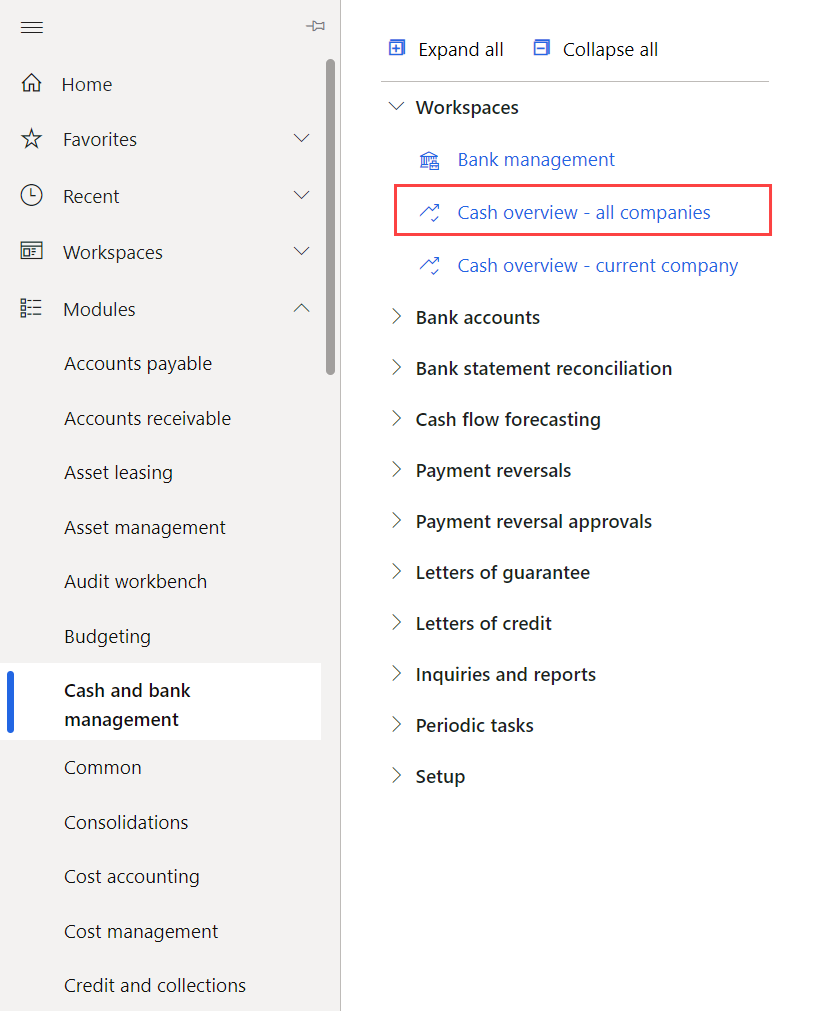
- Navigate to Cash and bank management > Workspaces > Cash overview - all companies.
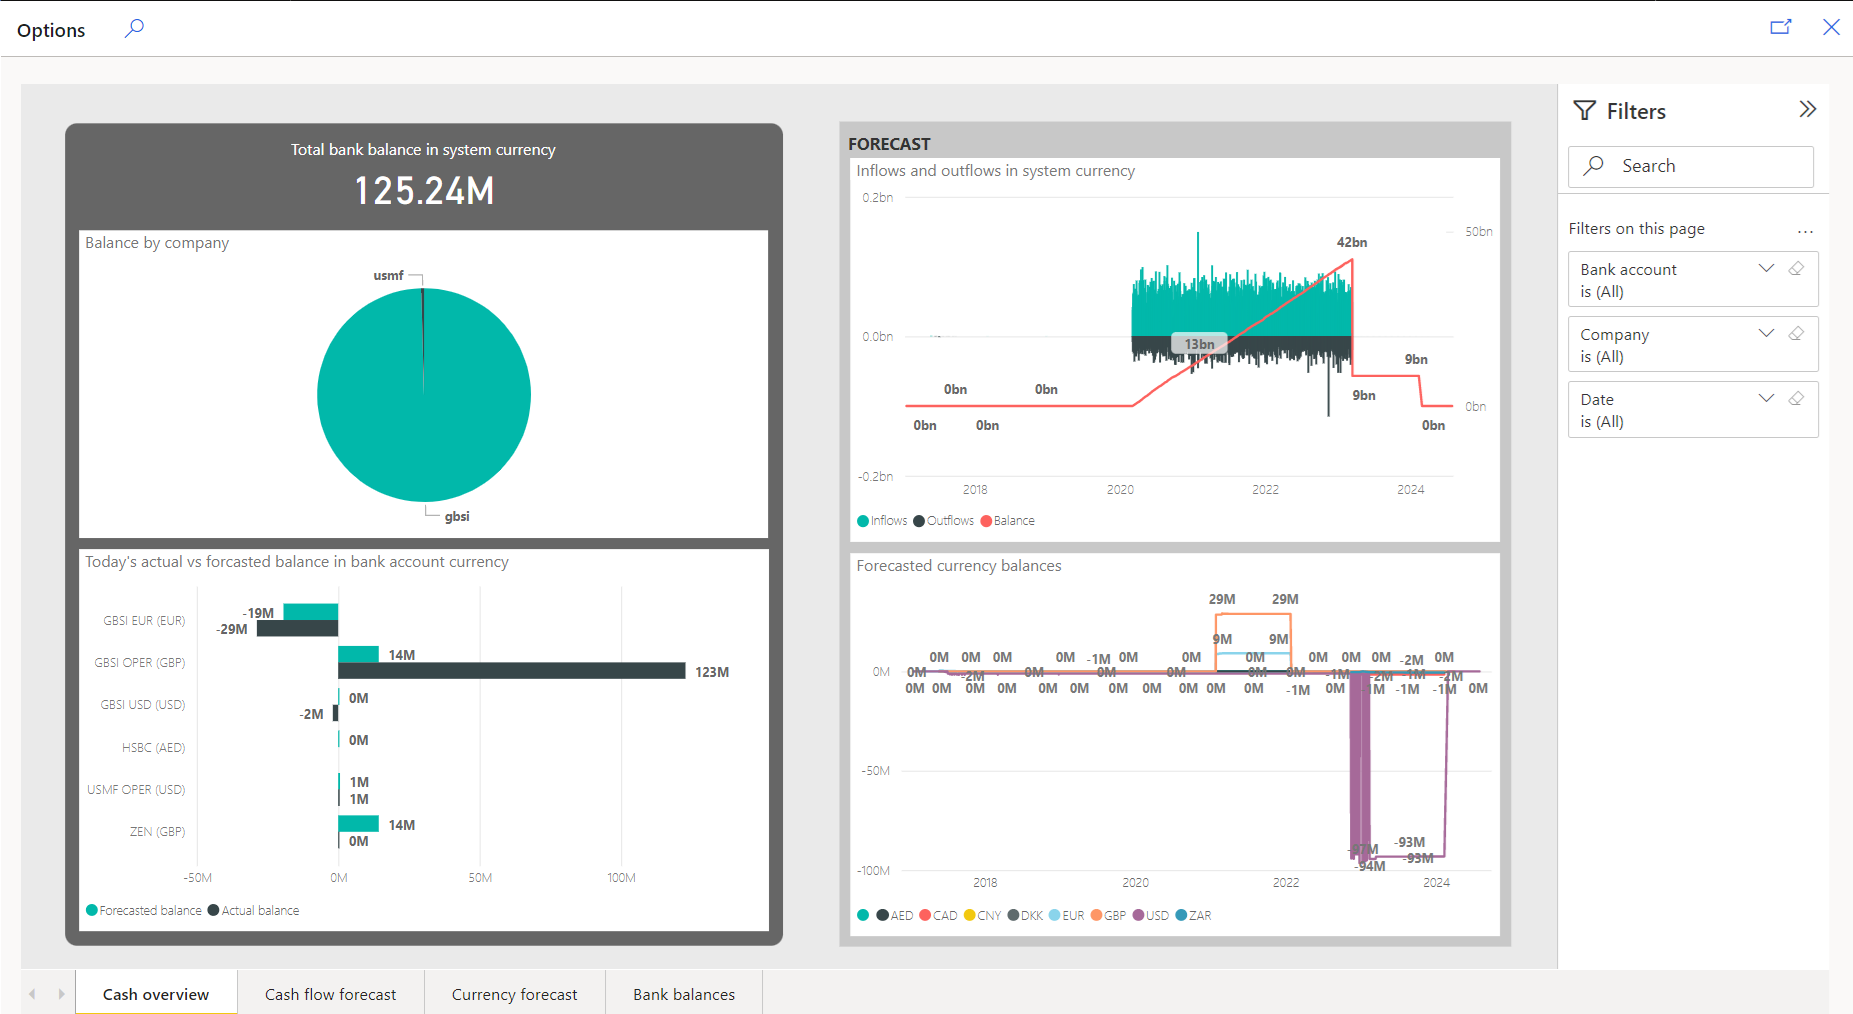
- This workspace gives an overview of the cash position of All the legal entities
- These graphs reflect data from the cash flow forecast to enhance decision making capabilities
¶ Step 7: Cash overview - current entity
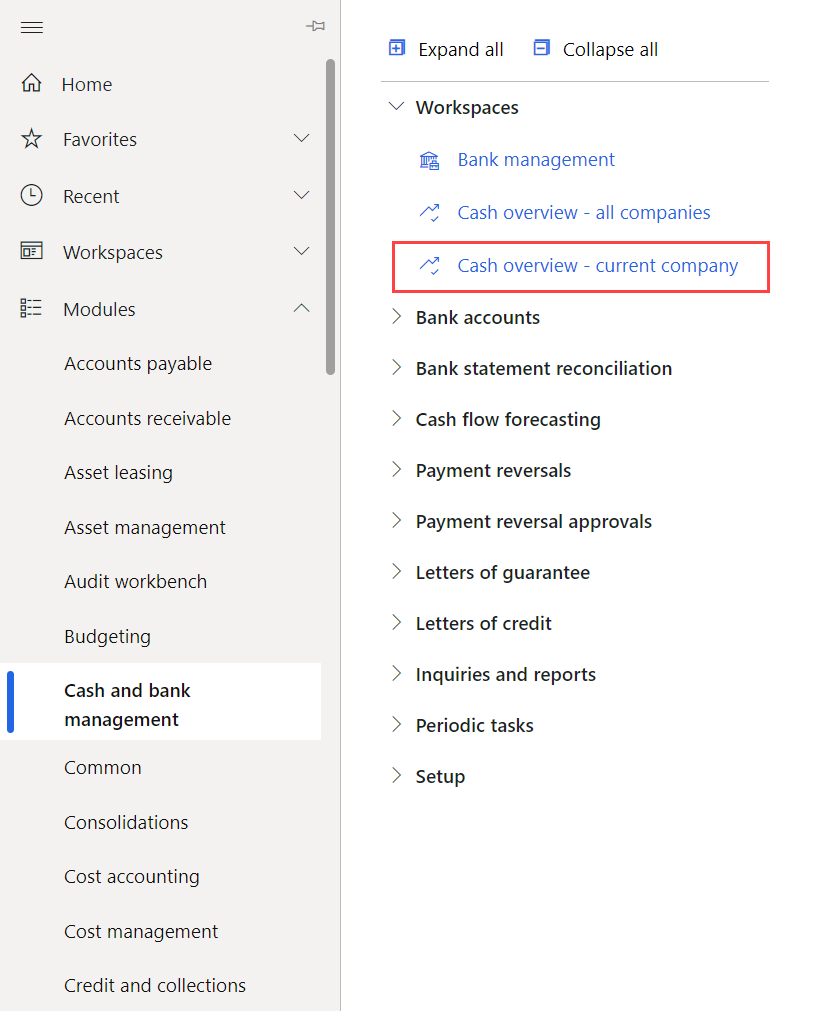
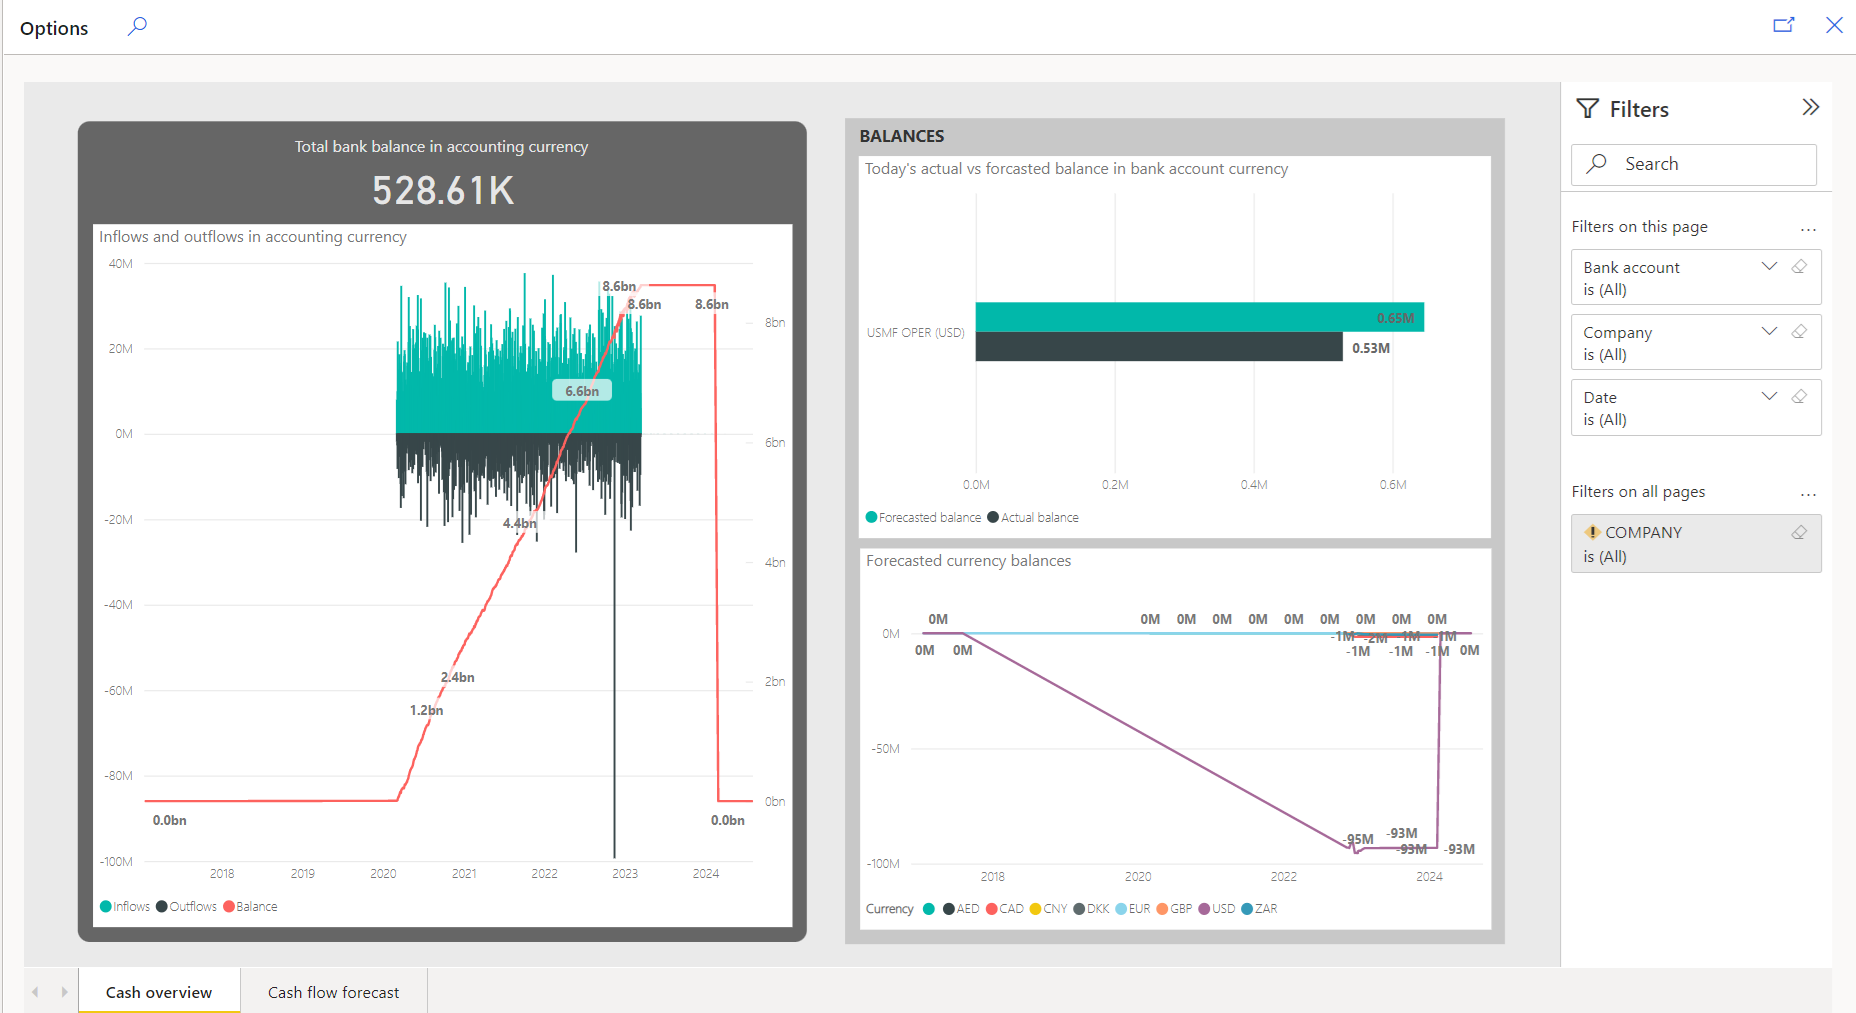
- Navigate to Cash and bank management > Workspaces > Cash overview - current company
- This workspace gives an overview of the cash position of the current legal entity that the user is in
¶ Step 8: Add Power BI reports to workspaces
¶ Step 8.1: Navigate to any workspace that has a Related information section.
Navigate to any workspace that has a Related information section that is visible. This section contains links that will redirect the user to the specific link.
For example:
- Navigate to Cash and bank management > Workspaces > Bank management.
- Scroll to the bottom of the Workspace until you see the Related information section header.
If a workspace does not have a related information section available, then the user will not be able to add a Power BI report to the Workspace. (Blue format)
¶ Reporting
¶ Step 9: Cash management workspace
A workspace has been created to list all bank accounts that are part of a group (spanning multiple legal entities), displaying their opening balance, cash in, cash out, and closing balance for a given period.
Navigate to Treasury > Workspaces > Cash management . This workspace includes three tabs:
- My work
- Legal Entity Bank Balances
- Global Bank Balances
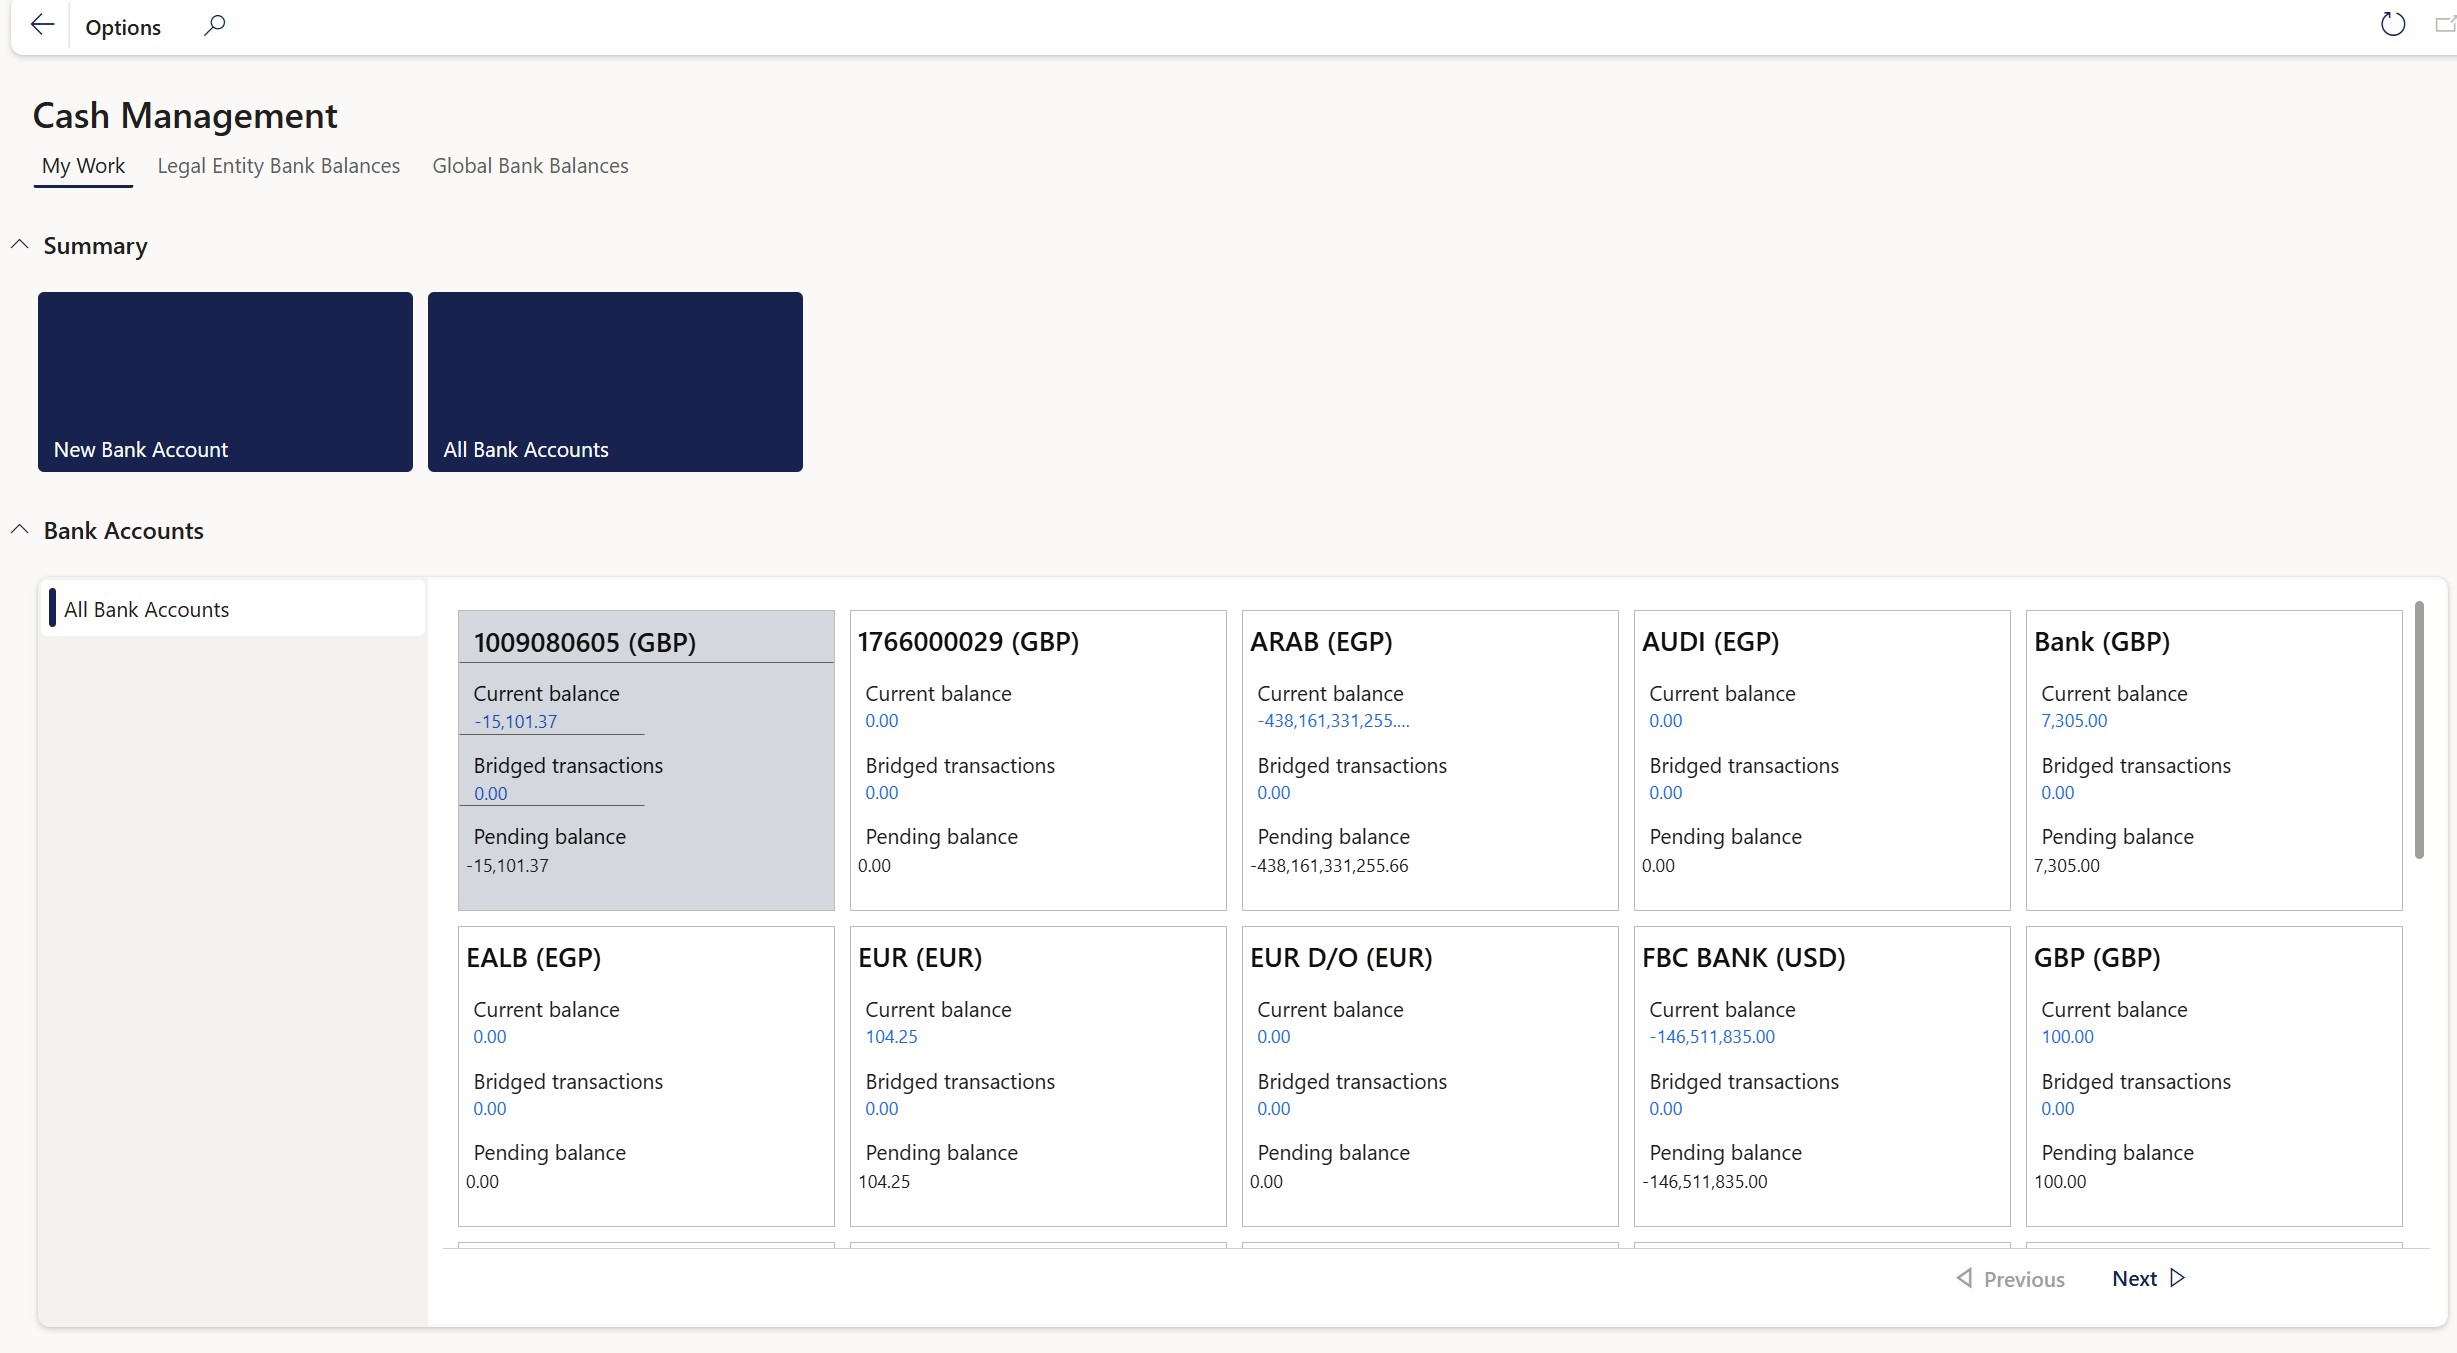
¶ Step 9.1 My work
The My work tab contains the following FastTabs:
- Summary
- Bank accounts
¶ Step 9.2 Legal Entity Bank Balances
The Legal entity Bank Balances tab contains the following FastTabs:
- Parameters
- Details
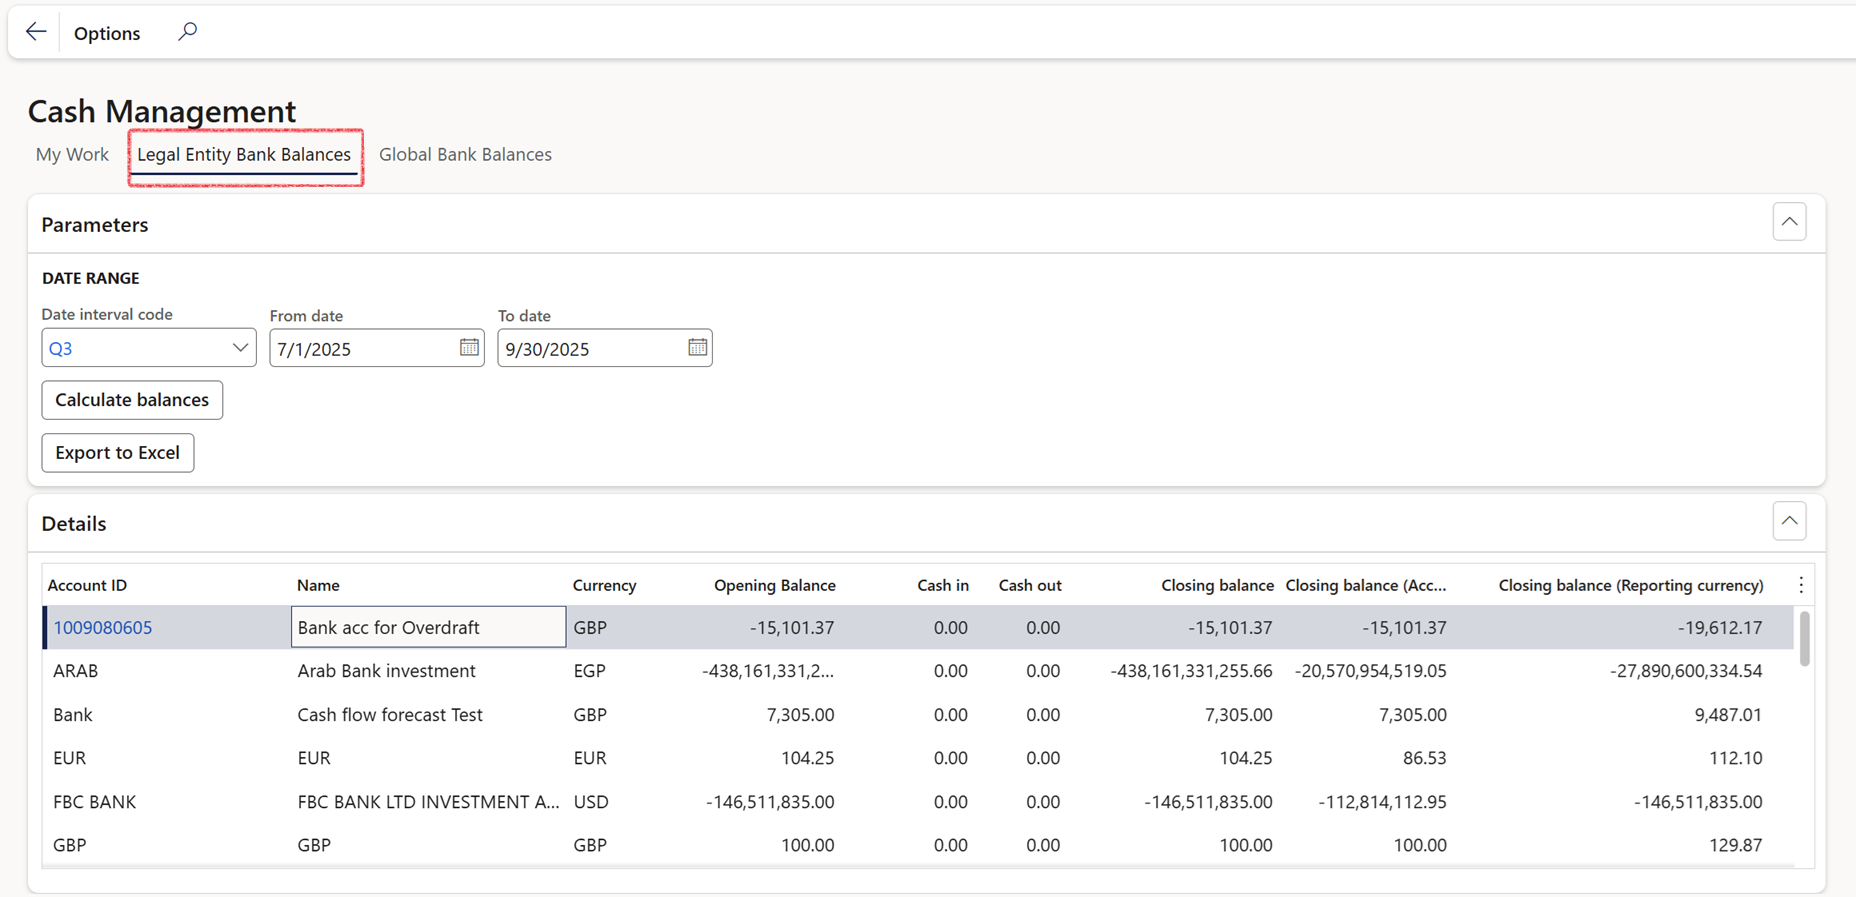
The Date interval code can be selected on the Parameters FastTab:
- Click on the Calculate balances button
The Details FastTab contain the following columns:
- Account ID
- Name
- Currency
- Opening Balance
- Cash in
- Cash out
- Closing balance
- Closing balance (Accounting currency)
- Closing balance (Reporting currency)
¶ Step 9.3 Global Bank Balances
The Global Bank Balances tab consist of the following FastTabs:
- Parameters
- Details
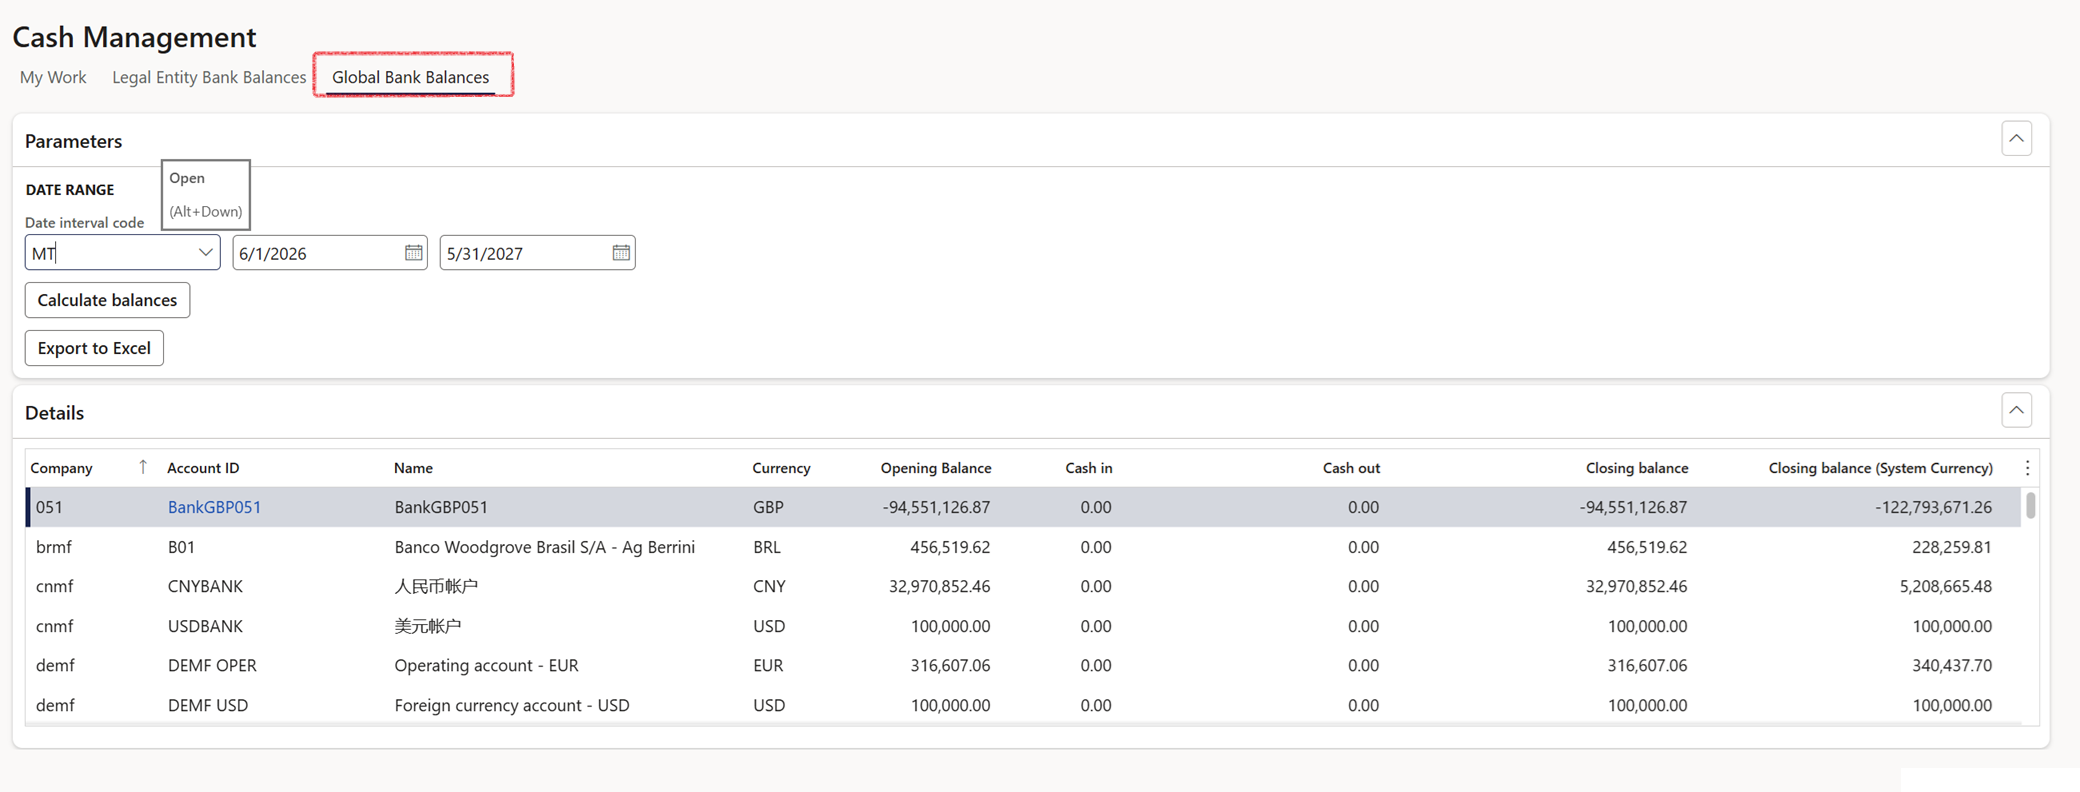
The Details FastTab contain the following columns:
- Company
- Account ID
- Name
- Currency
- Opening Balance
- Cash in
- Cash out
- Closing balance
- Closing balance (System currency)
