¶ Introduction
To enable integration between the Symplexity HR and Payroll software solution and D365. The integration allows for employee and worker data as well as payroll transactions to be shared between these software solutions. The Axnosis ISV solution utilises the following three modules:
¶ Navigation
- System Administration
- Payroll
- General ledger
¶ Setups
¶ Step 1: Setup Payroll parameters
- Go to: Payroll > Setup > Parameters > Payroll parameters
- Open the Integration tab
- In the Journal name field, select Payroll from the dropdown list
- In the Financial dimension field, select PostingCostCentre from the dropdown list

¶ Daily use
¶ Step 2: Worker creation and update
Workers import file received
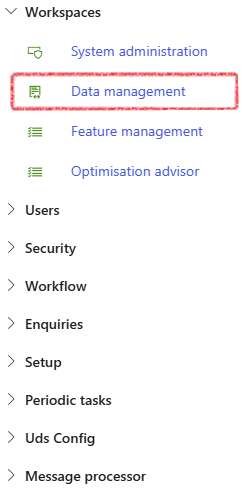
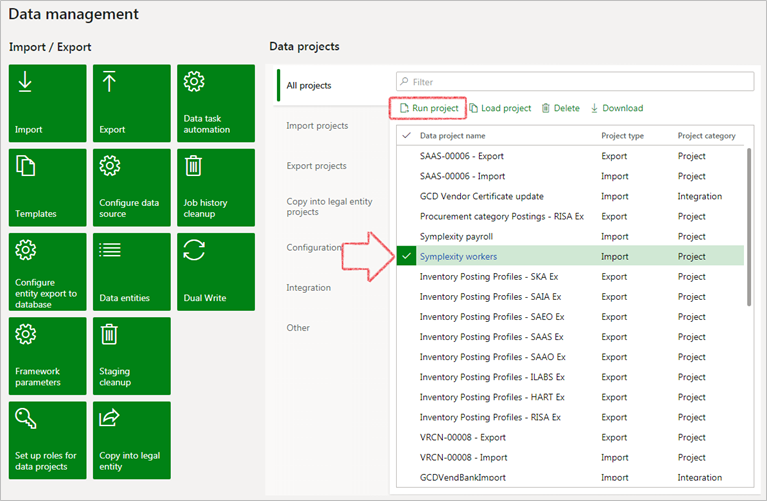
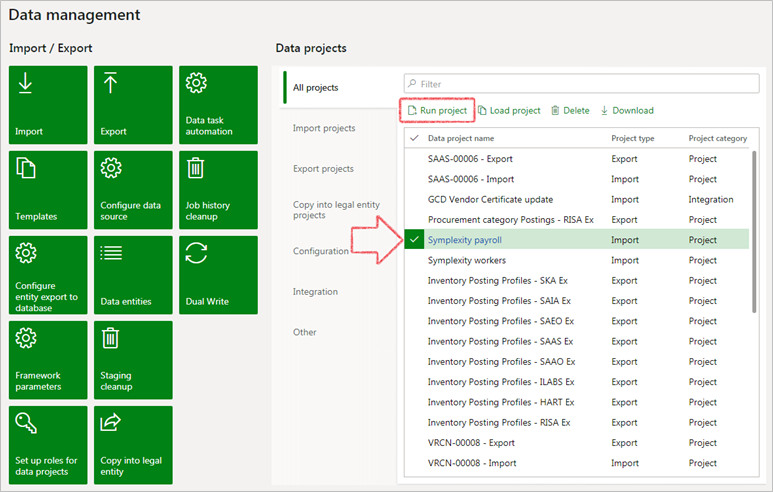
- Go to: System administration > Workspaces > Data management
- Under Data projects, select the Symplexity workers import project
- Click on the Run project button
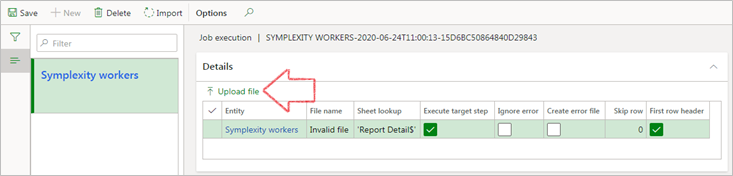
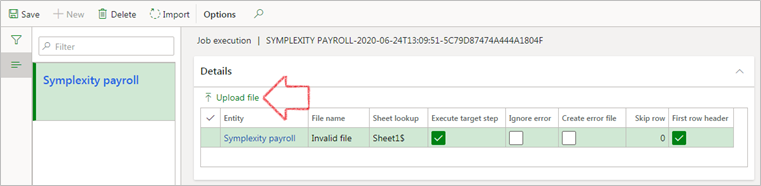
- On the Job execution form, click on the Upload file button
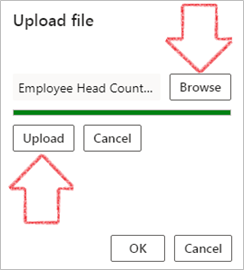
- On the Upload file dialog, click on the Browse button
- Select the Worker import file that you want to upload from your documents
- Click on the Upload button
- Click OK
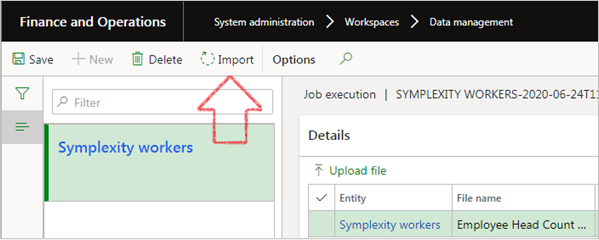
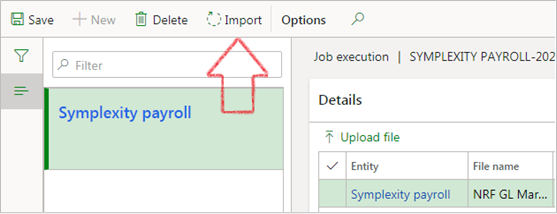
- On the Action pane, click on the Import button
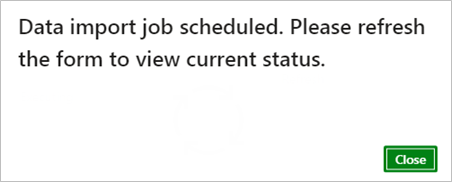
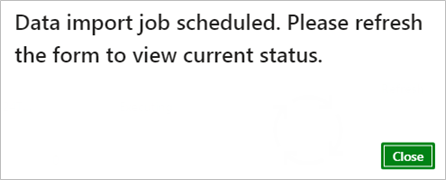
- On the popup notification, click on the Close button
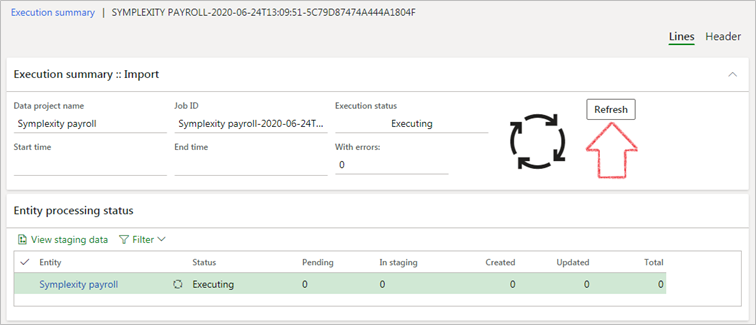
- On the Execution summary form, click on the Refresh button
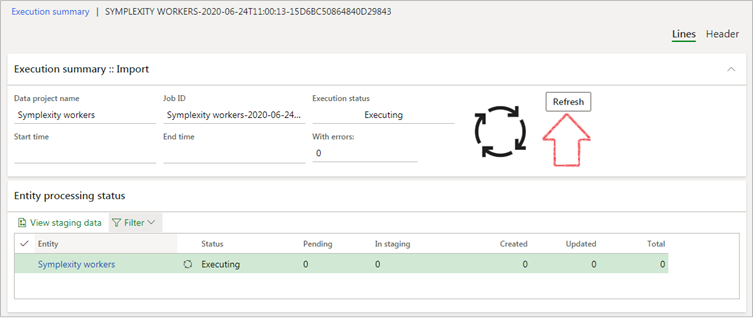
- If the status is Failed/Partially succeeded:
- On the Execution summary form, under the Entity processing status section, click on the View staging data button
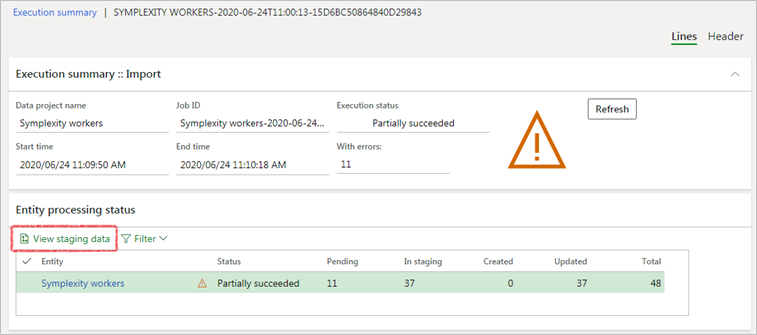
- Select the line with Staging status Error
- The Message (reason for failing) will be displayed at the bottom of the screen
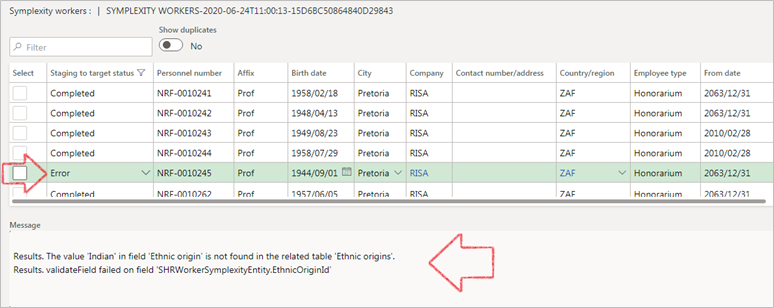
| Verify that the workers have been successfully imported (or whether the data has been updated/adjusted accordingly) |
¶ Step 3: Payroll data import and journal creation
Payroll import file received
- Go to: System administration > Workspaces > Data management
- Under Data projects, select the Symplexity payroll import project
- Click on the Run project button
- On the Job execution form, click on the Upload file button
- On the Upload file dialog, click on the Browse button
- Select the Worker import file that you want to upload from your documents
- Click on the Upload button
- Click OK

- On the Action pane, click on the Import button
- On the popup notification, click on the Close button
- On the Execution summary form, click on the Refresh button
| If the status is Failed: - On the Execution summary form, under the Entity processing status section, click on the View staging data button - Select the line with Staging status Error - The Message (reason for failing) will be displayed at the bottom of the screen |
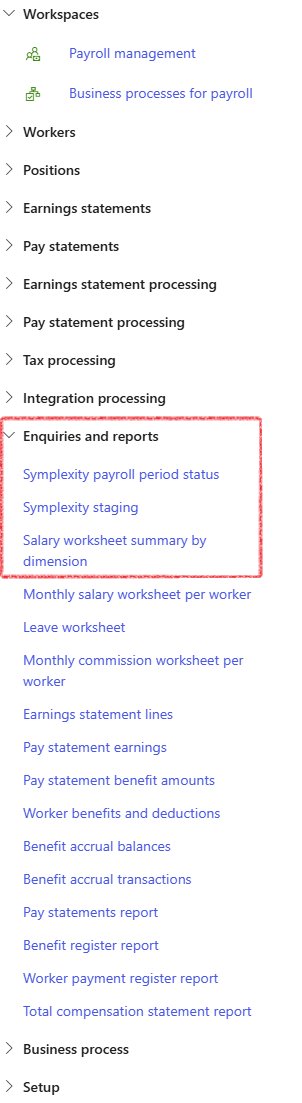
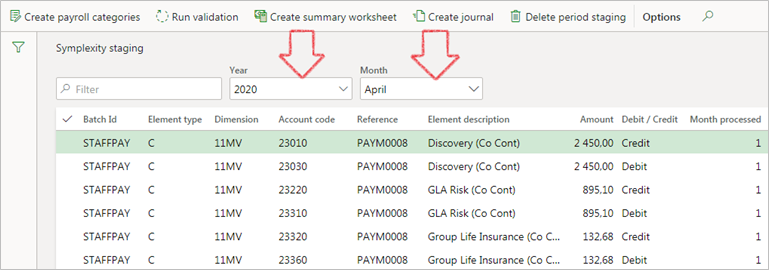
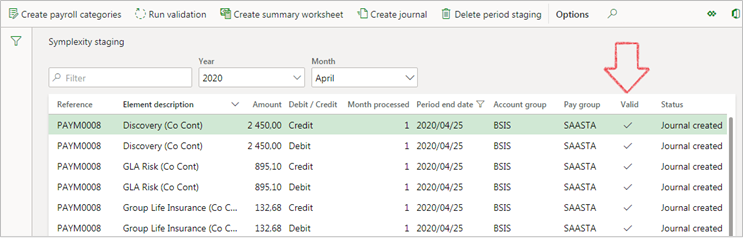
- Go to: Payroll > Inquiries and reports > Symplexity staging
- Use the Year and Month filters to select the relevant period to process
- On the Action pane, click on the Create payroll categories button
- On the Create payroll categories dialog, specify the Month and Year period
- Click OK
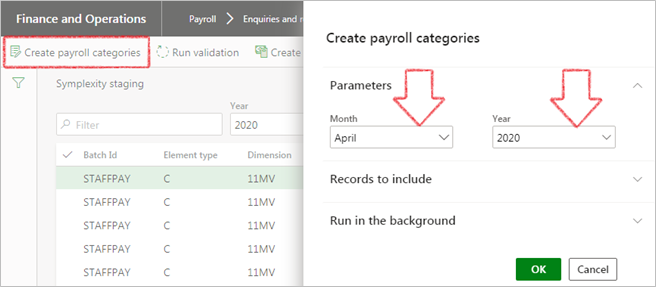
| Note that this step will create any additional categories (if applicable) in D365 ensuring synchronization between the 2 systems |
- On the Action pane, click on the Run validation button
- On the Validate Symplexity payroll staging dialog, specify the Month and Year period
- Click OK
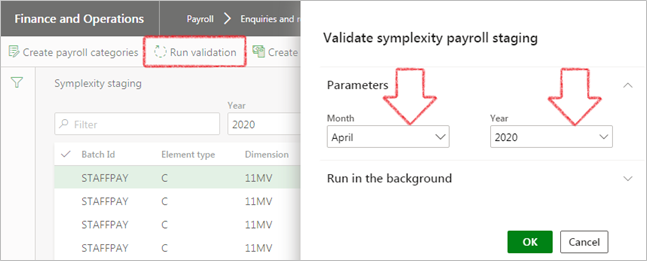
| NOTE: View the Valid checkbox against each record in the grid. This step will validate the imported (raw) data from Symplexity for accuracy (matching data residing in D365). If the data needs to be reimported/amended due to errors etc., use the “Delete period staging” button, specify the relevant Month/Year period and click “OK” to delete the selected staging data. This functionality can only be executed before the system created payroll journal has been posted. |
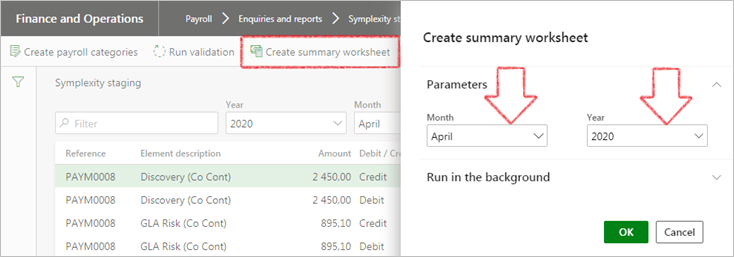
- On the Action pane, click on the Create summary worksheet button
- On the Create summary worksheet dialog, specify the Month and Year period
- Click OK
- Go to: Payroll > Enquiries and reports > Salary worksheet summary by dimension
- Use the Year and Month filters to select the relevant period to review

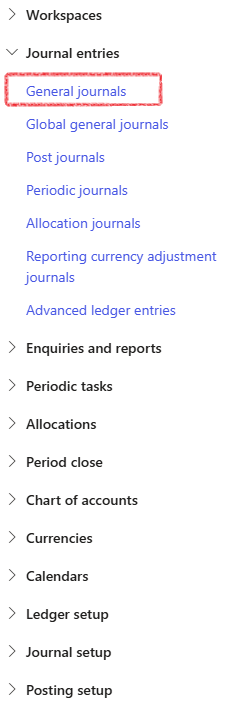
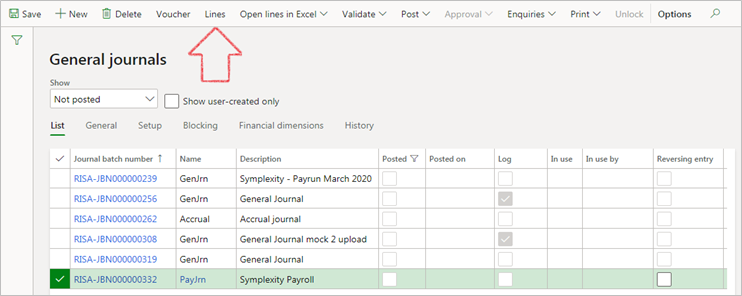
- Go to: General ledger > Journal entries > General journals
- Find the applicable payroll journal
- On the Action pane, click on the Lines button
OR
- Go to: Payroll > Inquiries and reports > Symplexity payroll period status
- Select on the journal voucher hyperlink created to access the journal directly
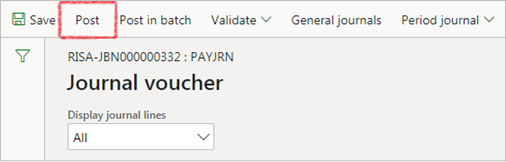
To review the journal lines:
- On the Action pane, click on the Validate button
- A blue bar with confirmation message will appear
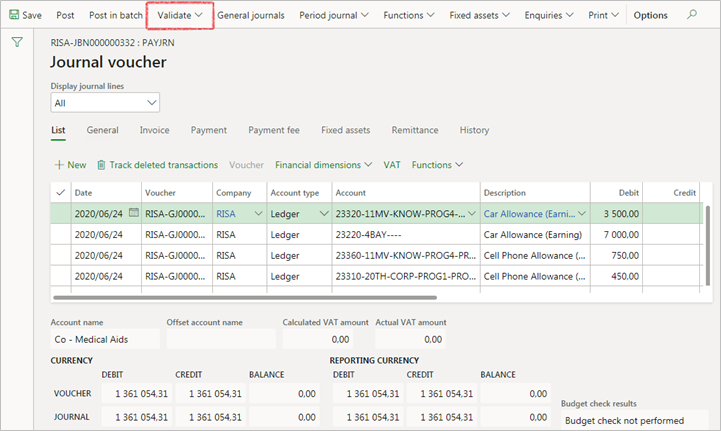
- On the Action pane, click on the Post button to process the journal
¶ Reporting
¶ Step 4: View results
Once the data has been reviewed for accuracy:
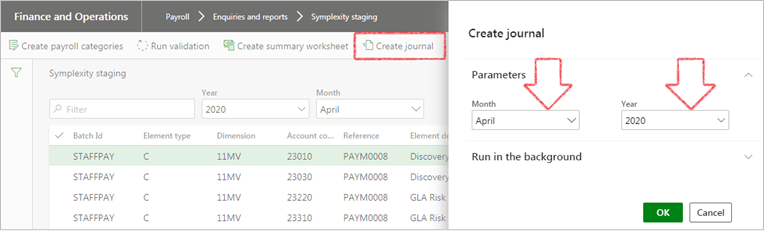
- Go to: Payroll > Inquiries and reports > Symplexity staging
- Use the Year and Month filters to select the relevant period
- On the Action pane, click on the Create journal button to create the journal with the validated data
- On the Create journal dialog, specify the Month and Year period
- Click OK