¶ Introduction
Vendor reconciliation is the process of comparing a company's internal financial records against a vendor's statement to ensure accuracy and resolve discrepancies. This involves matching open vendor transactions (invoices, payments, credit notes, etc) to the vendor's statement to verify that the amounts and transactions are correct. Effective vendor reconciliation helps prevent overpayments, detects errors or fraud, improves cash flow management, and fosters stronger, more transparent relationships with vendors.
¶ Navigation
¶ Specific setups
These setups are required and will be covered below:
- Number sequence
- Journal names
- Vendor recon parameters
- Vendor recon workflow
¶ Step 1: Parameters
¶ Step 1.1: Number sequence
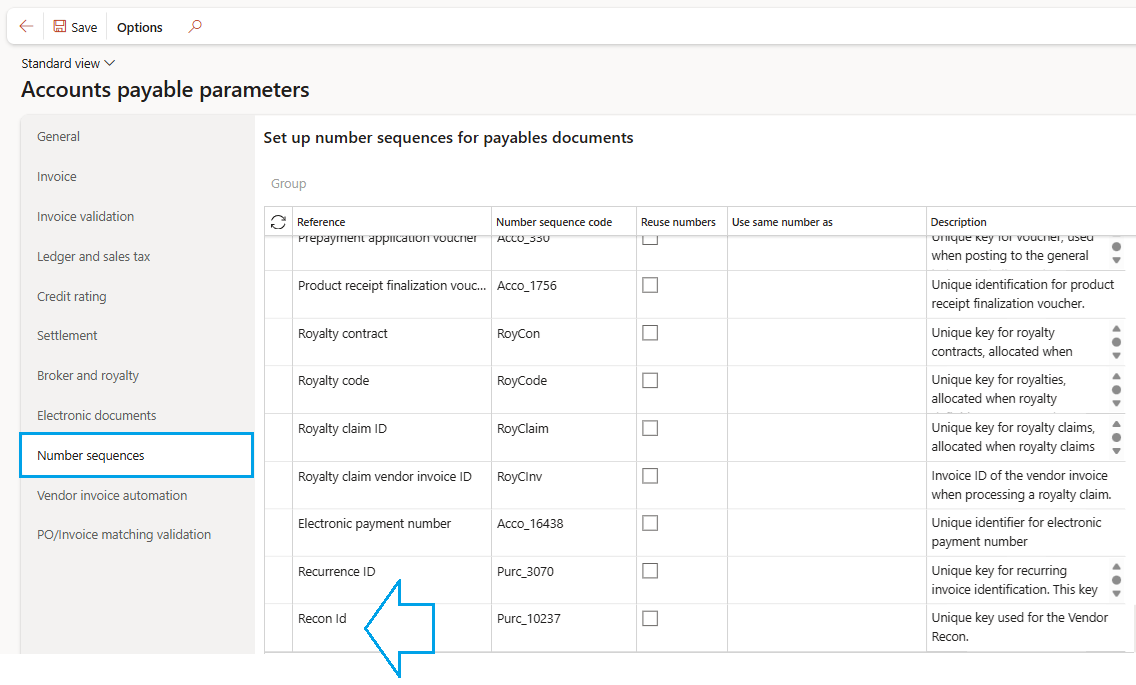
When a new vendor recon is created from the list page, the number sequence specified in the accounts payable parameters will be used
Go to: Accounts payable > Setup > Accounts payable parameters
¶ Step 1.2: Vendor recon parameters
Go to: Accounts payable > Setup > Accounts payable parameters
- Under the General tab, expand the Vendor reconciliation Fast tab. Fill in the parameters as needed
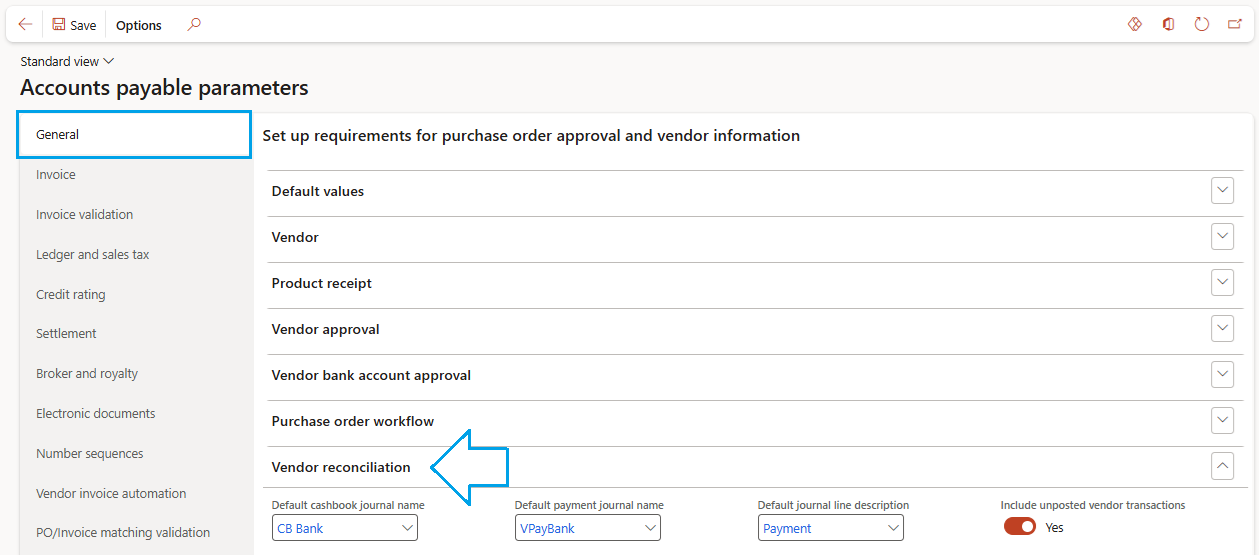
Include uposted vendor transactions: This slider can hide/unhide the section on the vendor recon details page, depending on your organisation's requirements. The feature is used when a user is required to include an urgent payment in the vendor recon, before the final tax invoice has been received.
¶ Step 2: Journal names
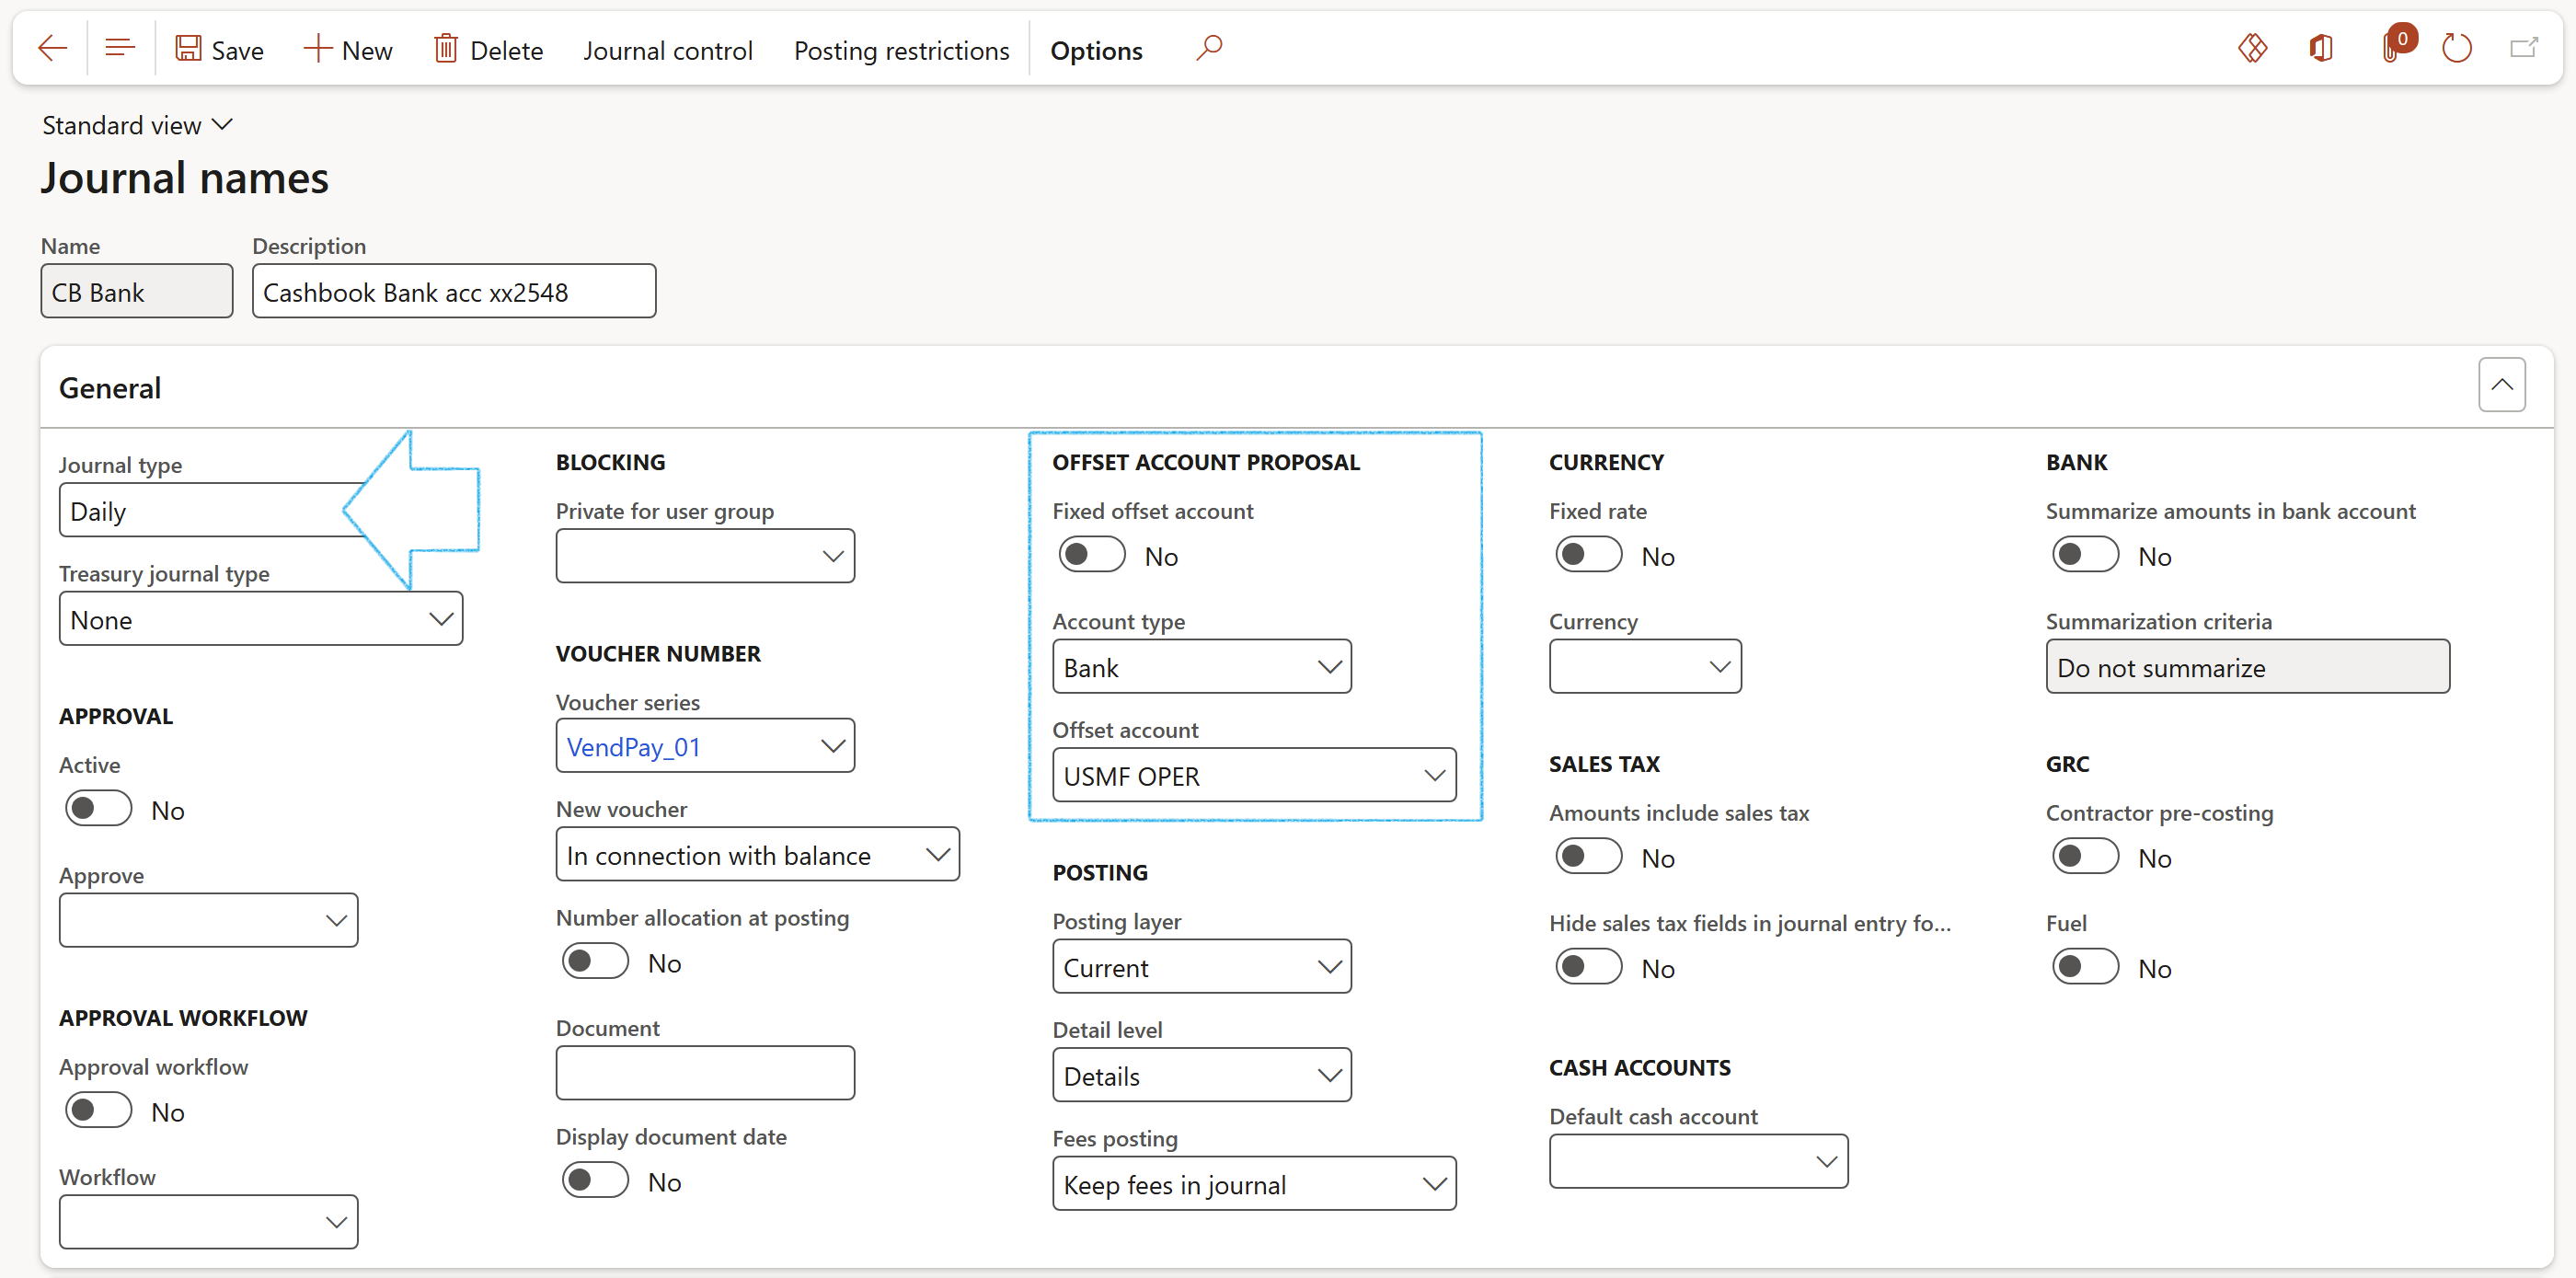
Go to: General ledger > Journal setup > Journal names
- Default cashbook journal: Create a new Daily journal type with the paying bank account set as default offset account. Fill in the remaining parameters as needed
- Default payment journal: Create a new Disbursement journal type with the paying bank account set as the default offset account. Fill in the remaining parameters as needed
¶ Step 3: Vendor recon workflow
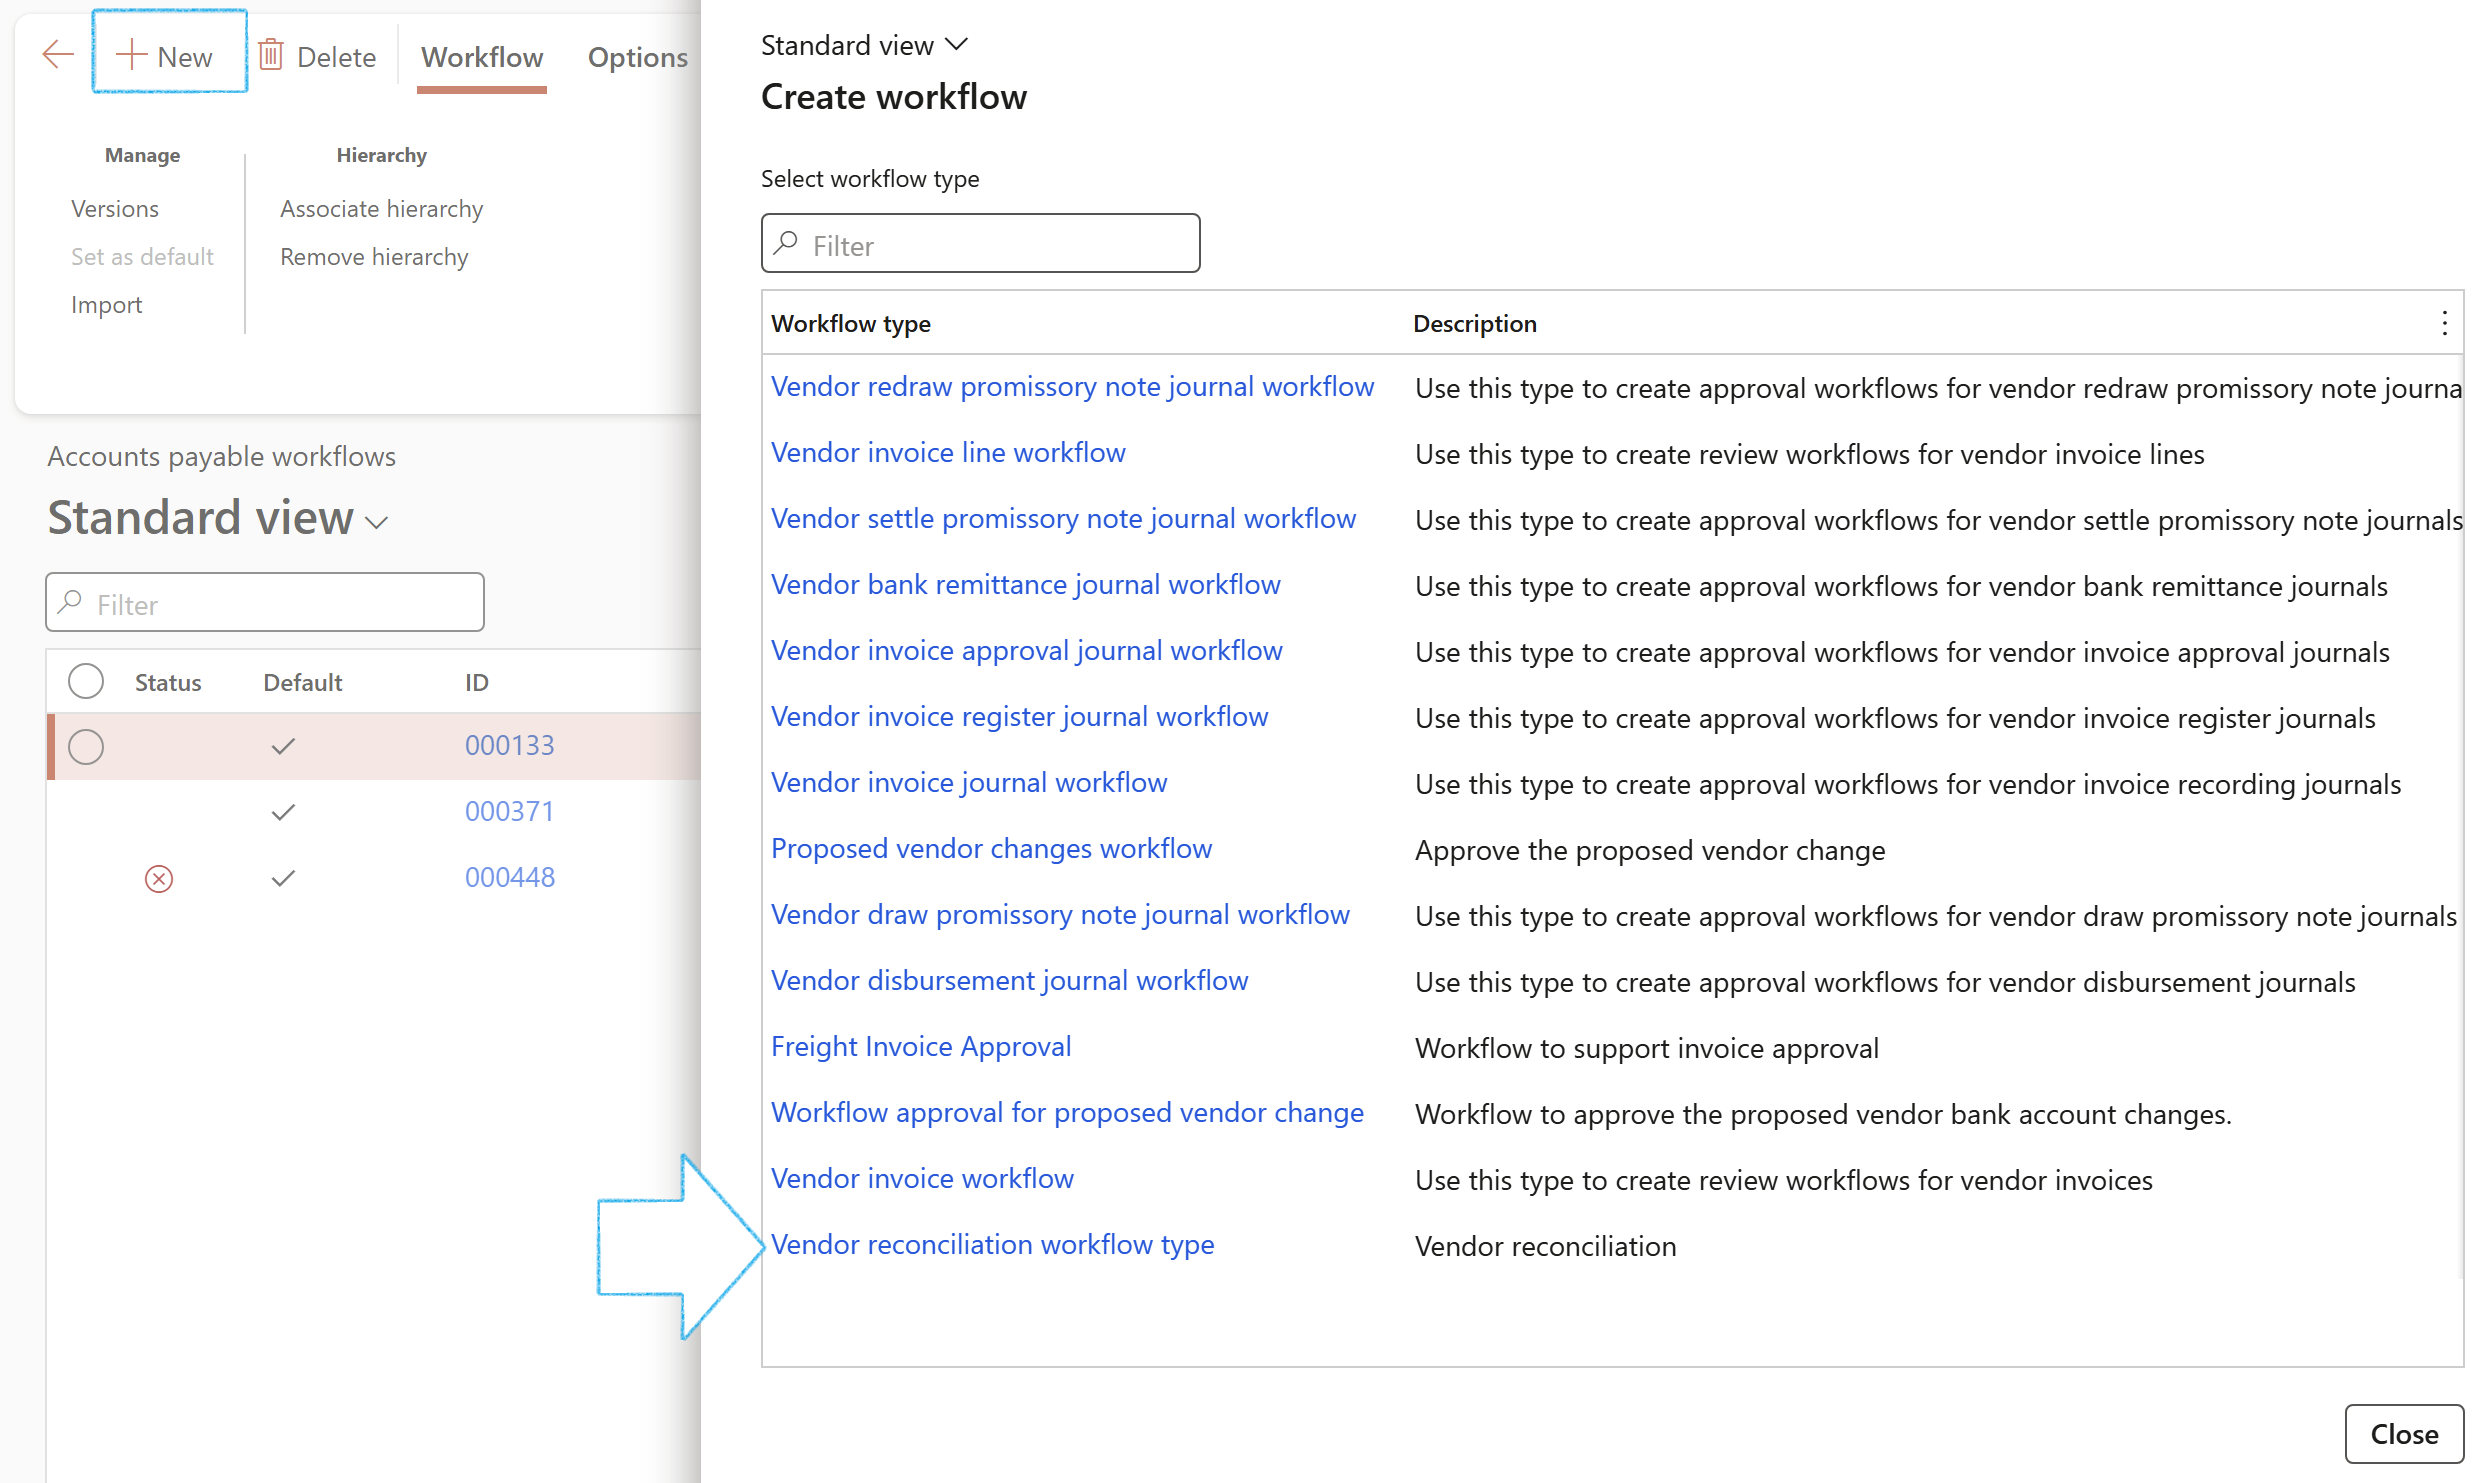
Go to: Accounts payable > Setup > Accounts payable workflows
- Click on the New button in the Action page
- Select Vendor reconciliation workflow type from the flyout menu
- Set up the workflow as needed with the workflow designer
¶ Daily use
¶ Step 4: Create a single vendor recon
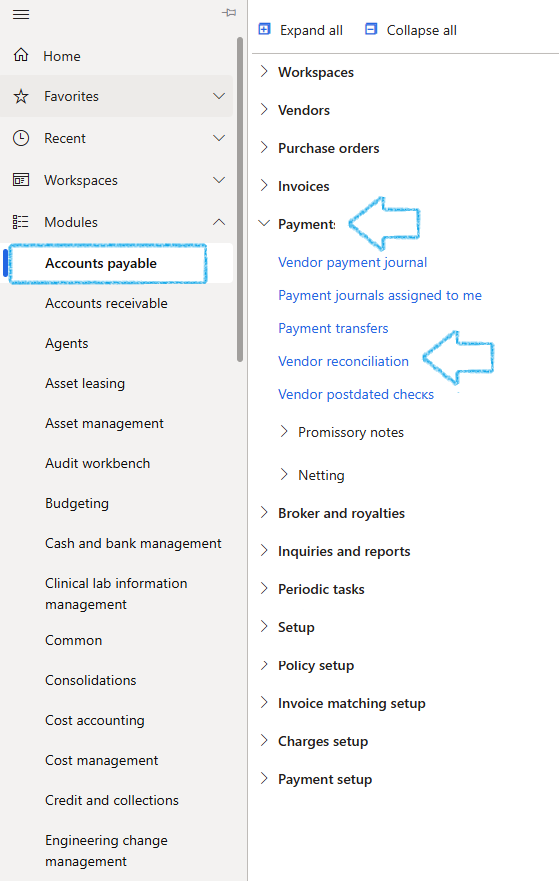
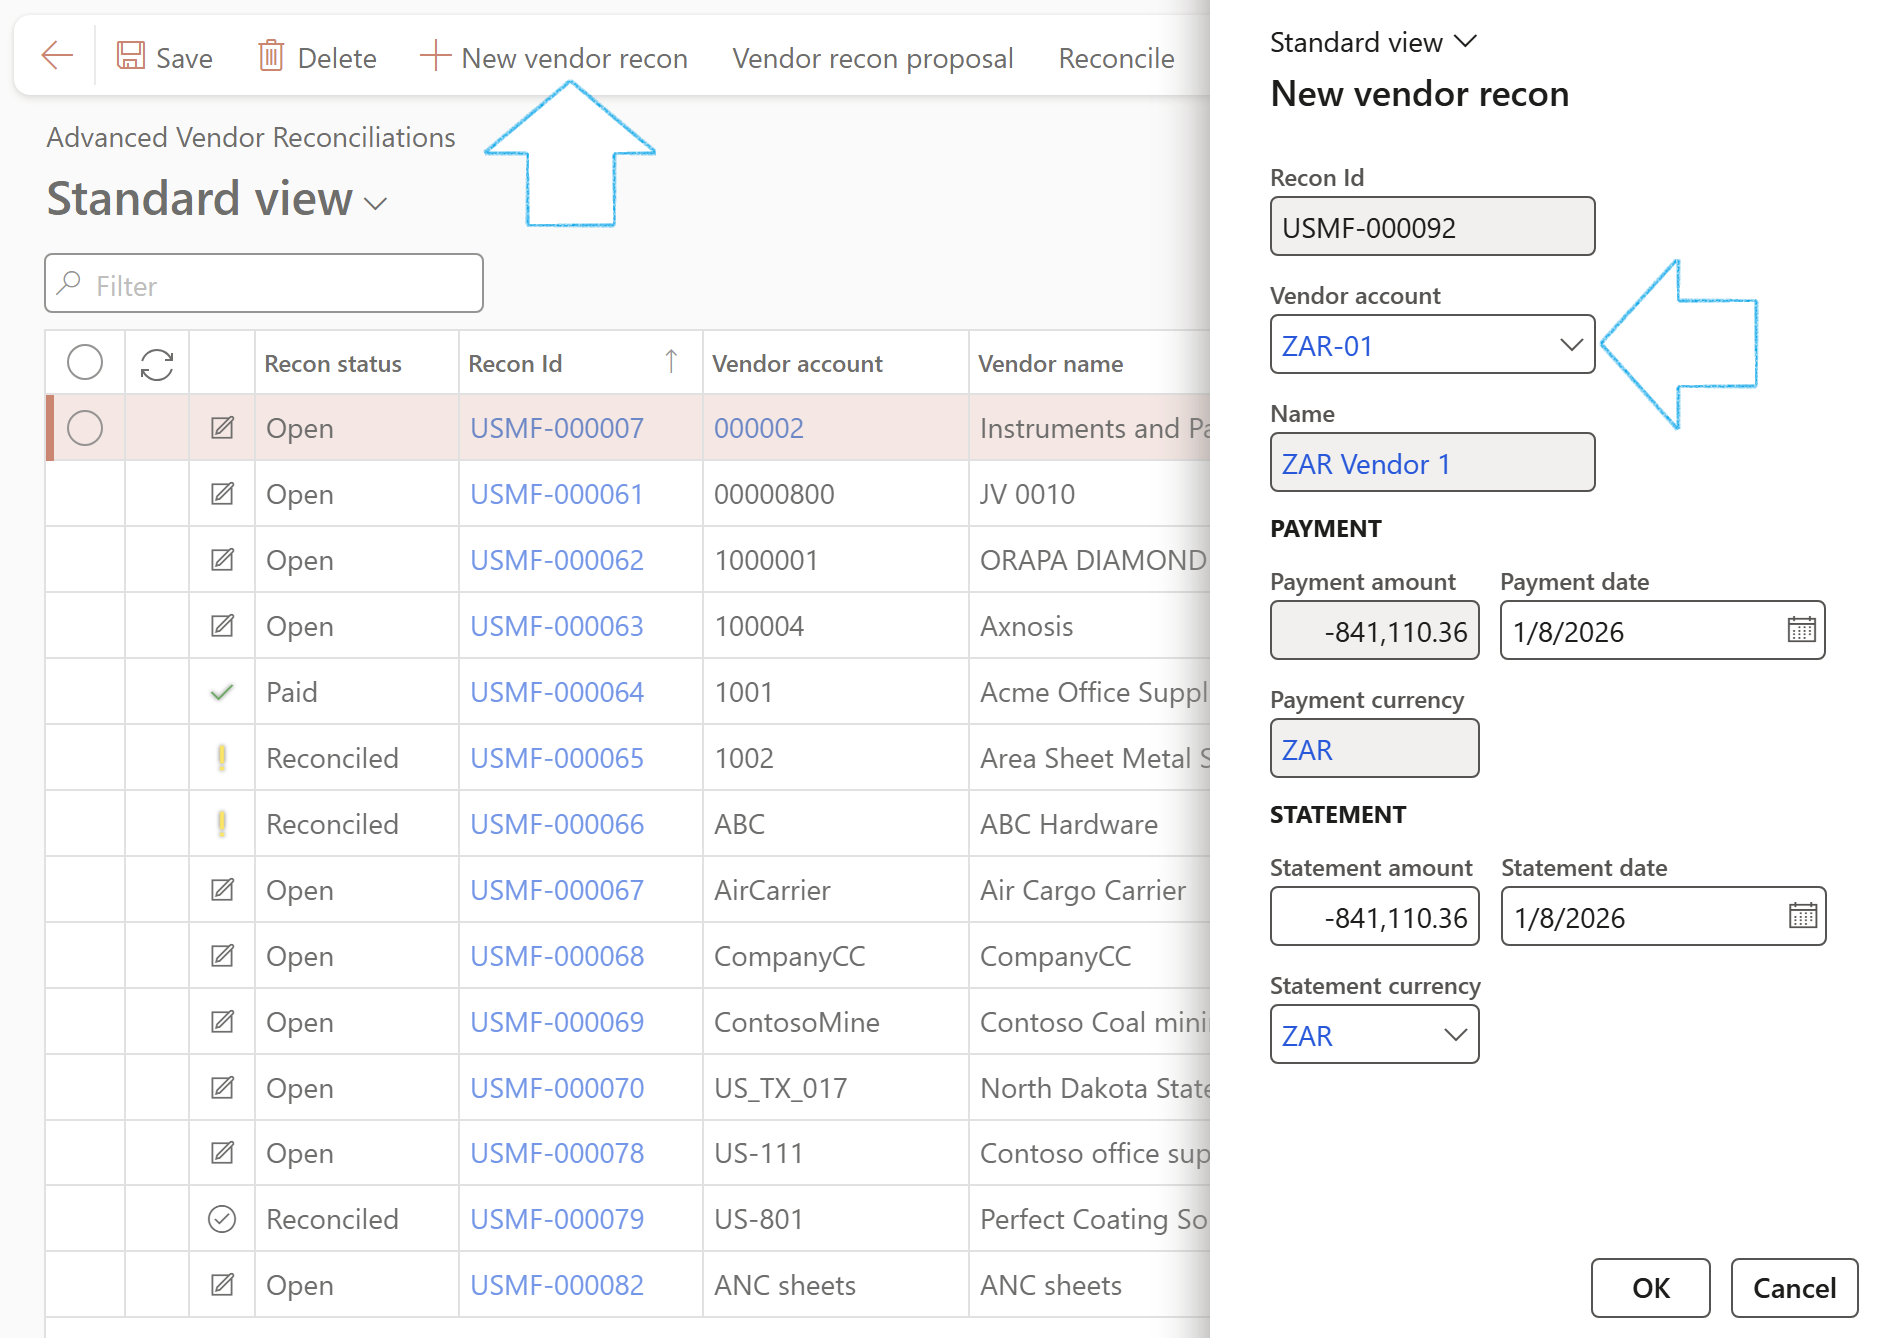
Go to: Accounts payable > Payments > Vendor reconciliation
- Click on the New vendor recon button in the Action pane
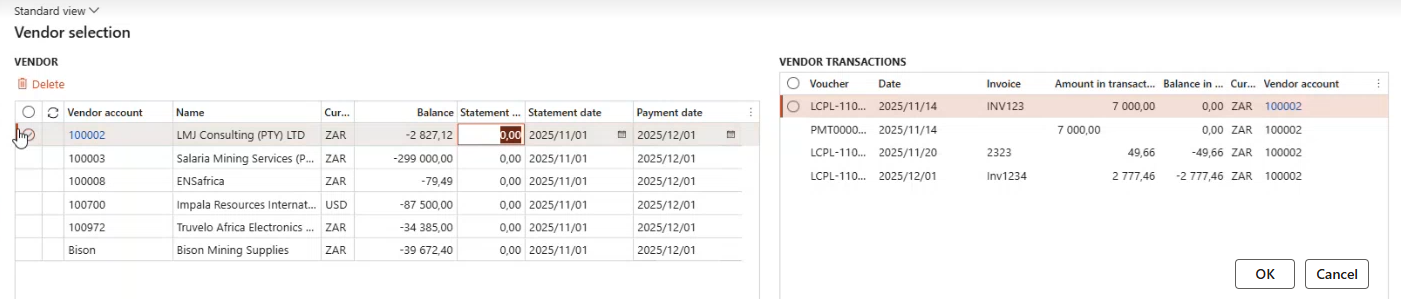
- Select the Vendor account from the dropdown list on the flyout menu of the vendor that is being reconciled for payment
- The vendor balance will be displayed in the Payment amount field
- Enter the Payment date
- Enter the Statement amount
- Enter the Statement date
- Statement currency is optional in case the statement is issued in a different currency than the vendor account currency
- Click on the OK button
- On the details page, the Navigation List will show all vendor recons on the left to switch and view different records

- Details on the selected vendor recon will show under the Vendor recon overview Fast tab
- If a discrepancy exists (an amount not showing on the statement), the amount will reflect in red under the Discrepancy amount field
- Use the Worksheet cluster Fast tabs below, to balance discrepancies by adding a line under Unallocated payments.
- Any adjustments on the worksheet Fast tabs will increase/decrease the Balanced vendor statement amount to align with the Payment amount
- The posted transactions will show under the Posted vendor transactions Fast tab on the right
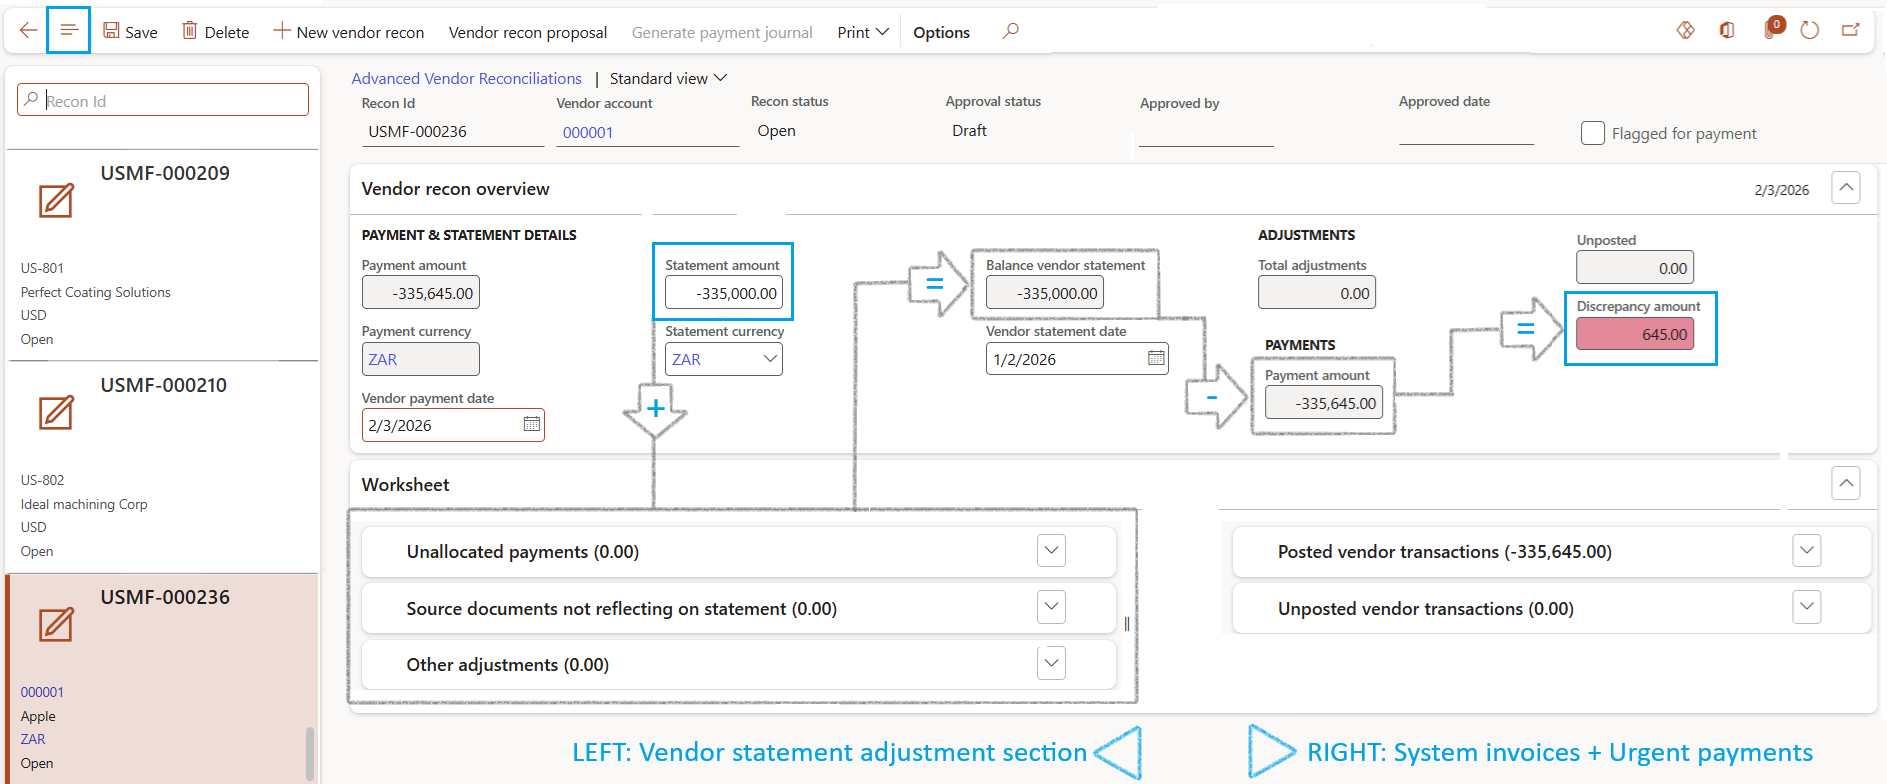
- Select/deselect invoices under Posted vendor transactions to be paid
- The amount can be edited for a partial payment
- A pre-payment can be done by adding a line under the Unposted vendor transactions Fast tab
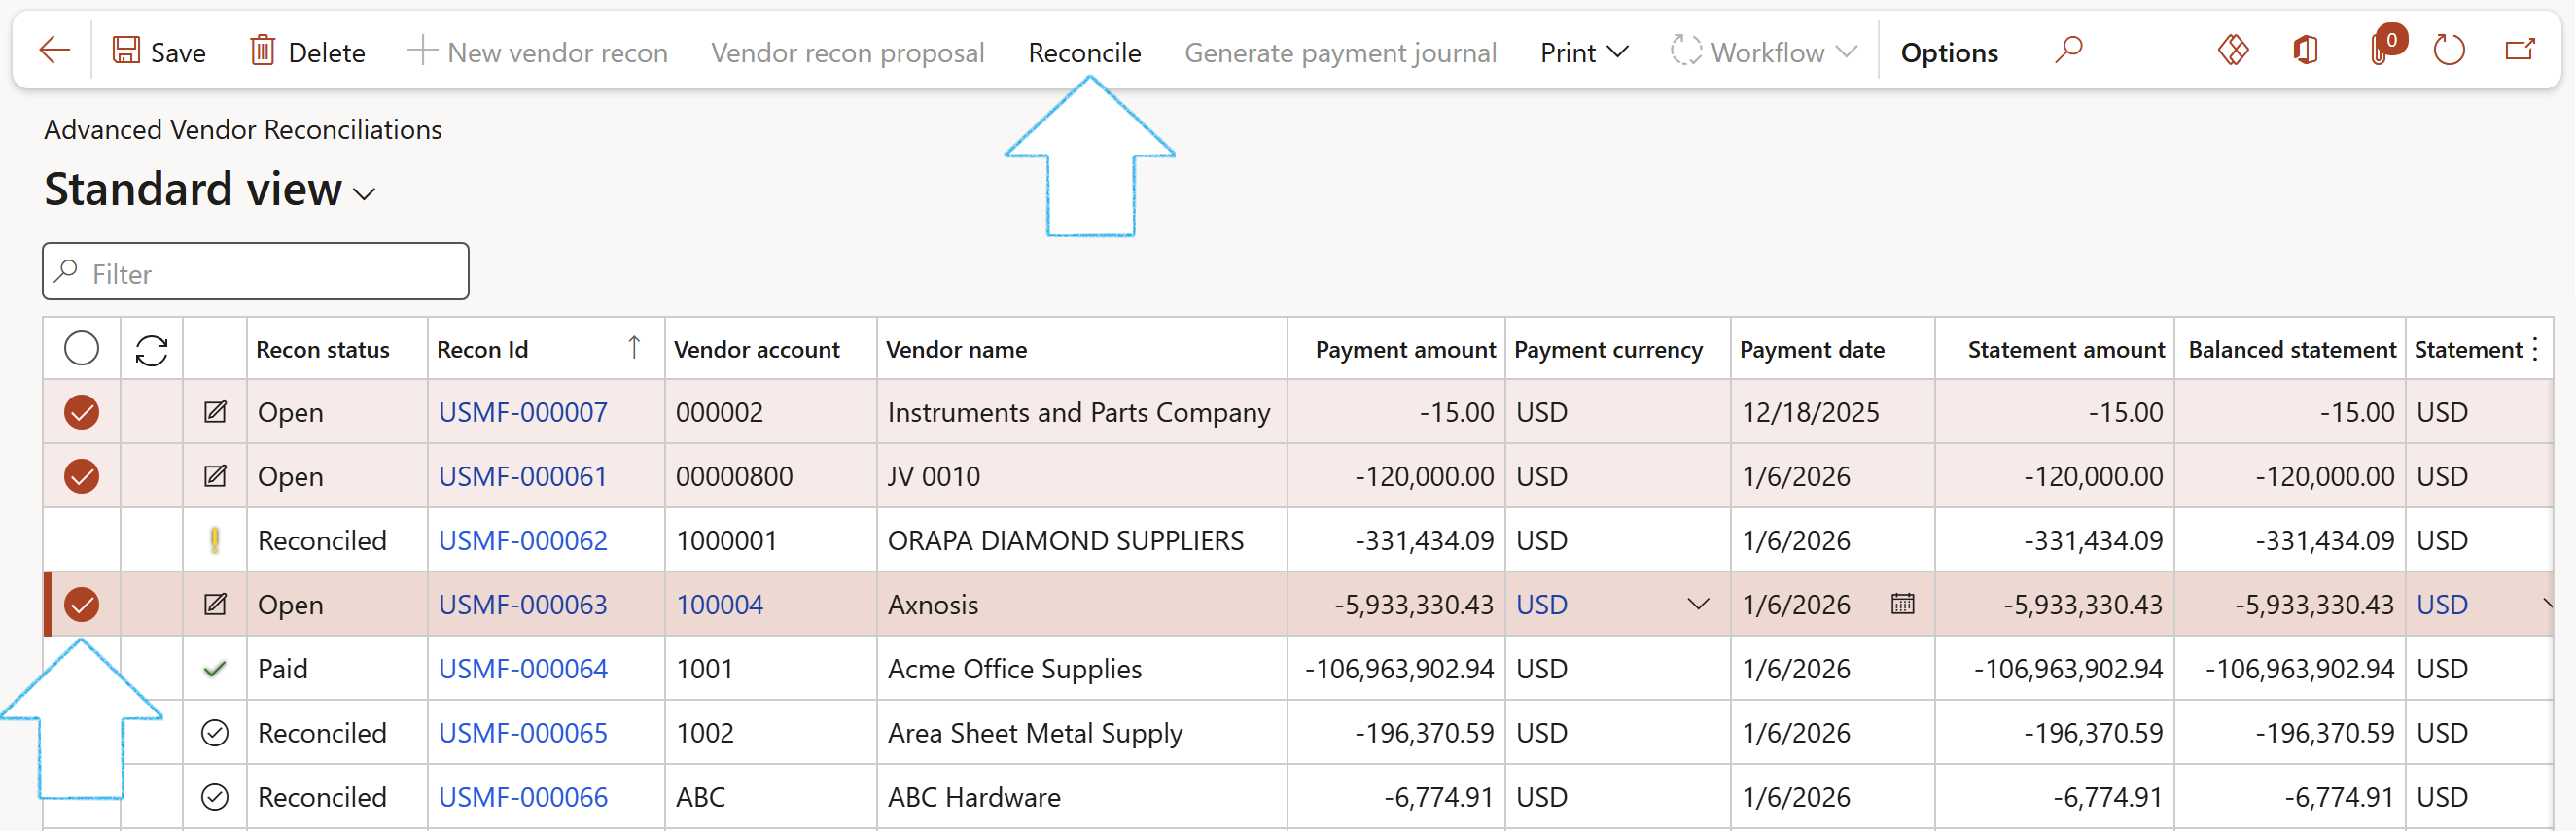
- Once the balanced vendor statement and payment amounts are aligned, the discrepancy amount is zero and the Reconcile button becomes available in the Action pane
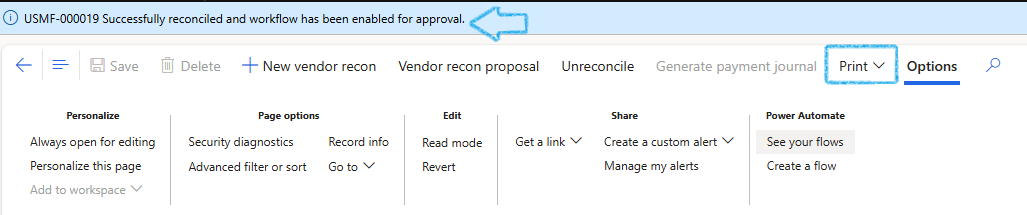
- Click on the Reconcile button

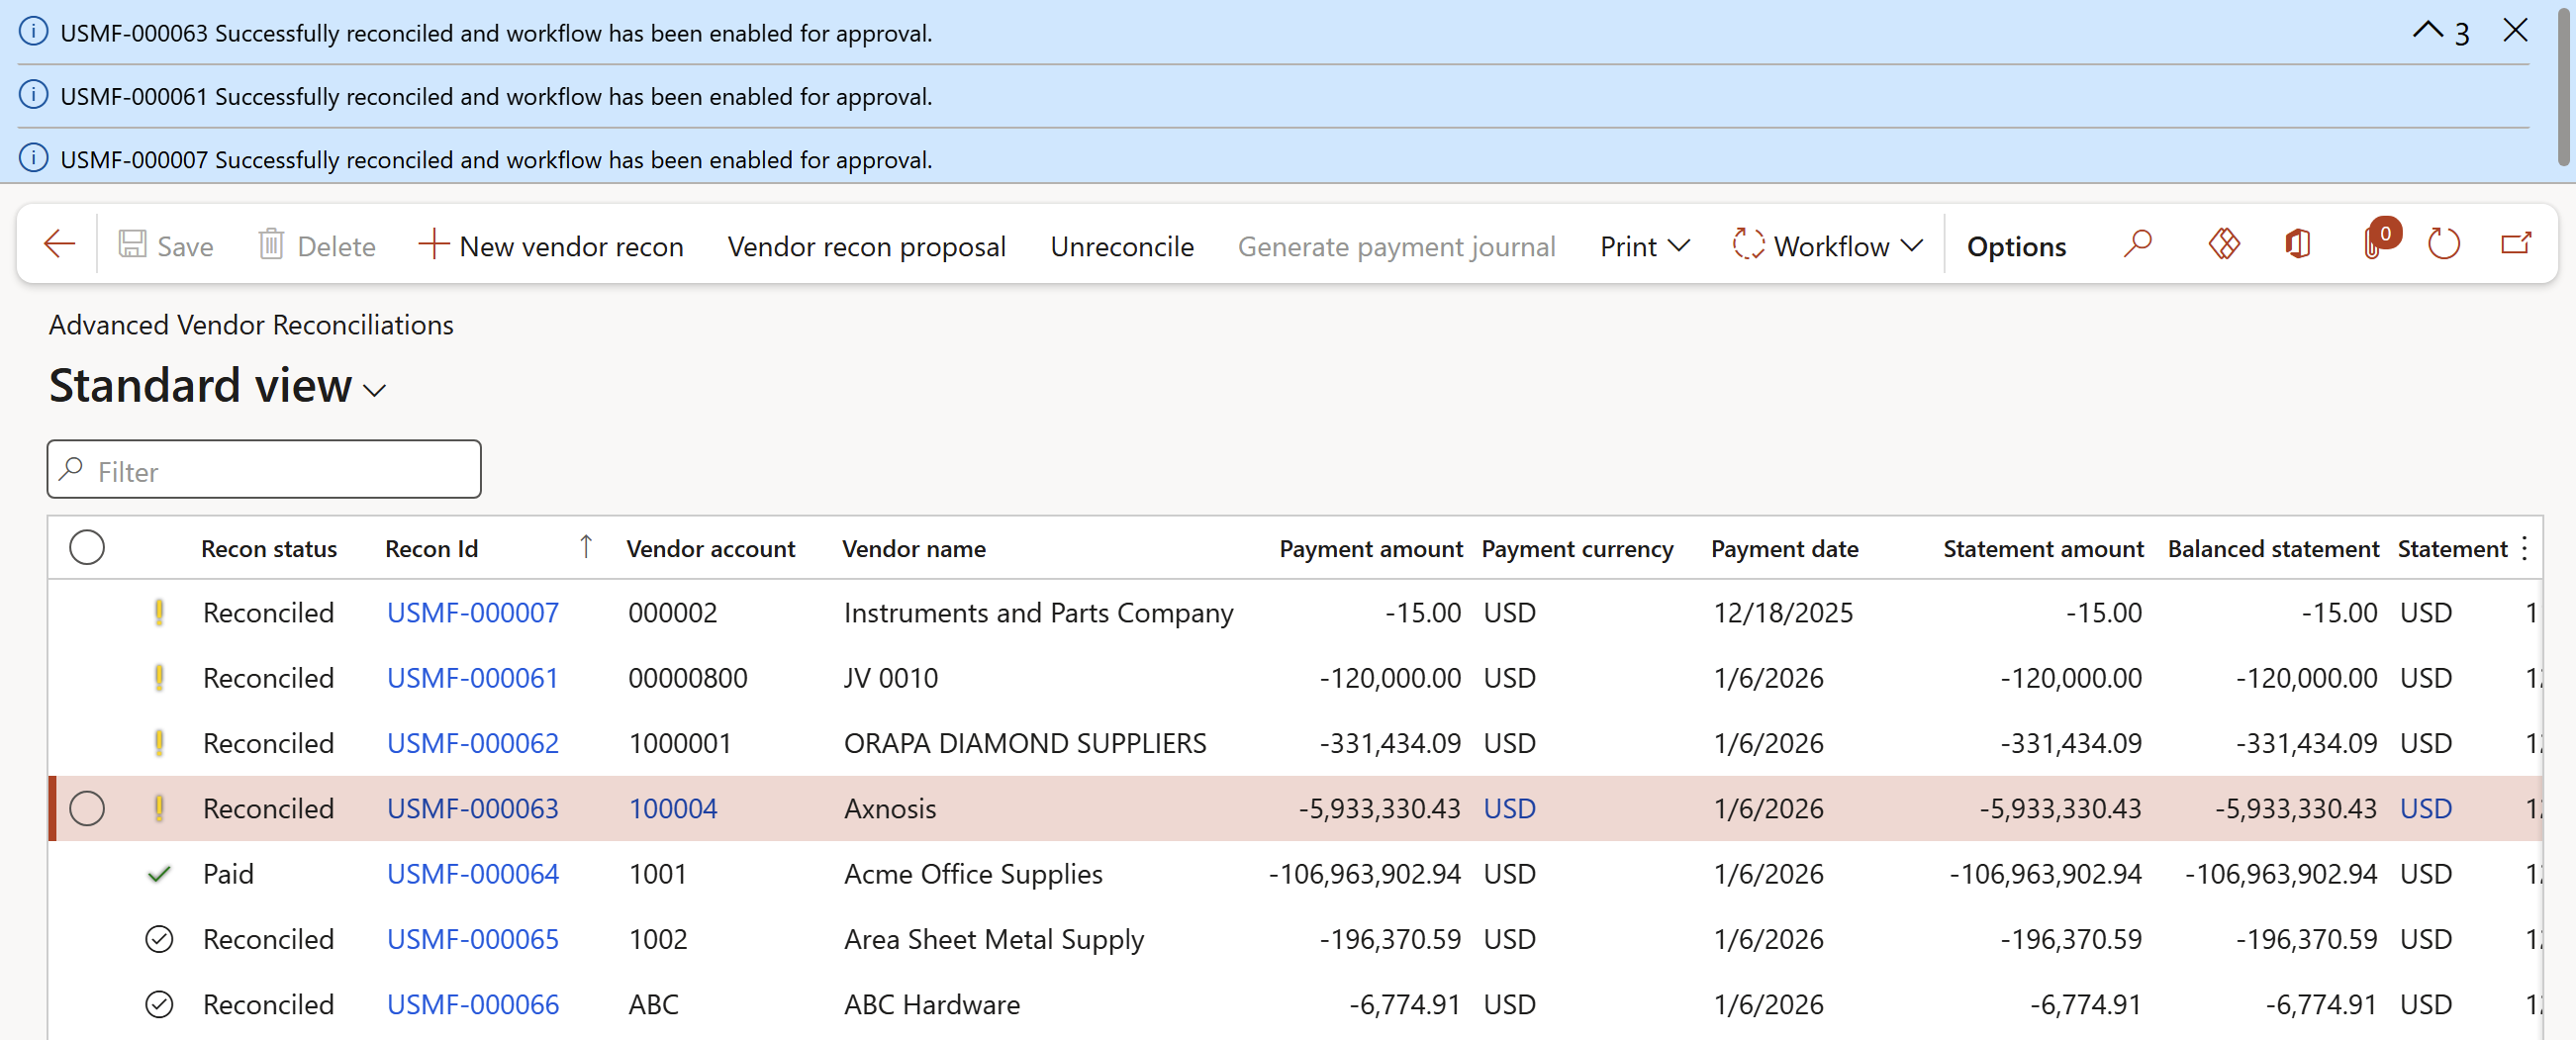
- A notification will appear notifying the user that the reconciliation was successful and workflow has been enabled for approval
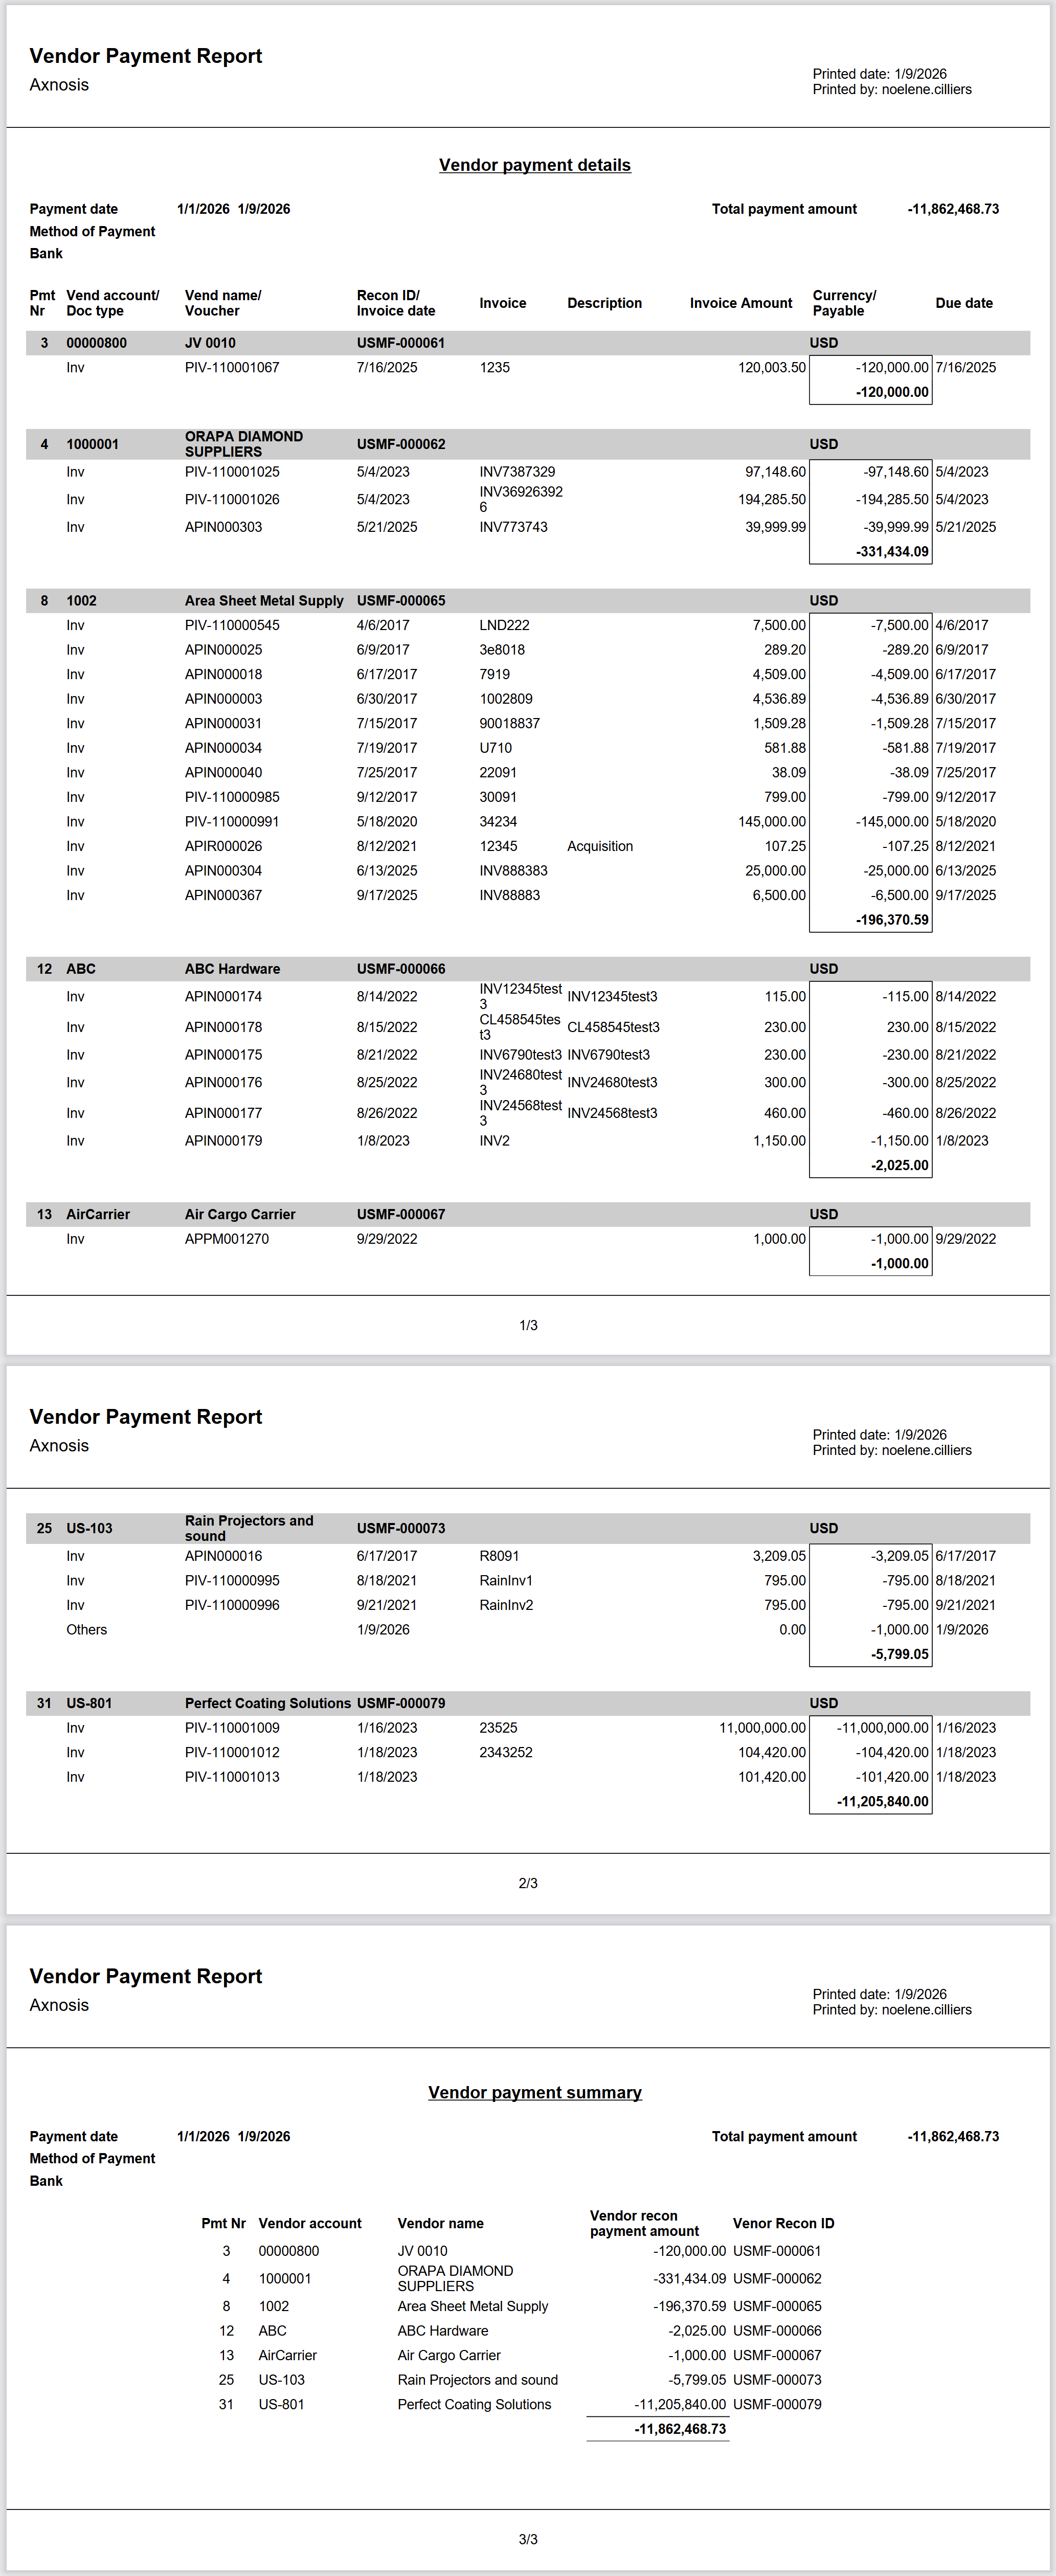
- The recon can be printed by clicking on the Print button on the Action pane
- All transactions payable will show on the printed document as well as who the Preparer and Approver were
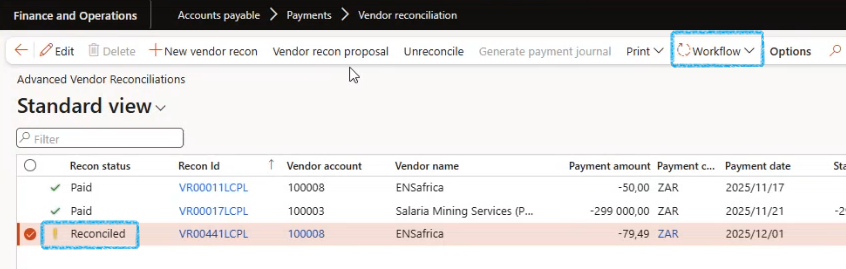
Go back to: Accounts payable > Payments > Vendor reconciliation
- The reconciled account will be indicated by a yellow icon
- Select the relevant account and click on the Workflow button in the Action pane to submit for approval
¶ Step 5: Create multiple vendor recon
Go to: Accounts payable > Payments > Vendor reconciliation
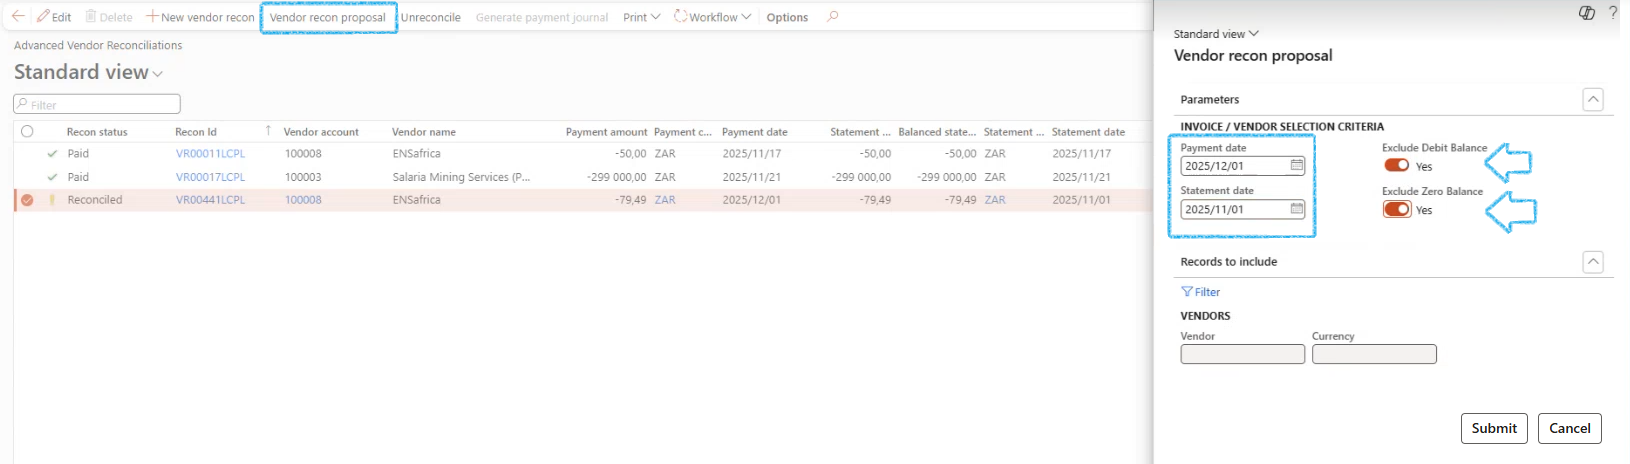
- Click on the Vendor recon proposal button on the Action pane
- The Vendor recon proposal dialog will open
- Enter the Payment date and Statement date
- Move the Exclude debit balance slider to Yes
- Move the Exclude zero balance slider to Yes
- Filters are available for vendors and currency
- Click on the Submit button
- A list of all vendors with due payments will appear
- Select the relevant vendor account.
- All accounts will automatically be included in the batch. If there are any accounts to be excluded, select them and click on the Remove button
- By selecting a specific vendor account, a list of all invoices captured can be viewed on the right
- Click on the OK button
- A message will appear in the Action Centre on the Navigation bar indicating that a Vendor reconciliation was successfully created.
- A warning will also appear under the Action center when a vendor recon has already been created to avoid duplicate payments

- Refresh the page
- For swift reconciliation, enter the statement amounts directly on the list page
- Select all records with zero discrepancy and click on the Reconcile button in the Action pane
- A notification will appear at the top of the page notifying the user of successful reconciliation and workflow has been enabled for approval
- Click on the Workflow button in the Action pane to submit for approval
- Once the request has been approved, the yellow icon is replaced with a black icon

¶ Adjustment to Payment date, statement date or Method of Payment
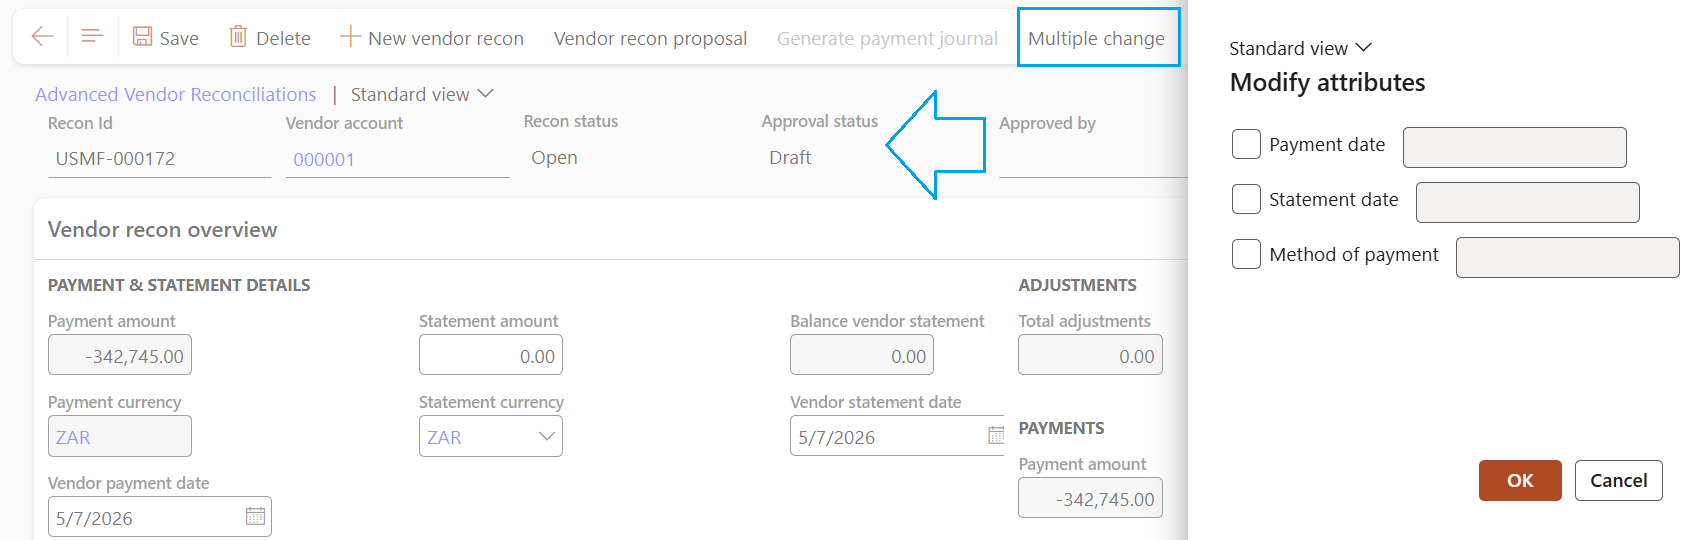
- When the Payment date, Statement date or Method of Payment for a selection of recons needs to be adjusted, it can be done by selecting the Multiple change option in the list view action pane.
- Payment date and Statement date change is only possible for recons in Draft approval status.
- Method of Payment change can be updated when the approval status is Approved.
- NB: Nothing can change if recon status is Paid.
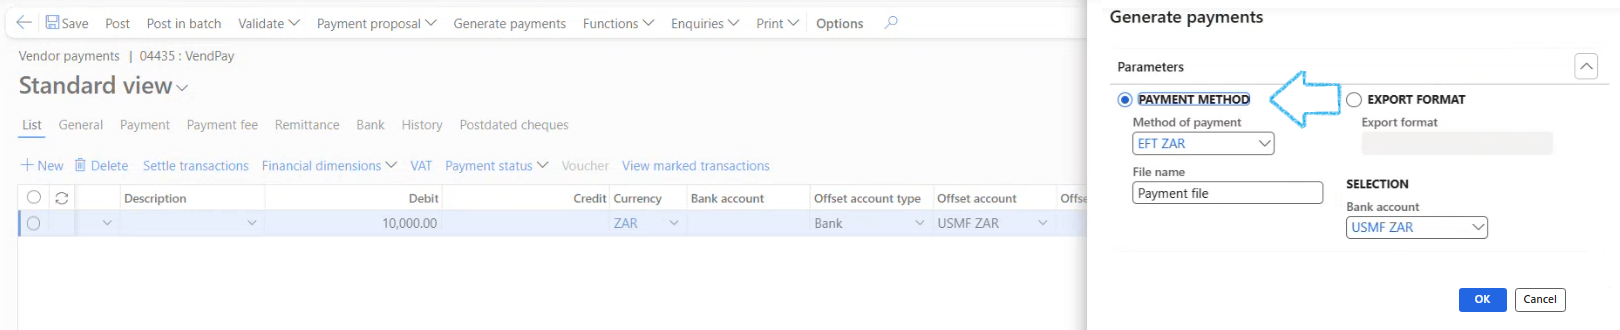
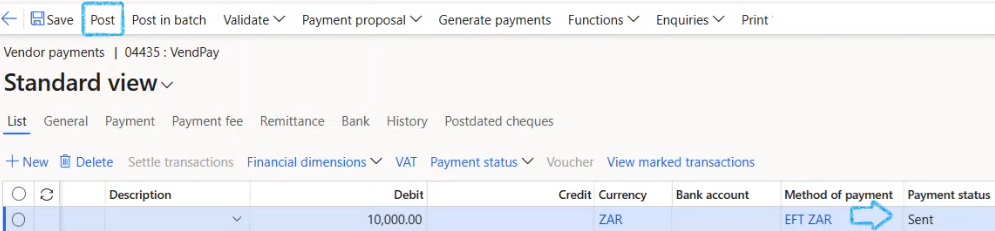
- Select the Journal line/s and click on the Generate payments button in the Action pane (The button will become available once the payment journal has been approved)
- Select the Payment journal name from the dropdown list in the dialog box
- Click on the OK button
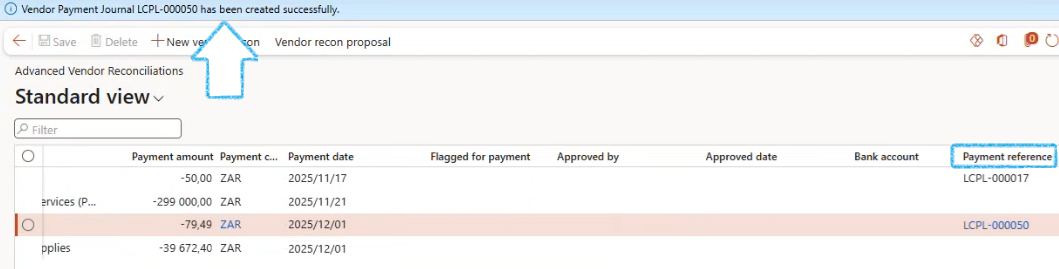
- A notification will appear at the top of the page confirming that the vendor payment journal has been created successfully
- Scroll to the right on the list page. A link to the payment journal will appear in the Payment reference column
- Click on the payment reference hyperlink to open the Vendor payment journal
- In the Action pane, click on the Lines button
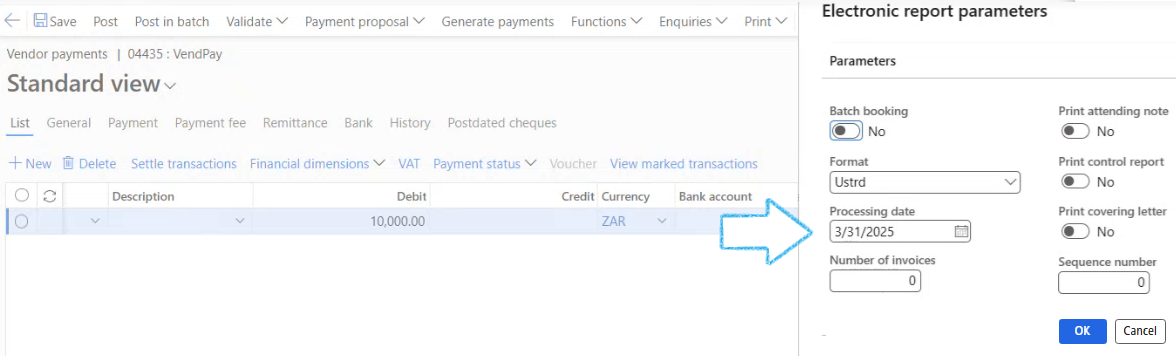
- The Electronic report parameters dialog will open
- Select the Processing date
- Click on the OK button
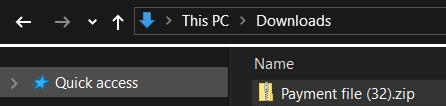
- The payment file will be generated and is available in the Downloads folder
- The payment file needs to be imported into the banking platform
- The status shows Sent which means that the transactions have not been paid yet
- Click on the Post button in the Action pane
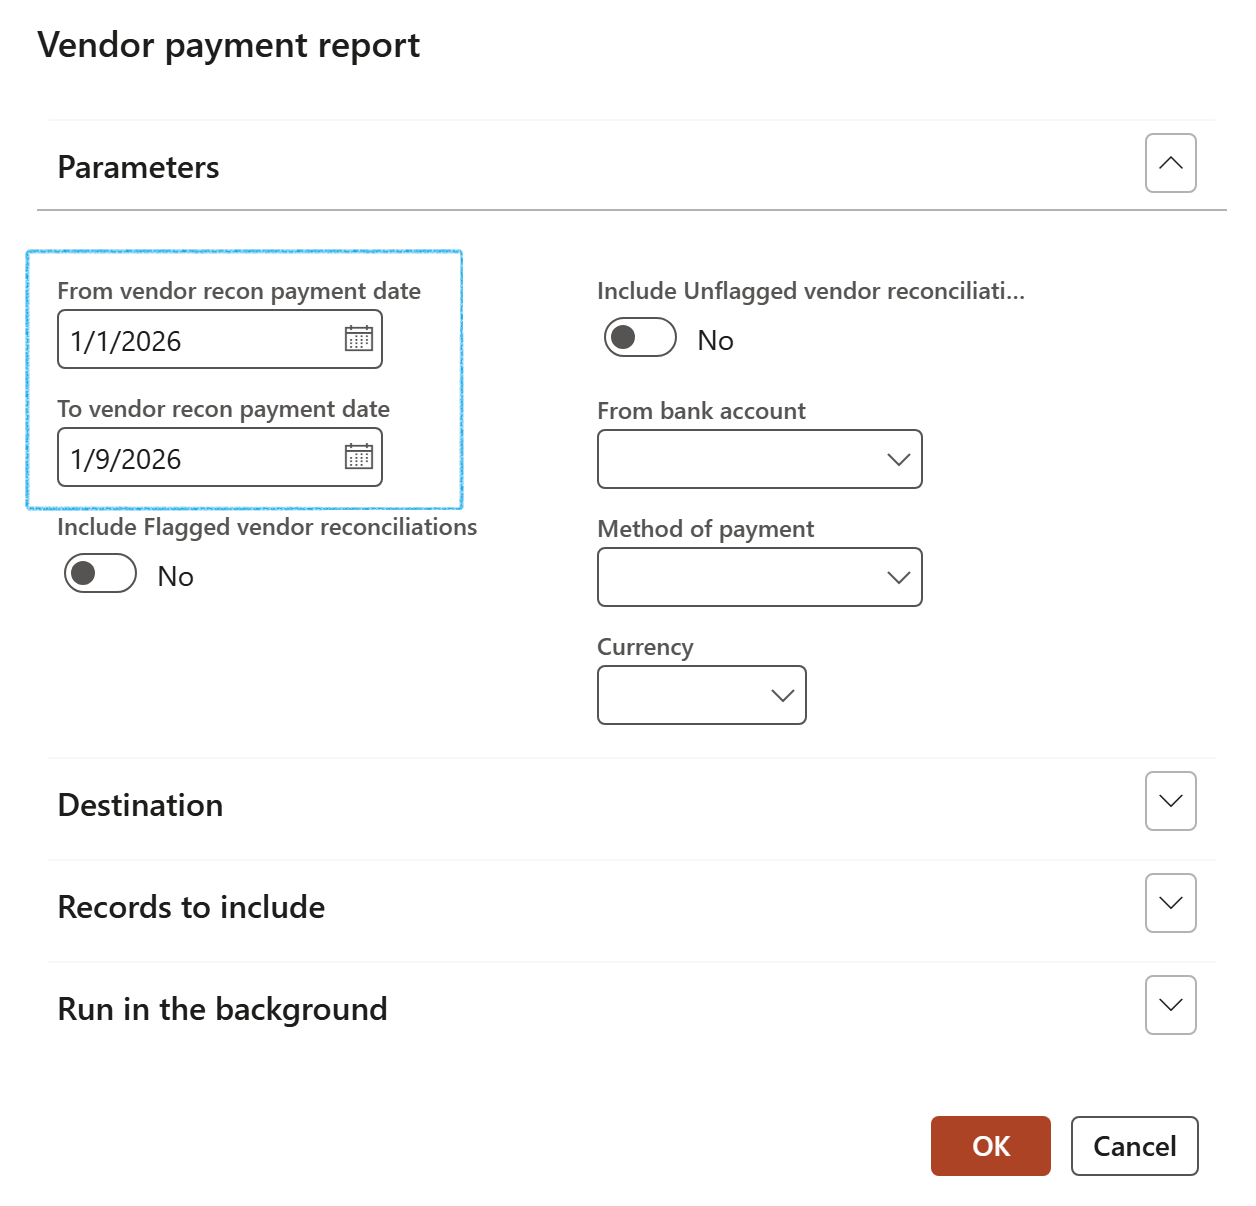
- Select the from and to dates for the report
- Click on the OK button

¶ Reporting
¶ Step 6: Vendor payment report
To print the Vendor payment report
Go to: Accounts payable > Inquiries and reports > Payment > Vendor payment report