¶ Introduction
Vendor Master data management functionality forms part of the GRC module.
- With Standard D365FO, the user can add a vendor to another legal entity form any legal entity.
- With Vendor Master data management from the GRC module, the user can only release a vendor (“Add vendor to another legal entity”) from the one legal entity that is specified as the Master data company in the parameters. The functionality to release a vendor in all the other legal entities, is disabled.
- With Standard D365FO, when the vendor is created it is created according to the destination legal entity numbering sequence. The result is that the same vendor will have different vendor numbers in the different legal entities.
- With Vendor Master data management from the GRC module, when the vendor is created the user can choose to create this vendor with the exact same vendor account number in the destination legal entity. If this vendor account number already exists in the destination legal entity, the user will get an error message. With this functionality the user will have to rename the vendor with the same vendor account number in all the different legal entities where it is used.
- With Standard D365FO, when the vendor is created in the new legal entity only the global address book (party) information is copied to the destination legal entity. Apart from this data, the only other information that can be specified is the Vendor group, currency, and vendor hold.
- With Vendor Master data management from the GRC module, you can specify the additional fields that must be copied from the source to the destination legal entity on the parameters setup form.
¶ Navigation

Path to the Onboarding and Offboarding setup forms:
- Human resources > Task management > Onboarding checklists
- Human resources > Task management > Offboarding checklists
¶ Specific setups
¶ Step 1: Master data management
Go to: GRC > Setup > Governance, Risk and Compliance parameters
- Click on the Governance tab
- Expand the Setup vendor master data management Fast tab
- Select the relevant Master data company from the dropdown list
- Select the fields that are required from the Available list and click on the arrow (>) to move them to the Selected list

¶ Step 2: Setup task management (HRM)
Task management lets you create tasks that must be completed to hire (onboard), terminate (offboard), and transfer (transition) employees, vendors, or customers. Task management uses the concept of checklists. A checklist is of a list of onboarding, offboarding, or transition tasks. Task management uses checklists to group tasks together, and to assign them to individuals or groups. The checklist functionality for onboarding, offboarding, and transitions is similar.
Go to: Human resources > Task management > Onboarding checklists or Offboarding checklists
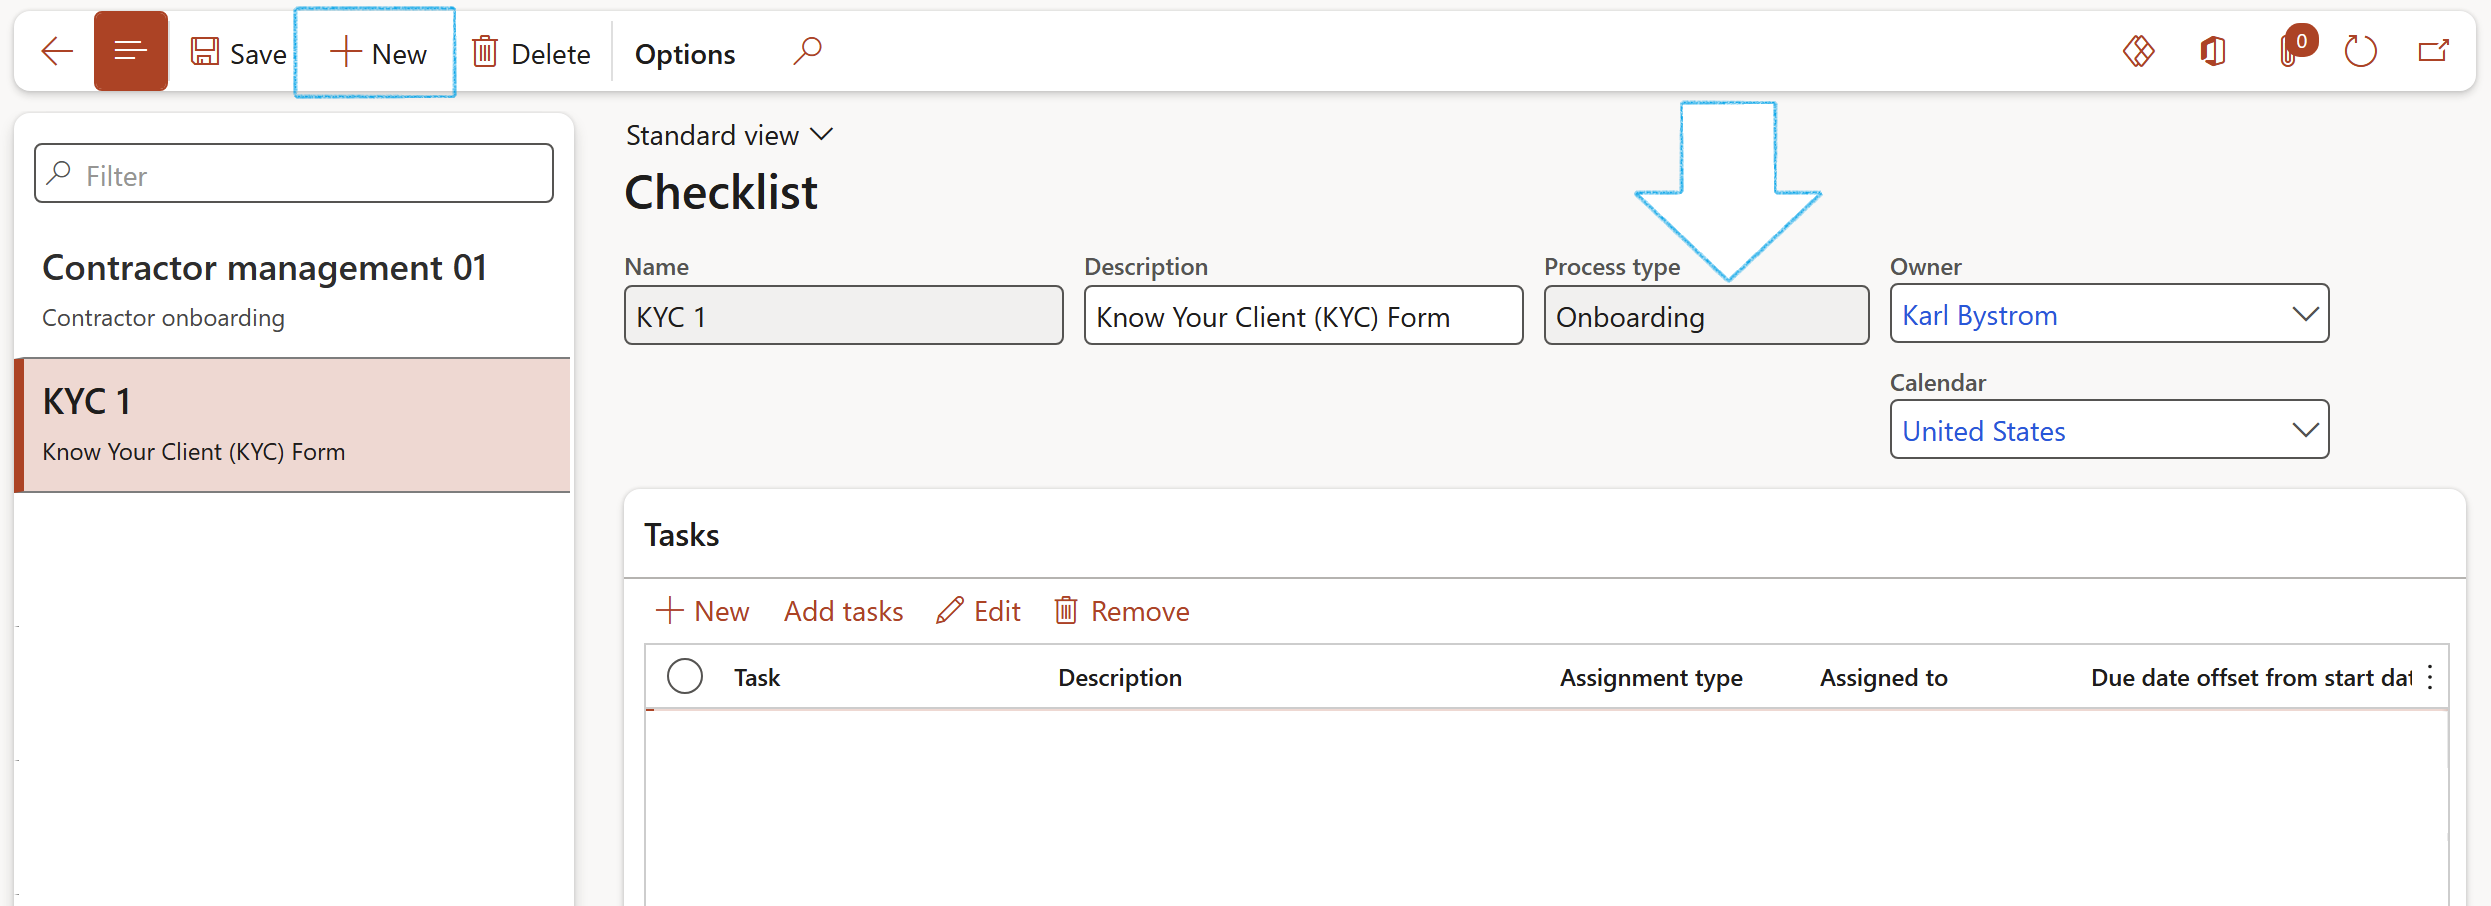
- In the Header:
- In the Action pane, click on the New button
- Enter a Name for the checklist
- Enter a Description for the checklist
- In the Process type field, select Onboarding or Offboarding from the dropdown list
- Select the Owner of the checklist from the dropdown list
- Select the relevant Calendar from the dropdown list
- Under the Tasks:
- In the Button strip, click on the New button
- On the Create a new checklist task dialog:
- Enter a Task name
- Enter a Description for the task
- Move the Vendor slider to Yes to indicate that the task involves onboarding/offboarding of a vendor
- Move the Customer slider to Yes to indicate that the task involves onboarding/offboarding of a customer
- In the Assigment type field, select Worker from the dropdown list
- Select the relevant worker from the Assigned to dropdown list
- Enter detail in the Instructions note box provided
- Click on the OK button
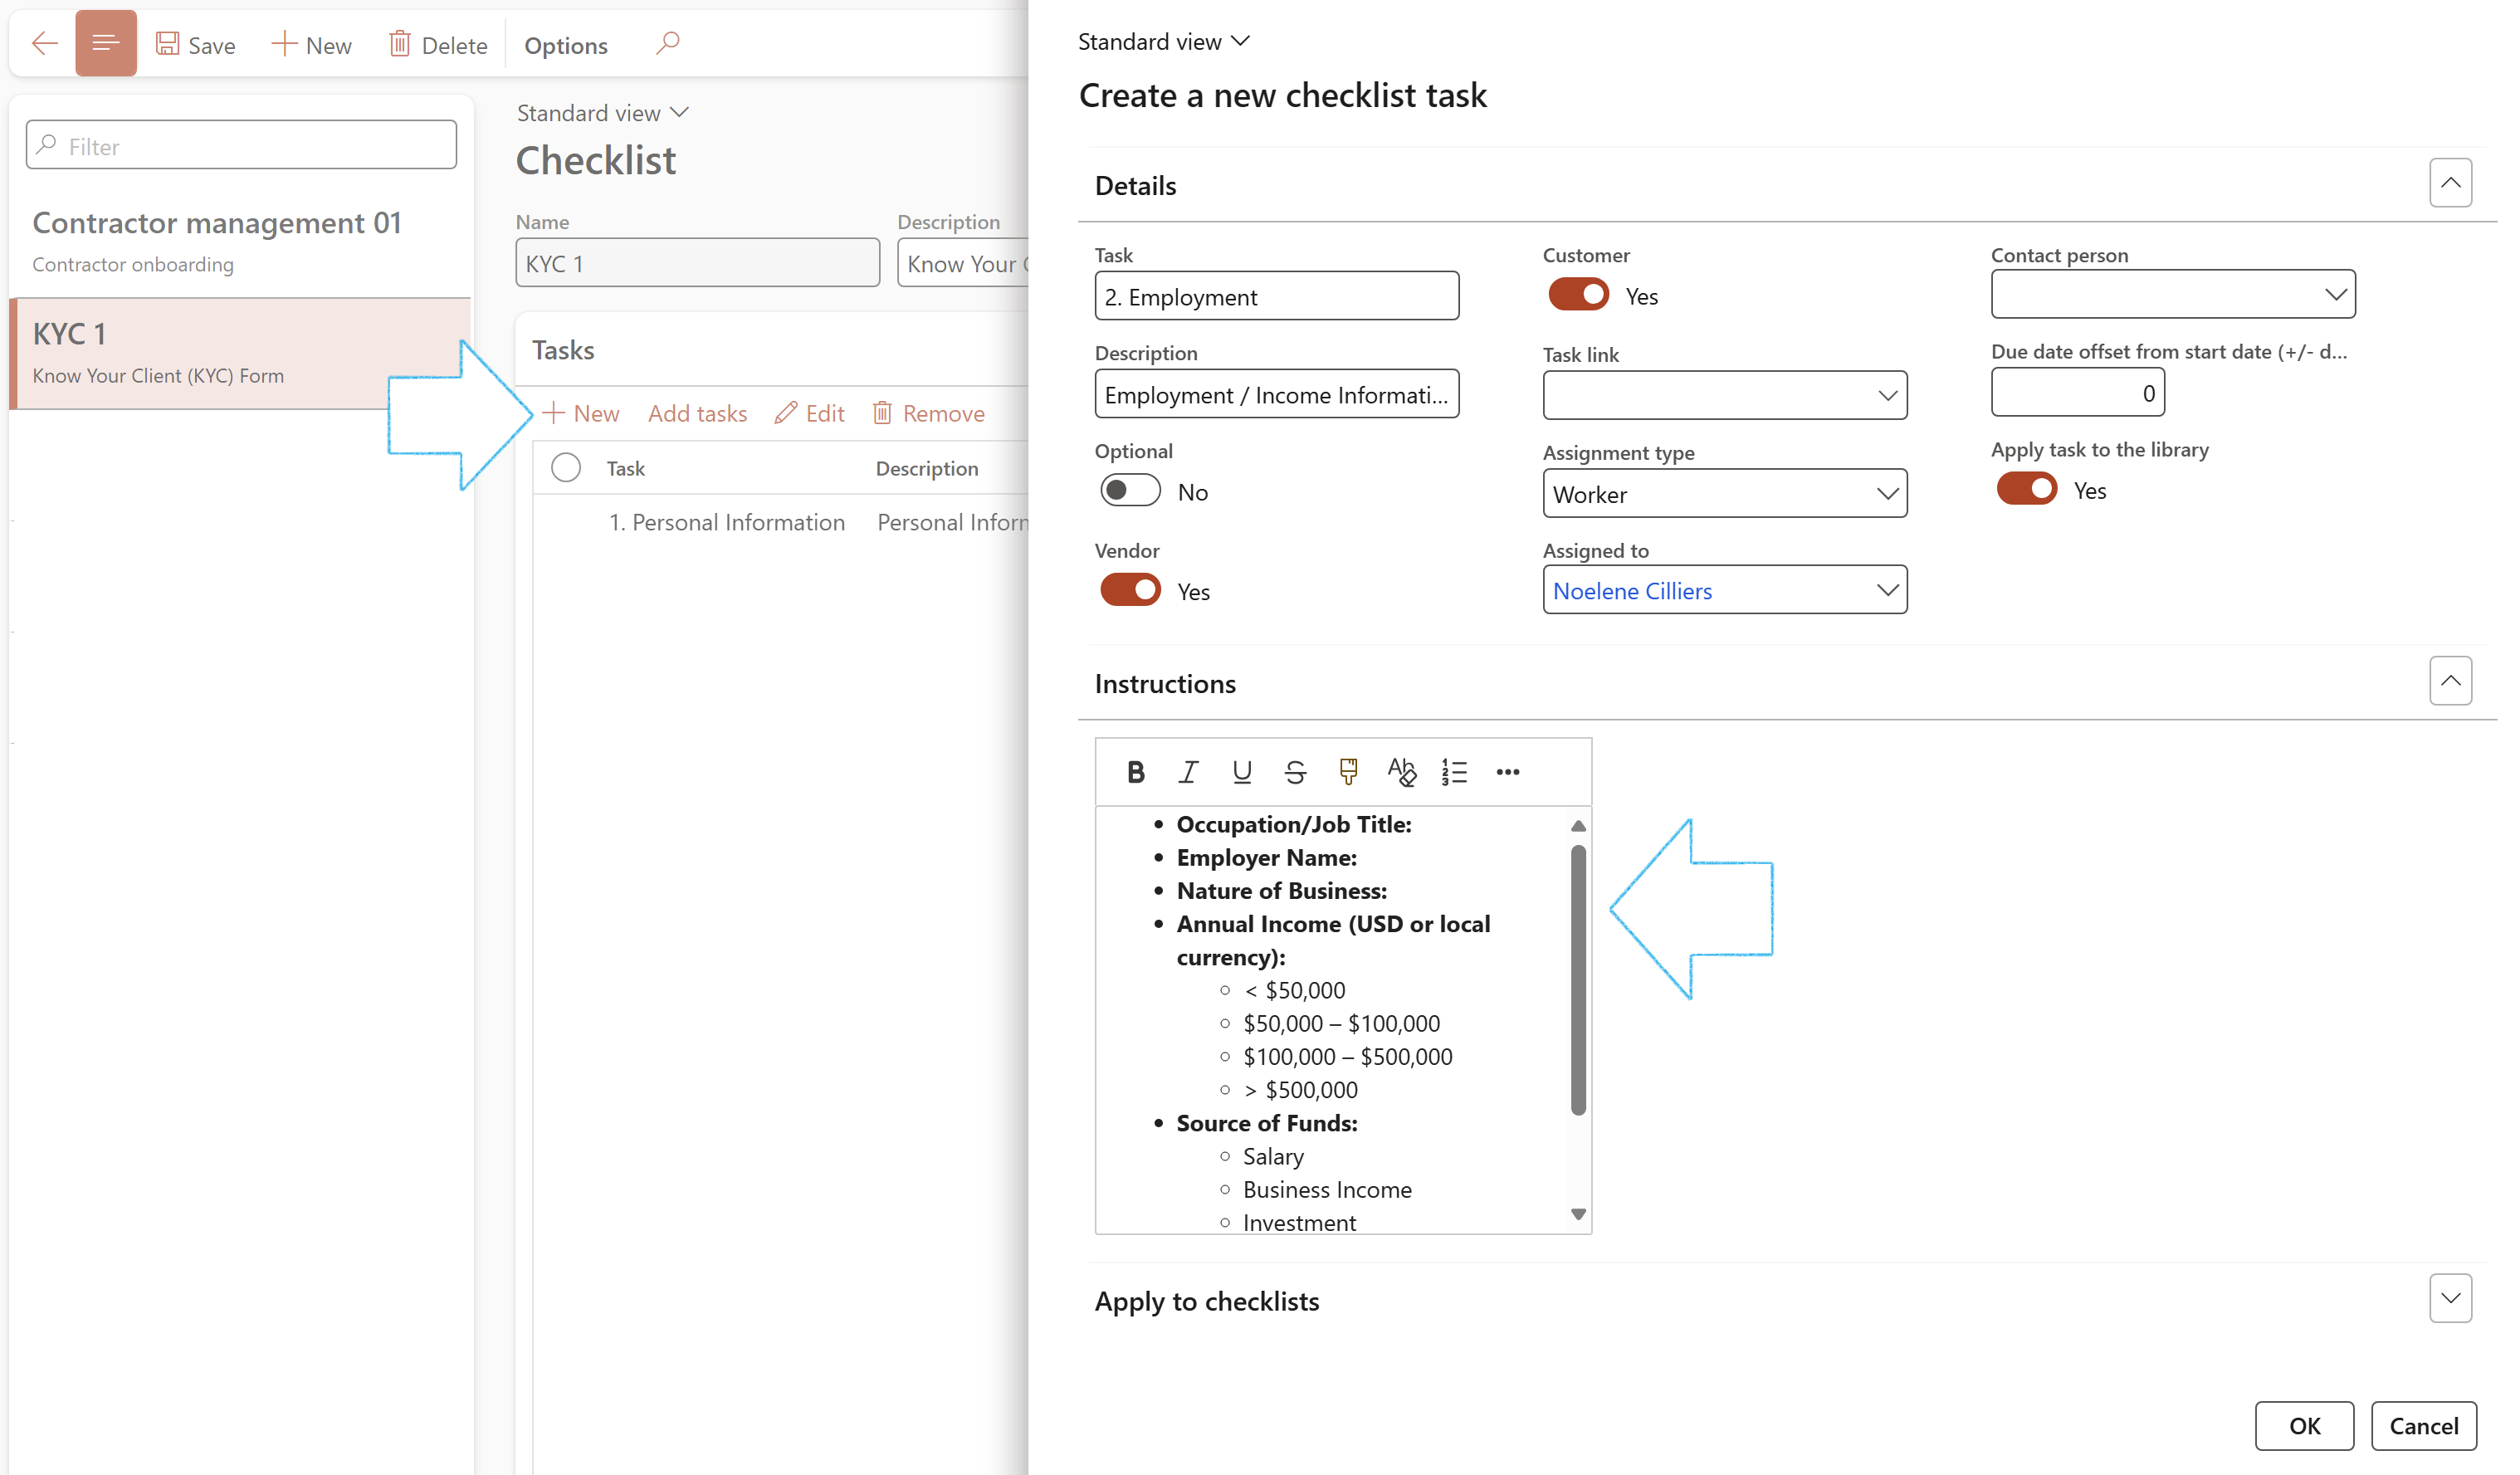
The Vendor and Customer sliders to be used for SCM trading partner related onboarding and offboarding tasks.
Do note the option to specify a Task link.
This could be to direct the users to a specific form (in D365) that needs to be completed as part of the on-boarding option or an external web site (maybe SharePoint to see if all required documents are uploaded to a specific documents library).
¶ Step 3: Setup Email templates
Details on how to setup email templates can be found under Step 3 in the GRC Alerts and notifications Wiki page
¶ Step 4: Setup Certification types
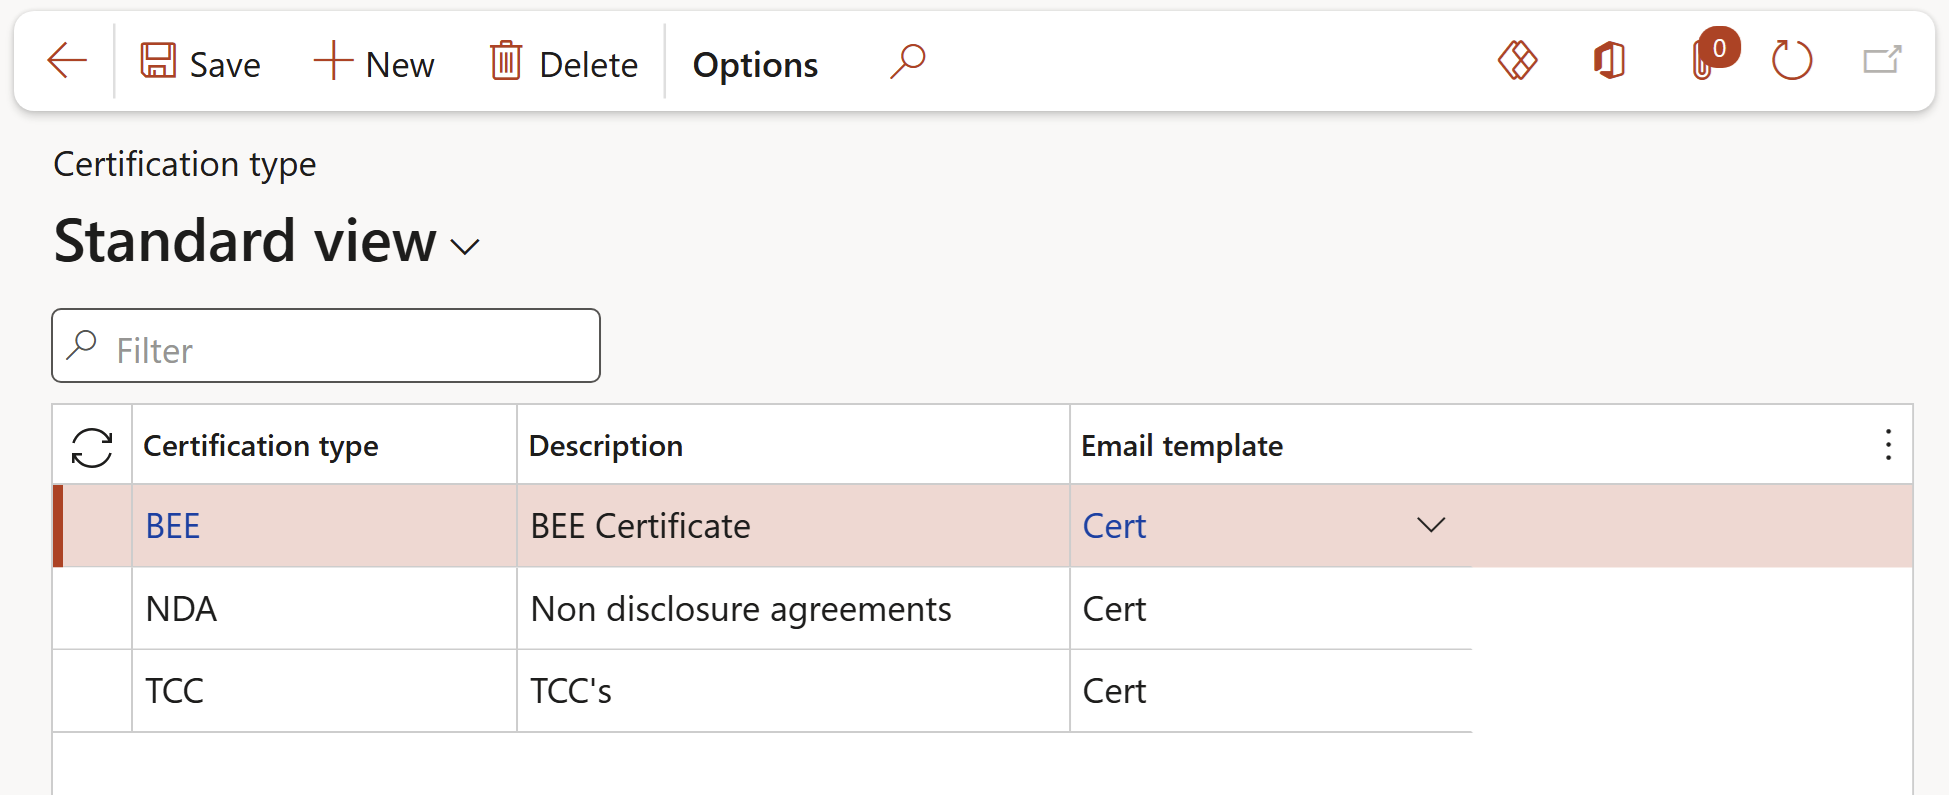
Go to: Procurement and sourcing > Setup > Vendors > Certification type
- On the Action pane, click on the New button
- Enter a Certificate type
- Enter a Description for the certificate type
- Select the relevant Email template from the dropdown list
¶ Daily use
¶ Step 5: Adding past experience and references on a vendor
¶ Step 5.1: Past experience
Go to: Purchase ledger > Vendors > All vendors
- Select the relevant vendor
- On the Action pane, in the Related information button group, click on the Past experience button

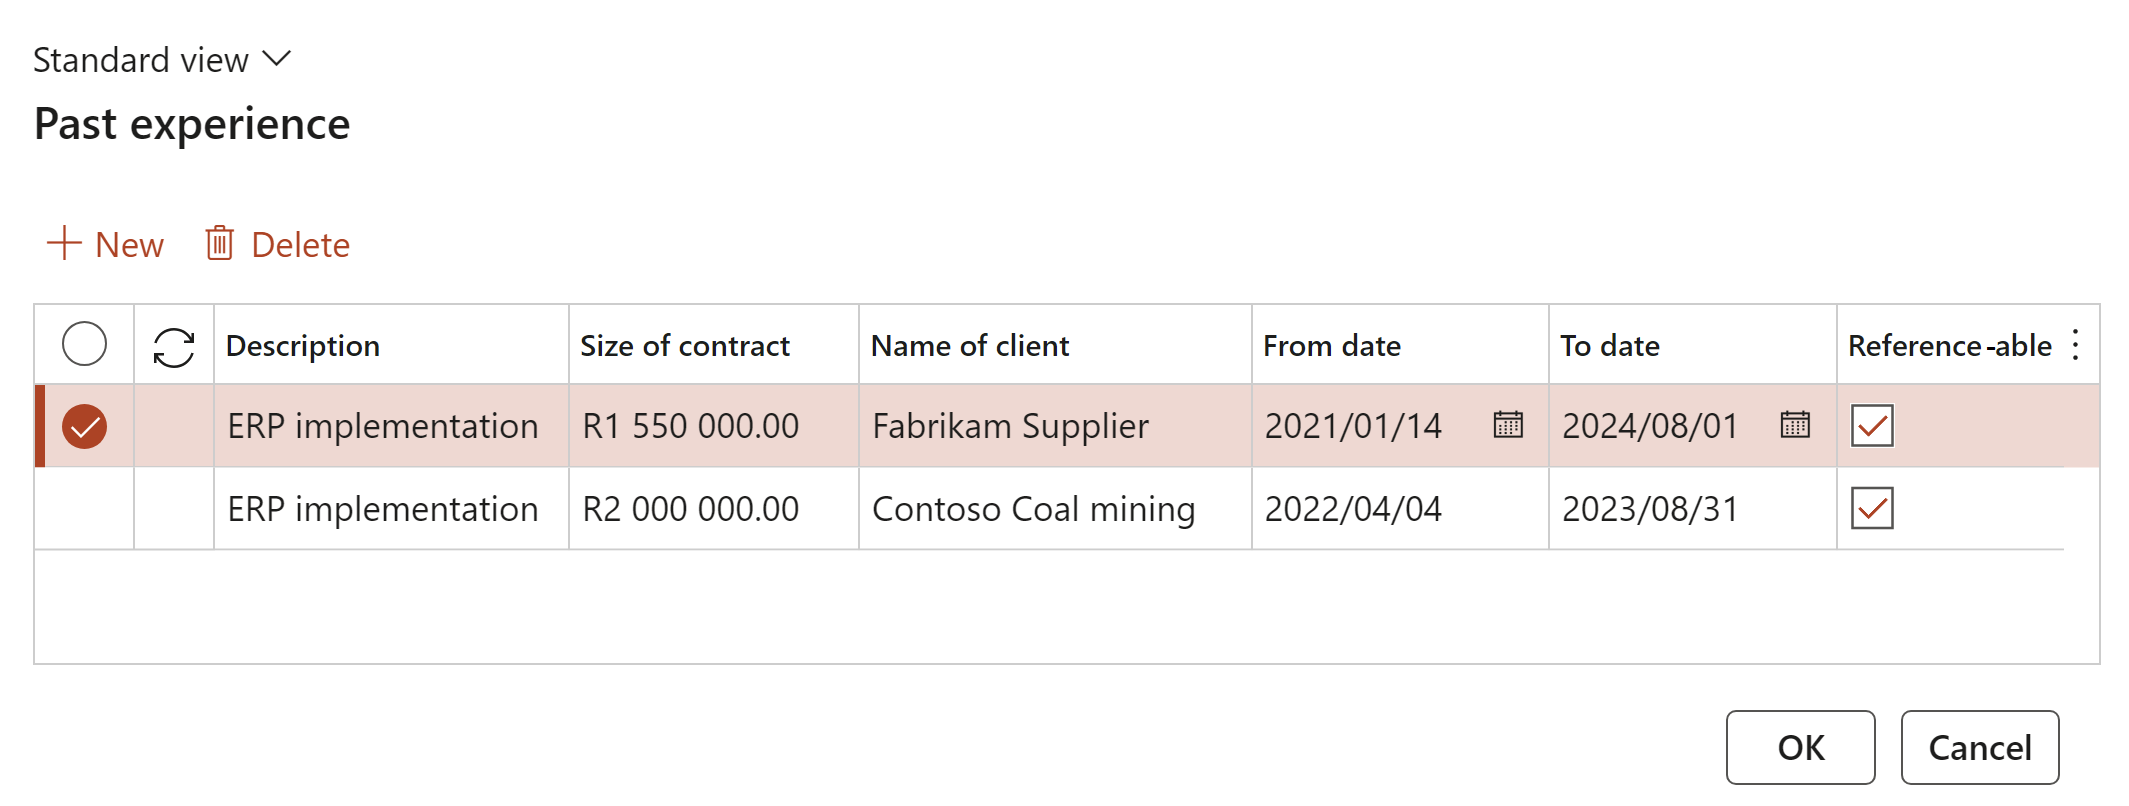
- On the Past experience dialog:
- Click on the New button
- Enter a Description of the past experience
- Enter the Size of the contract
- Enter the Name of the client
- Enter the From date and the To date of the past experience
- Tick the Reference-able if applicable
- Click on the OK button to save the entered details
¶ Step 5.2: References
Go to: Purchase ledger > Vendors > All vendors
- Select the relevant vendor
- On the Action pane, in the Related information button group, click on the Resources button

- On the Resources dialog:
- Click on the New button
- Enter the Name of the resource
- Enter the number of Years experience of the resource
- Enter the Qualification of the resource
- Indicate whether the resource is a Key resource
- Indicate whether the resource has provided a CV
- Click on the OK button to save the entered details

¶ Step 5.3: Certifications
Go to: Purchase ledger > Vendors > All vendors
- Select the relevant vendor
- On the Action pane, in the Set up button group, click on the Certifications button

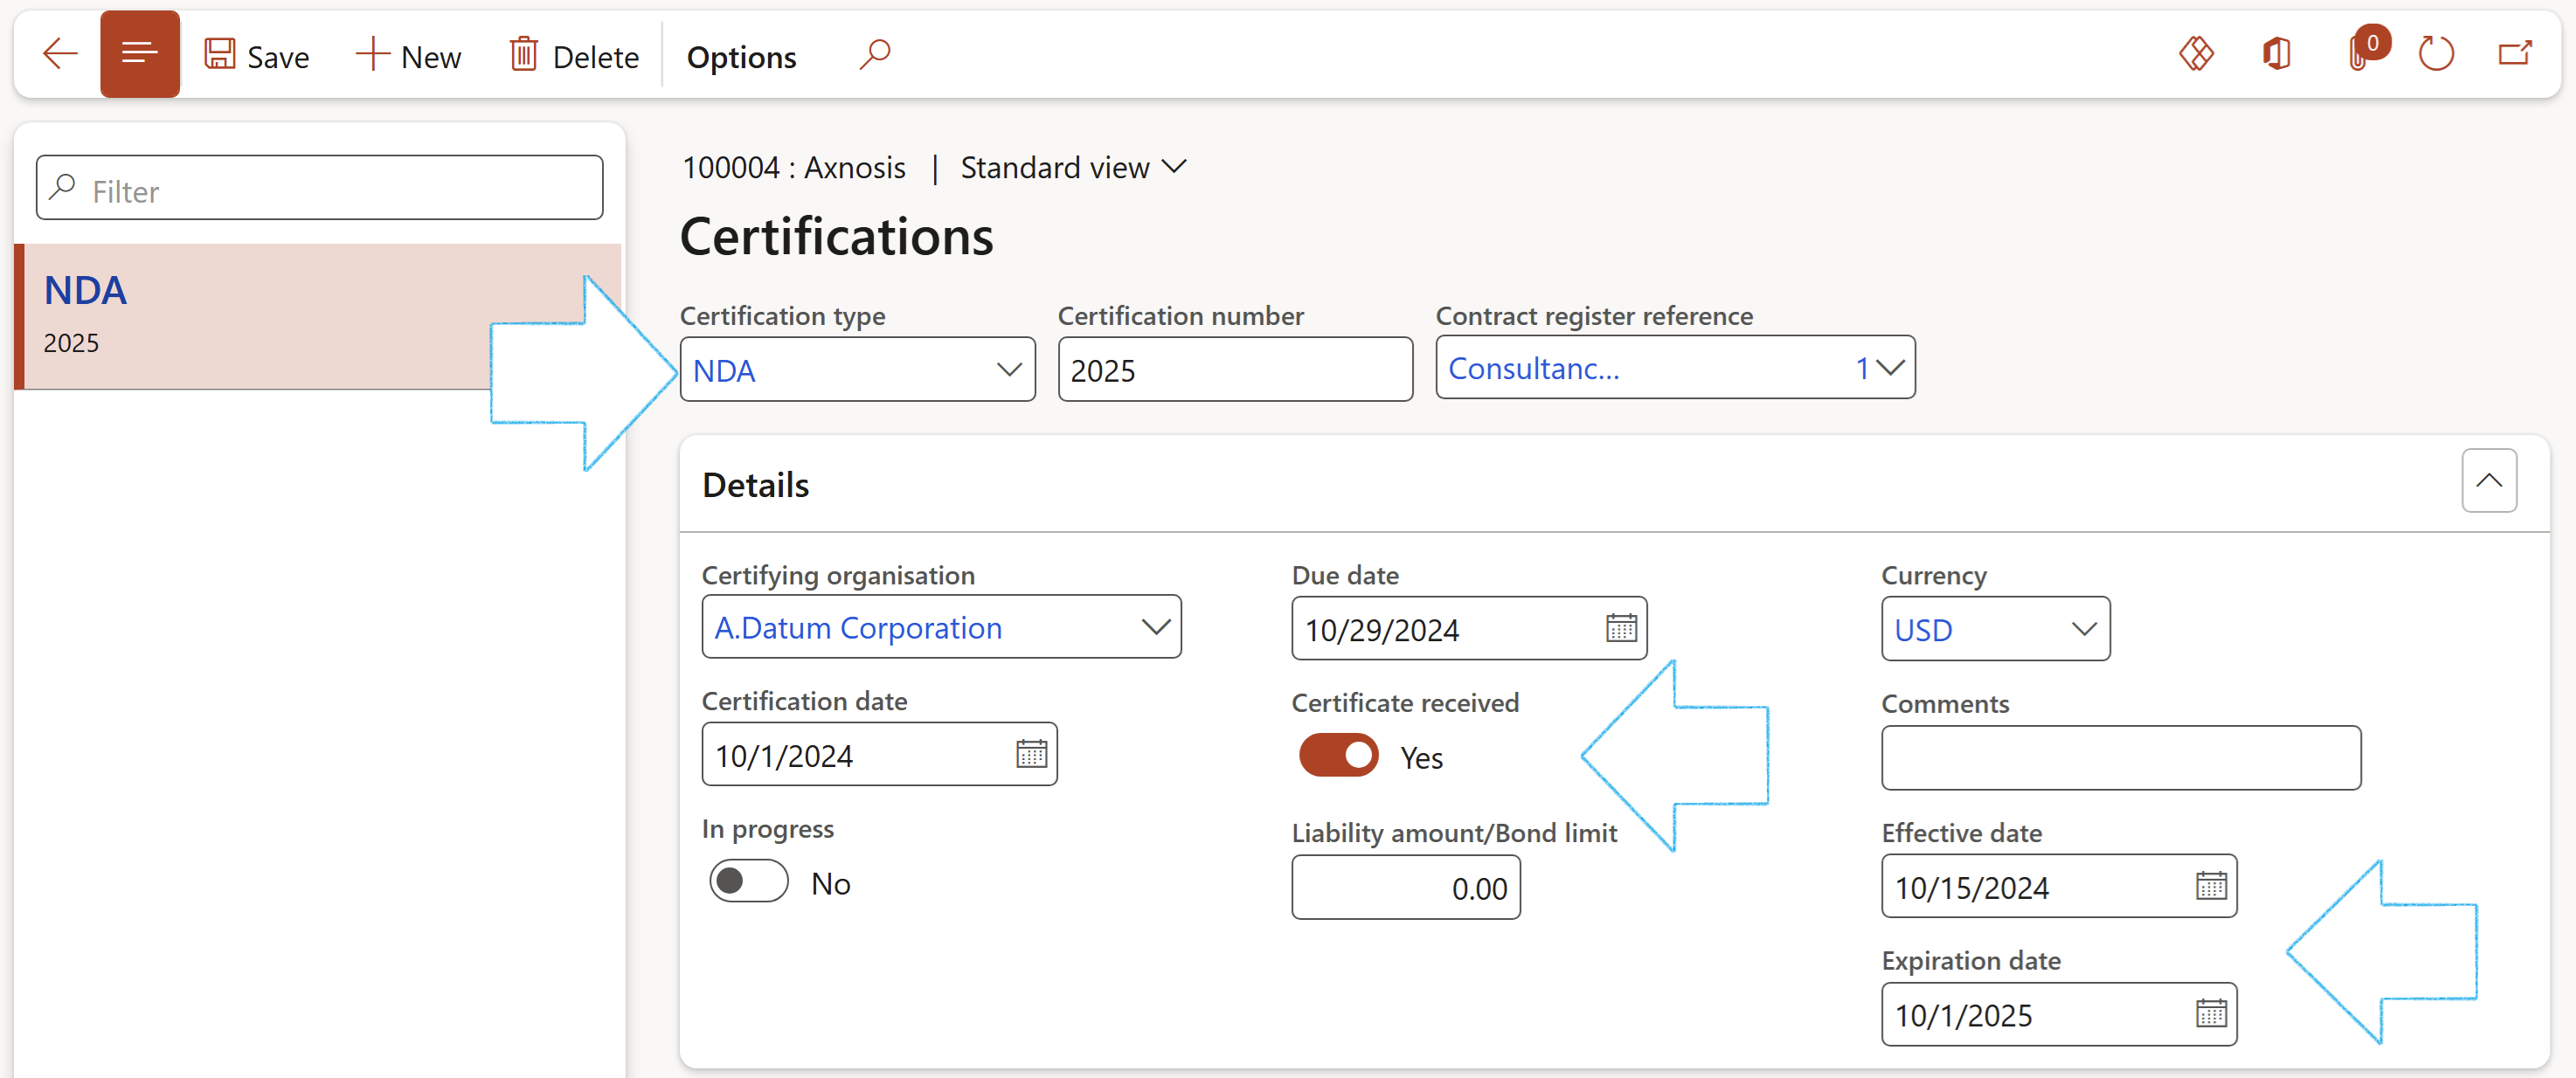
On the Certifications form:
- Click on the New button
- Select the relevant Certification type from the dropdown list
- Enter a Certification number for the certificte
- Select the relevant Contract register reference from the dropdown list
- Expand the Details Fast tab
- Select the relevant Certifying organisation from the dropdown list
- Enter the Certification date
- Enter the Due date
- Indicate wheather the Certificate has been received
- Enter additional Comments
- Enter the Effective date of the certificate
- Enter the Expiration date of the certificate
¶ Step 5.4: Creating Contacts for vendors
Go to: Purchase ledger > Vendors > All vendors
- Select the relevant vendor
- On the Action pane, in the Set up button group, click on the Contacts button and select Add contacts

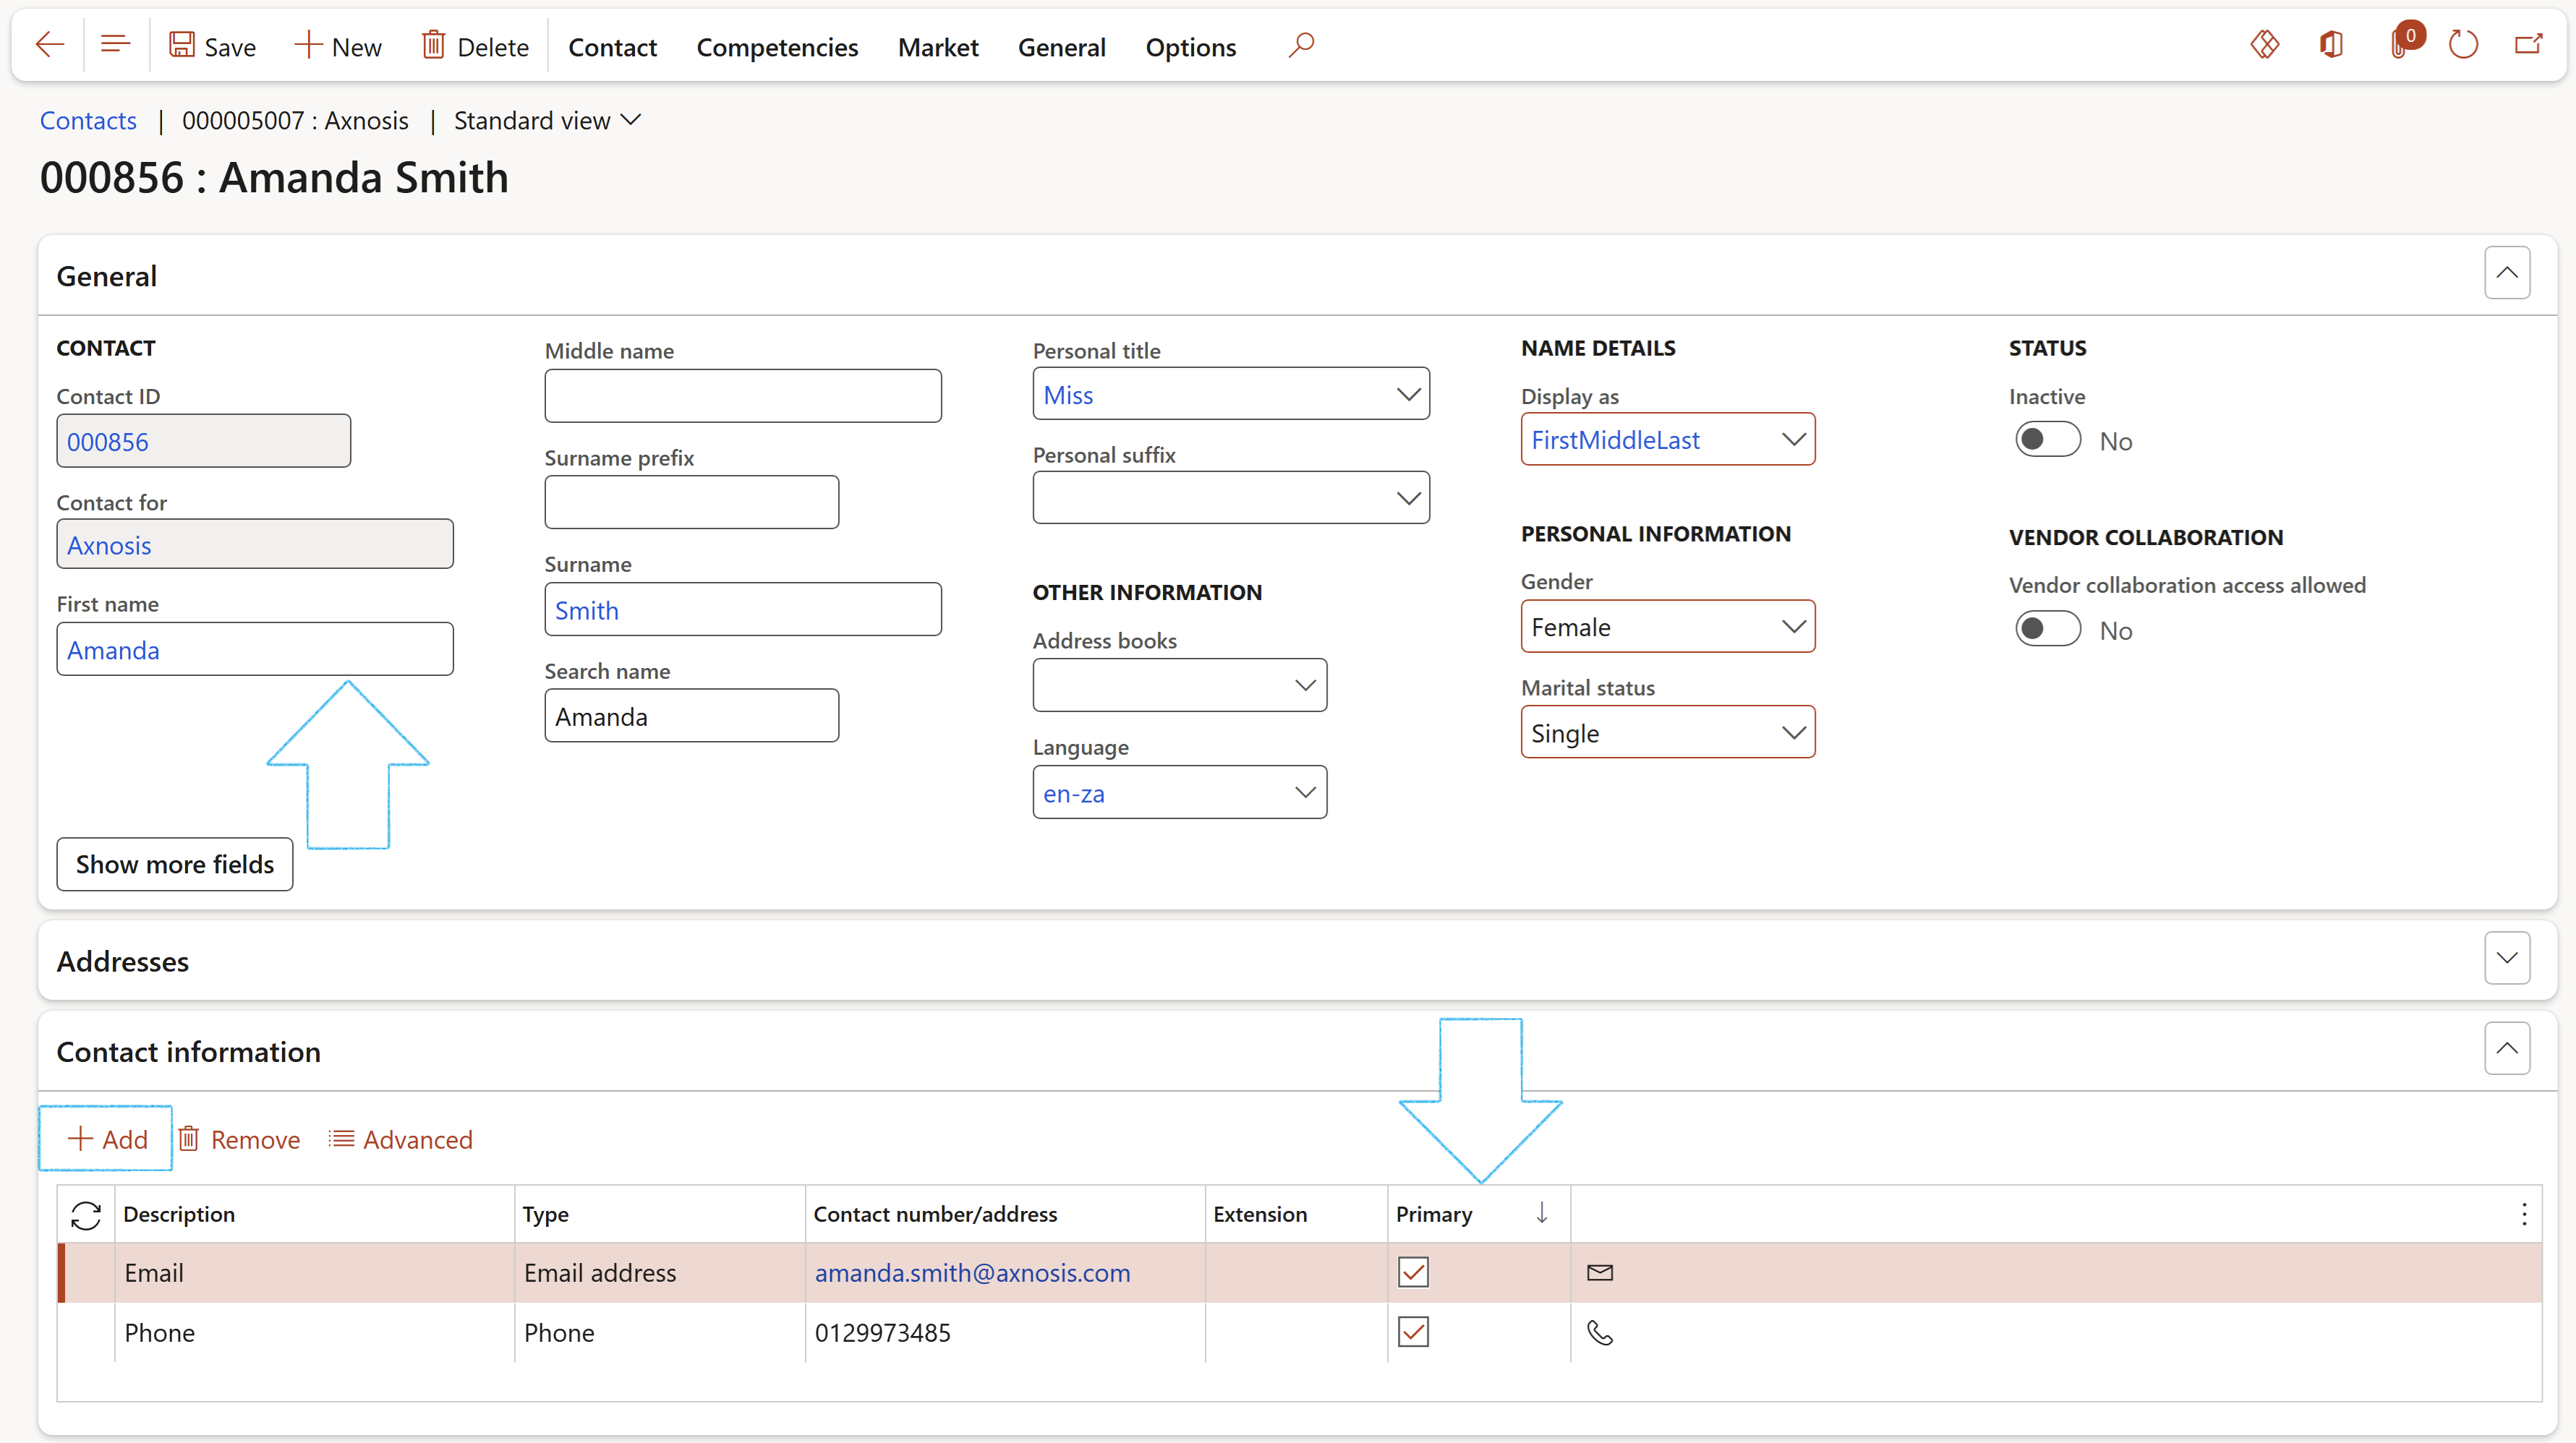
On the Contacts form:
- Click on the New button
- Enter a First name for the contact
- Enter a Surname for the contact
- Enter a Search name for the contact
- Select the relevant Personal title for the contact
- Expand the Contact information Fast tab
- Click on the Add button
- Enter a Description for the contact information being added
- Select the relevant Type of contact information from the dropdown list
- Enter the Contact number/address
- Indicate whether this is the Primary contact method for the new contact
¶ Step 6: Onboarding a customer
Go to: Sales and marketing > Customers > All customers
- Select the relevant customer
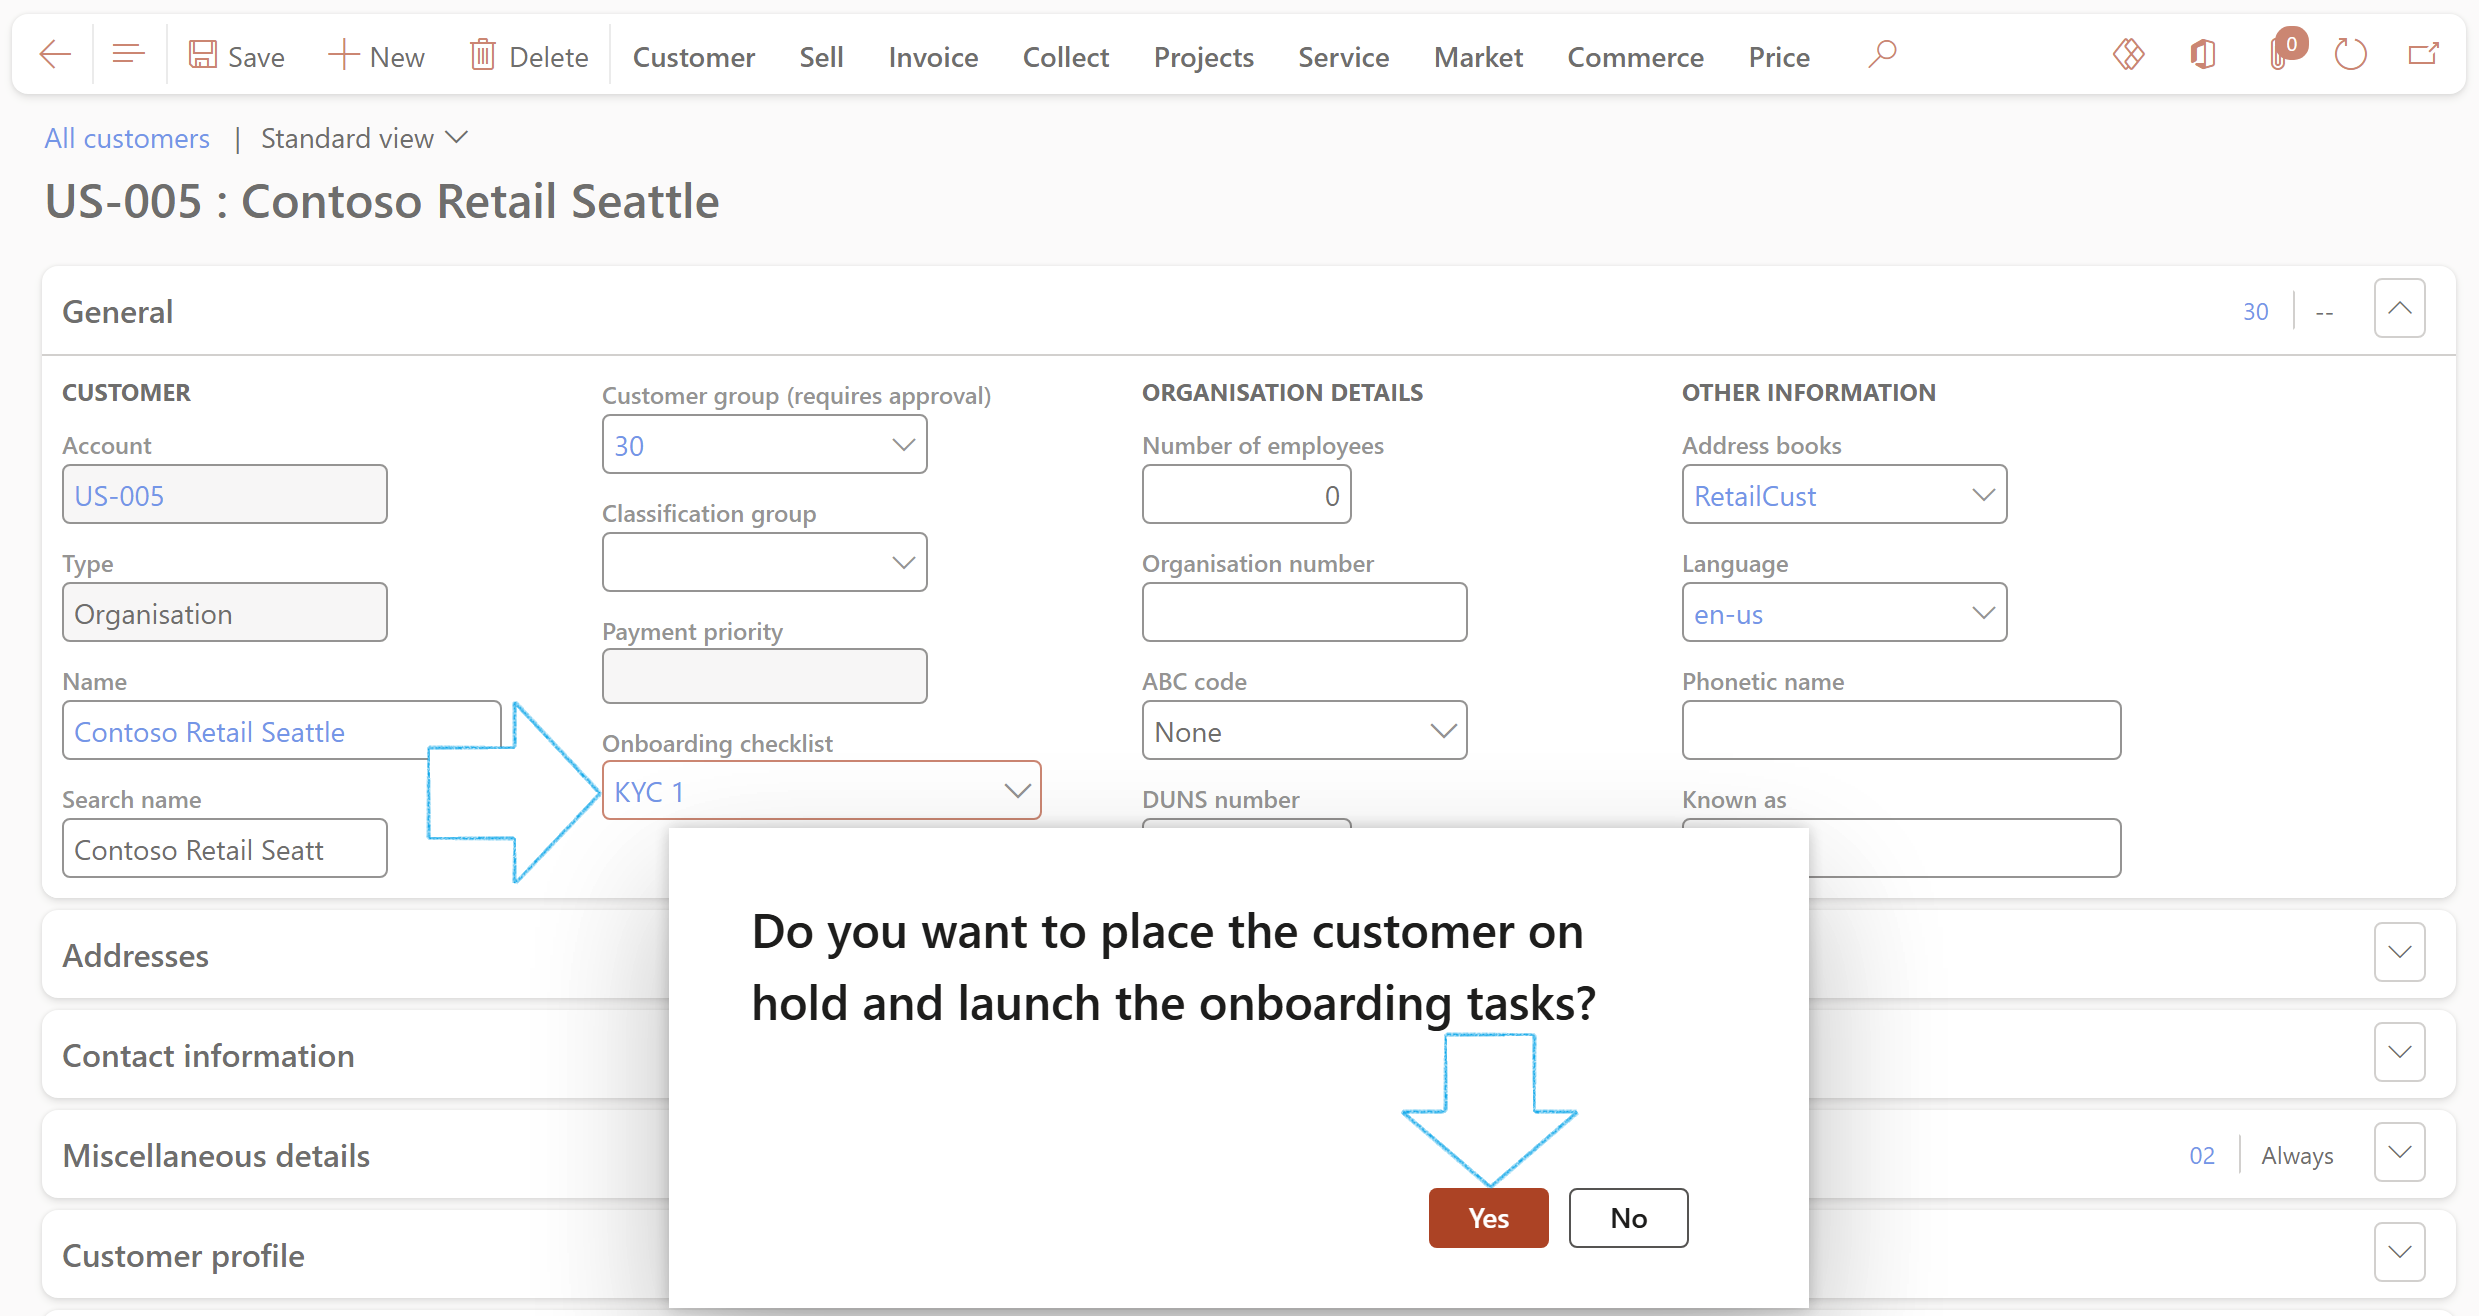
- Under the General Fast tab, select the relevant Onboarding/Offboarding checklist from the dropdown list
- Click Yes on the pop-up if the customer must be placed on hold while the onboarding tasks are launched
¶ Step 7: Onboarding and offboarding a vendor
Go to: Purchase ledger > Vendors > All vendors
- Select the relevant vendor
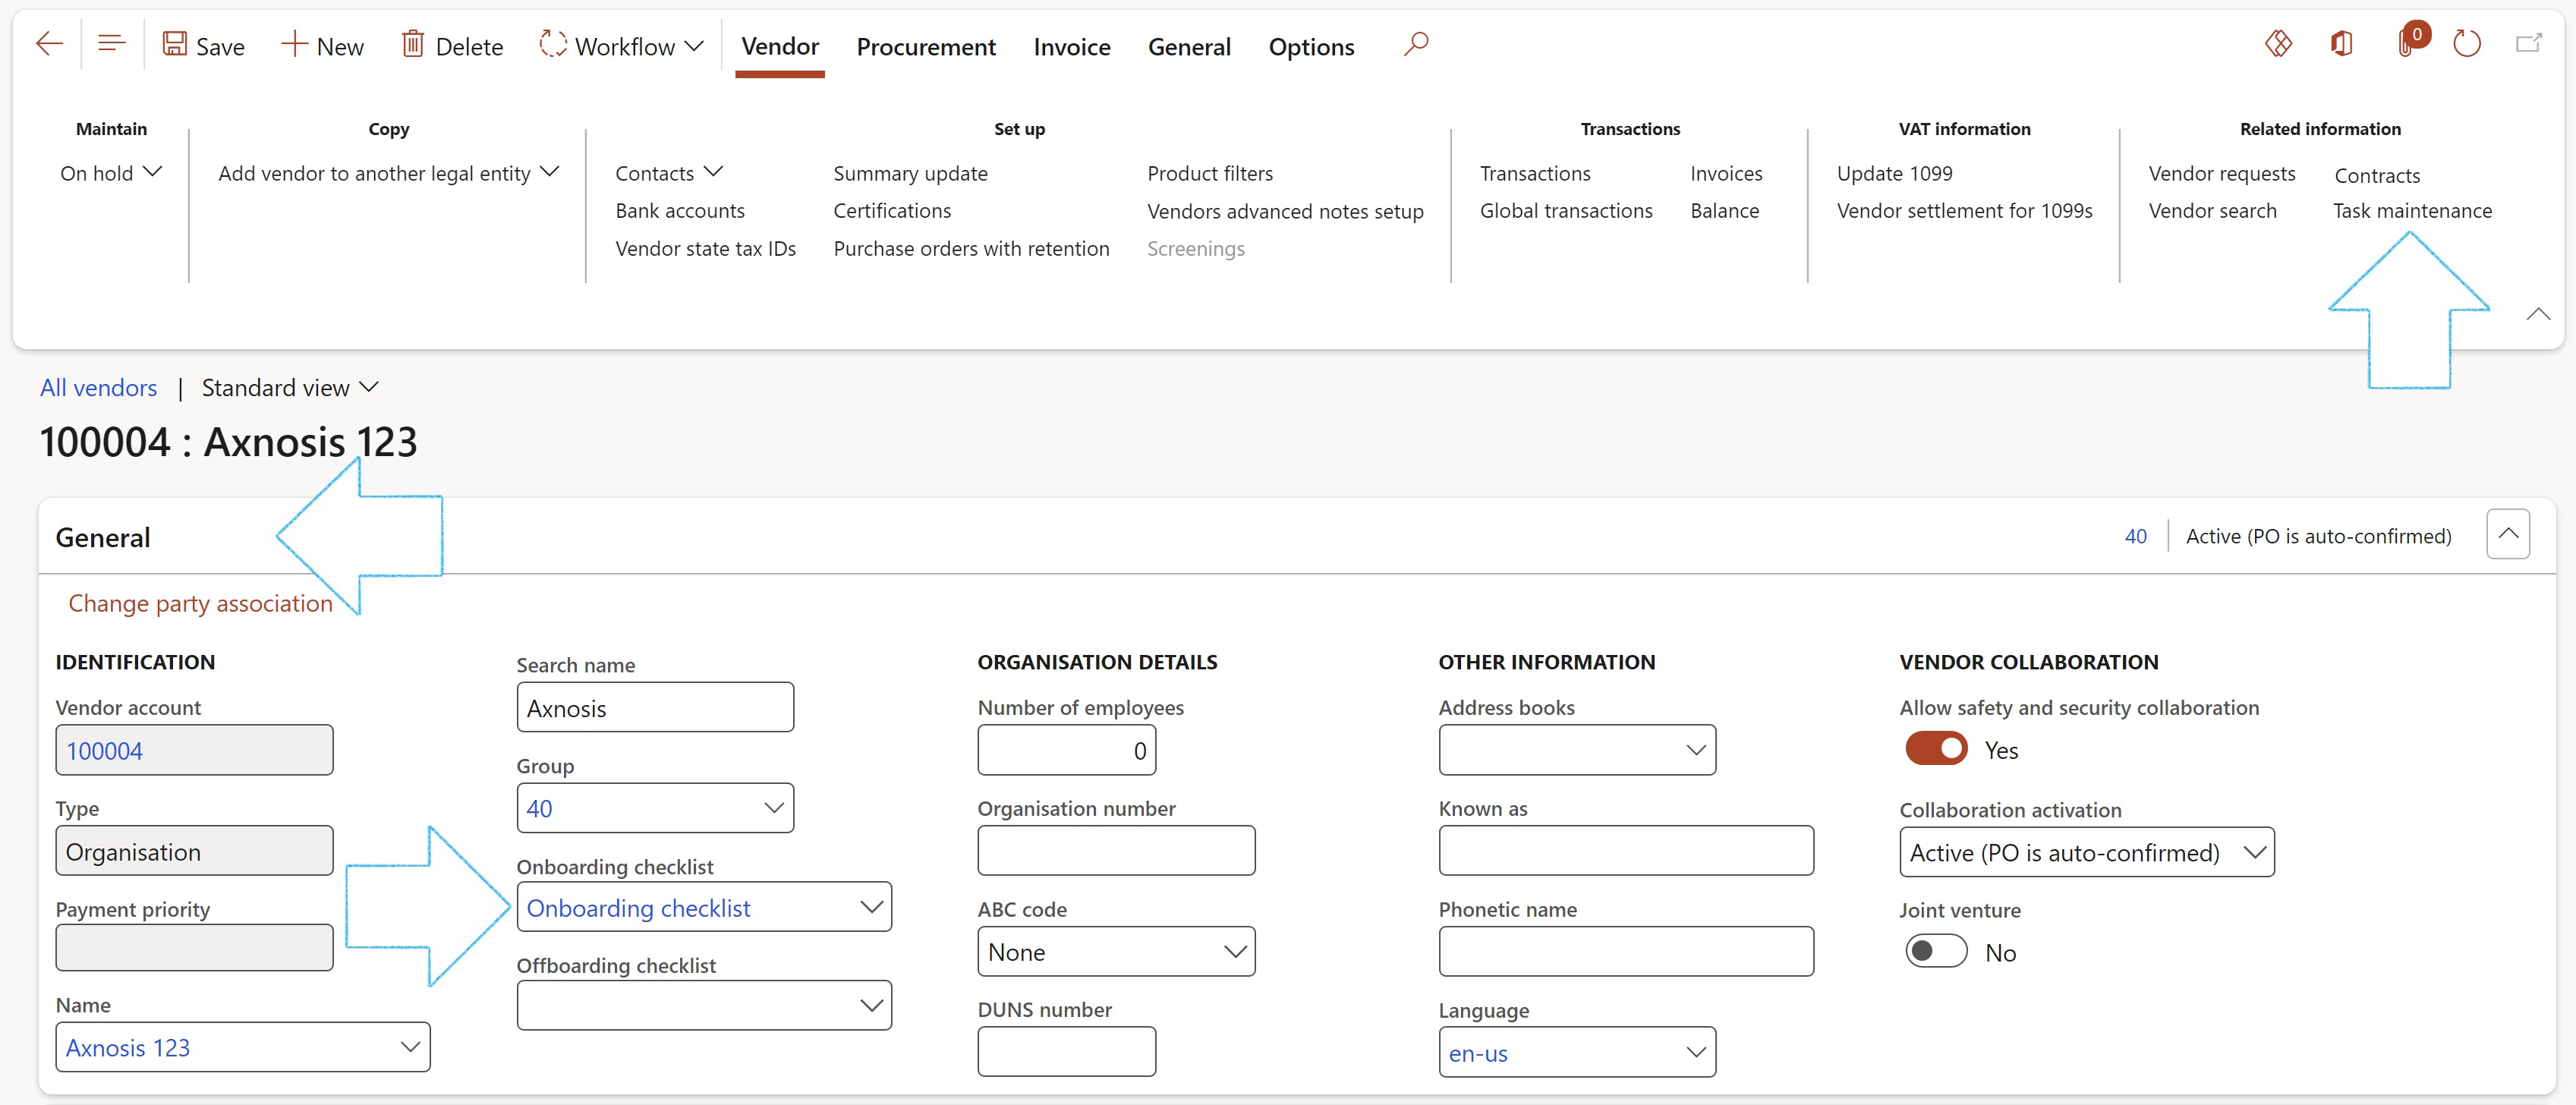
- Under the General Fast tab, select the relevant Onboarding/Offboarding checklist from the dropdown list
- Click Yes on the pop-up if the vendor must be placed on hold while the onboarding/offboarding tasks are launched
¶ Step 7.1: Execute to-do list
User will then be asked if they want to create a formal "checklist". On Yes a To-do list for the worker in the setup (step 2 above) will be visible on the D365 F&O home screen.
For Overdue task items a vertical red line will be displayed.
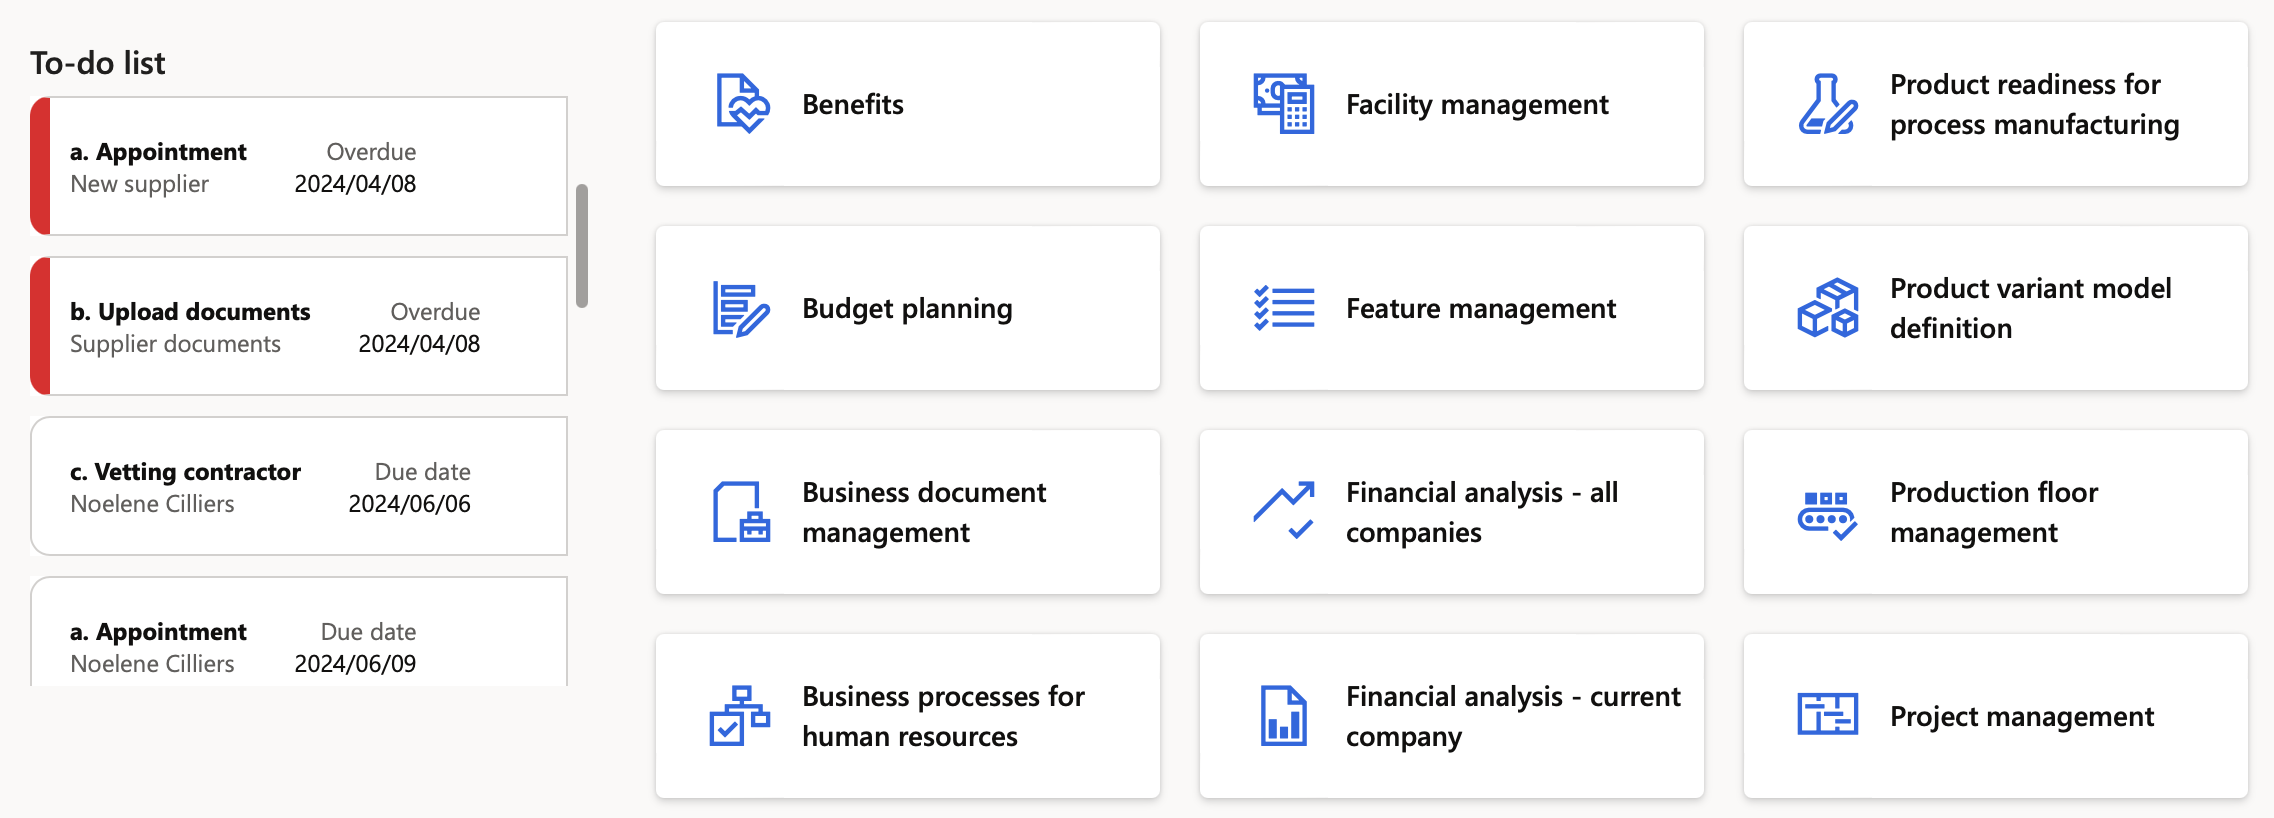
- Click on the relevant task on the to-do list
In the Task form Details Fast tab, users can see the status of the task.
- On the button strip, click on the Change status button group and choose the new status. If "Completed" it will disappear from the to-do list
- On the button strip, click on the Reassign button group and choose new "owner" for the task; it will disappear from the to-do list for the logged in user
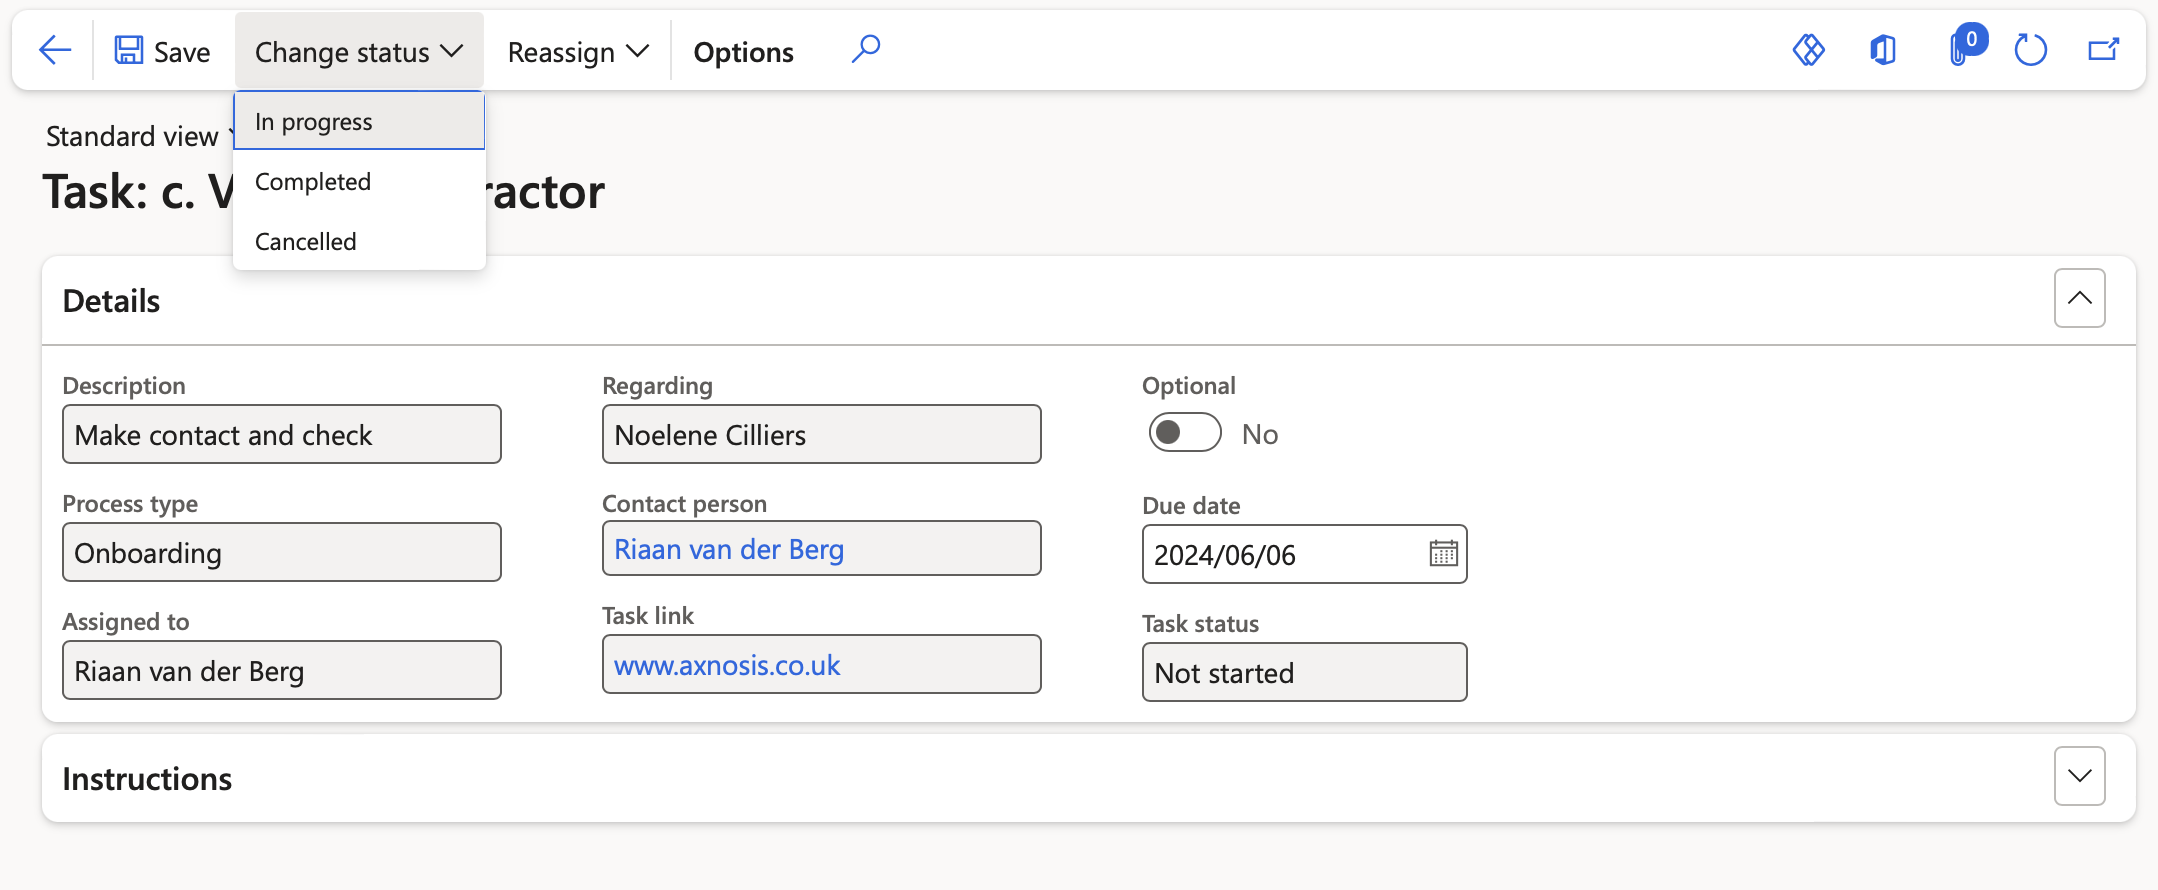
The Task link field is usefull. If other forms (inside Dynamics) or external web sites are linked users can use the hyperlink of the value inside this field to first complete something before marking this task as complete.
¶ Step 8: Add a vendor to another legal entity
Go to: Purchase ledger > Vendors > All vendors
- Select the relevant vendor
- On the Action pane, under the Vendor tab, click on the Add vendor to another legal entity button
- On the dialog, complete the following fields:
- Company – Select the company that this vendor must be created for
- Vendor group – Select the relevant vendor group for the company
- Currency – Select the default currency for this vendor
- Vendor hold – Specify the vendor hold for this vendor
- Include additional fields from parameters - Add additional vendor fields to populate on the copy action. These are the fields specified on the parameters (GRC added functionality)
- Force consistent vendor number across legal entities - Force consistent vendor number from the Master data company across legal entities (GRC added functionality)
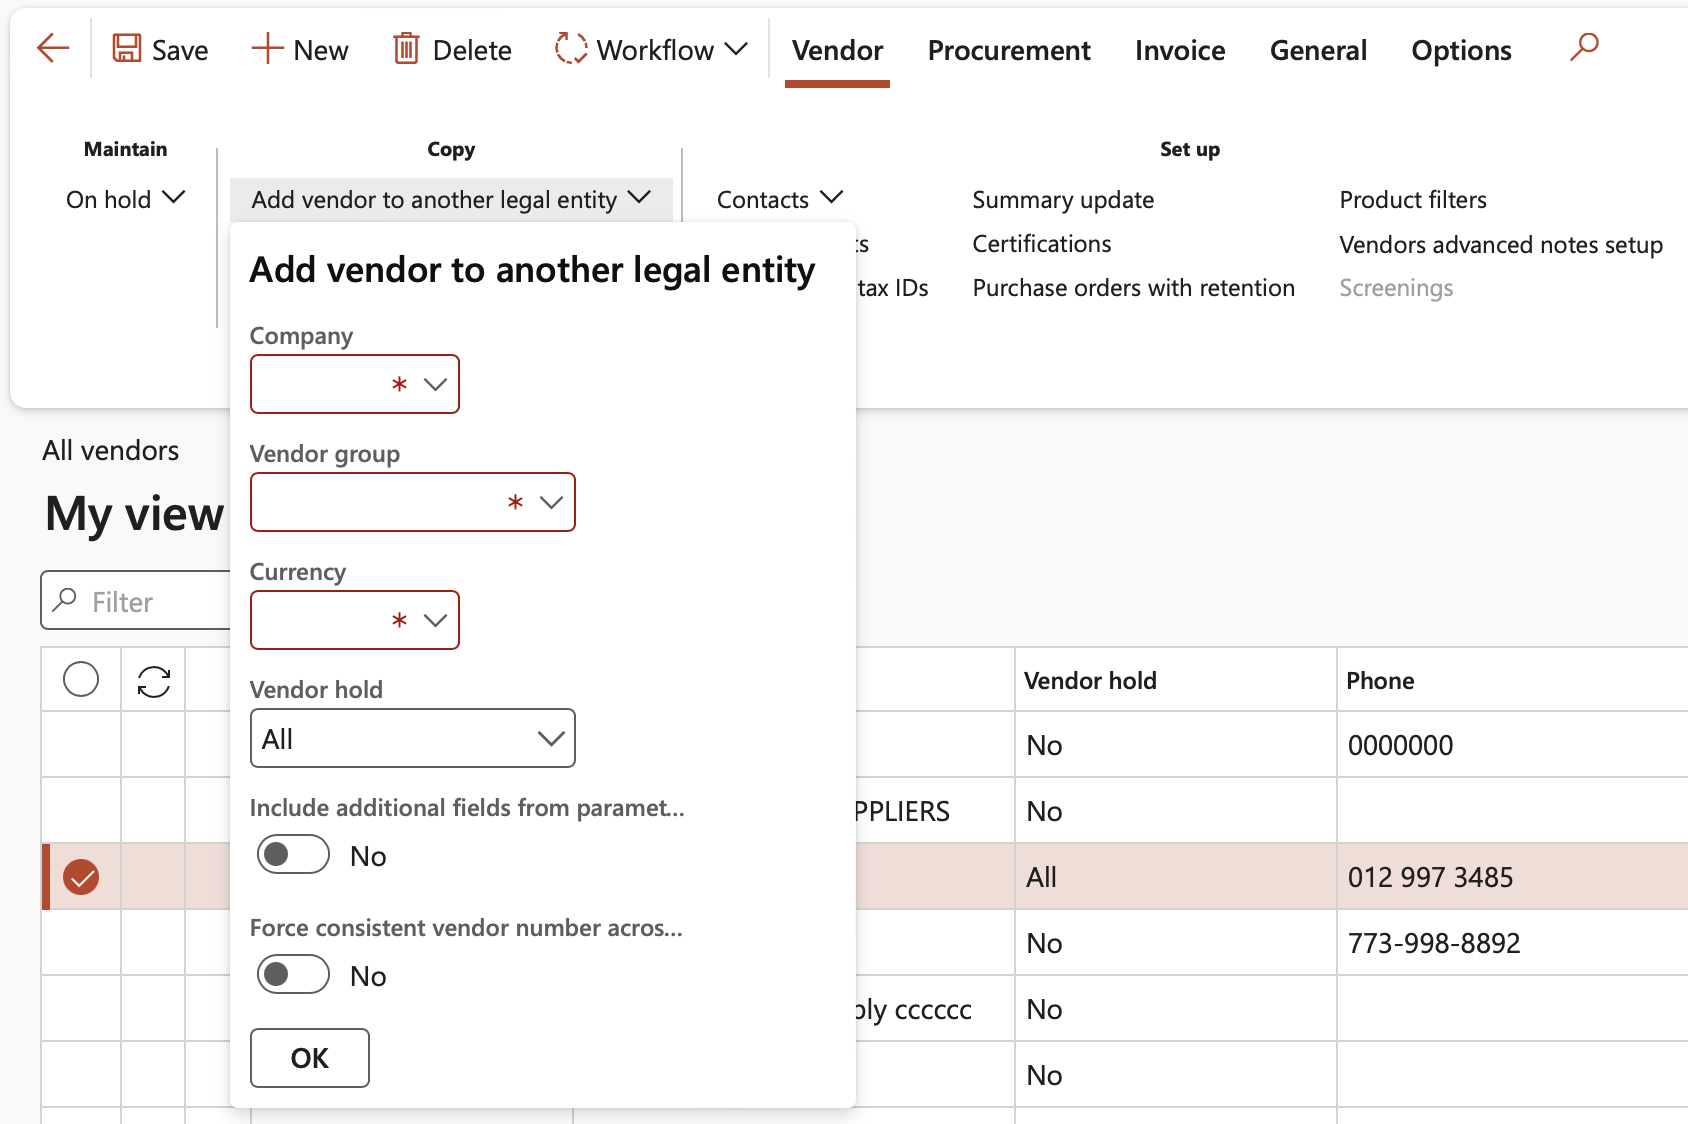
This button will only be available in the Master data company selected on the parameters. All other companies will not have this functionality

¶ Step 9: Runnung the Vendor certificate batch alert
Go to: Purchase ledger > Periodic tasks > Vendor certificate batch alert
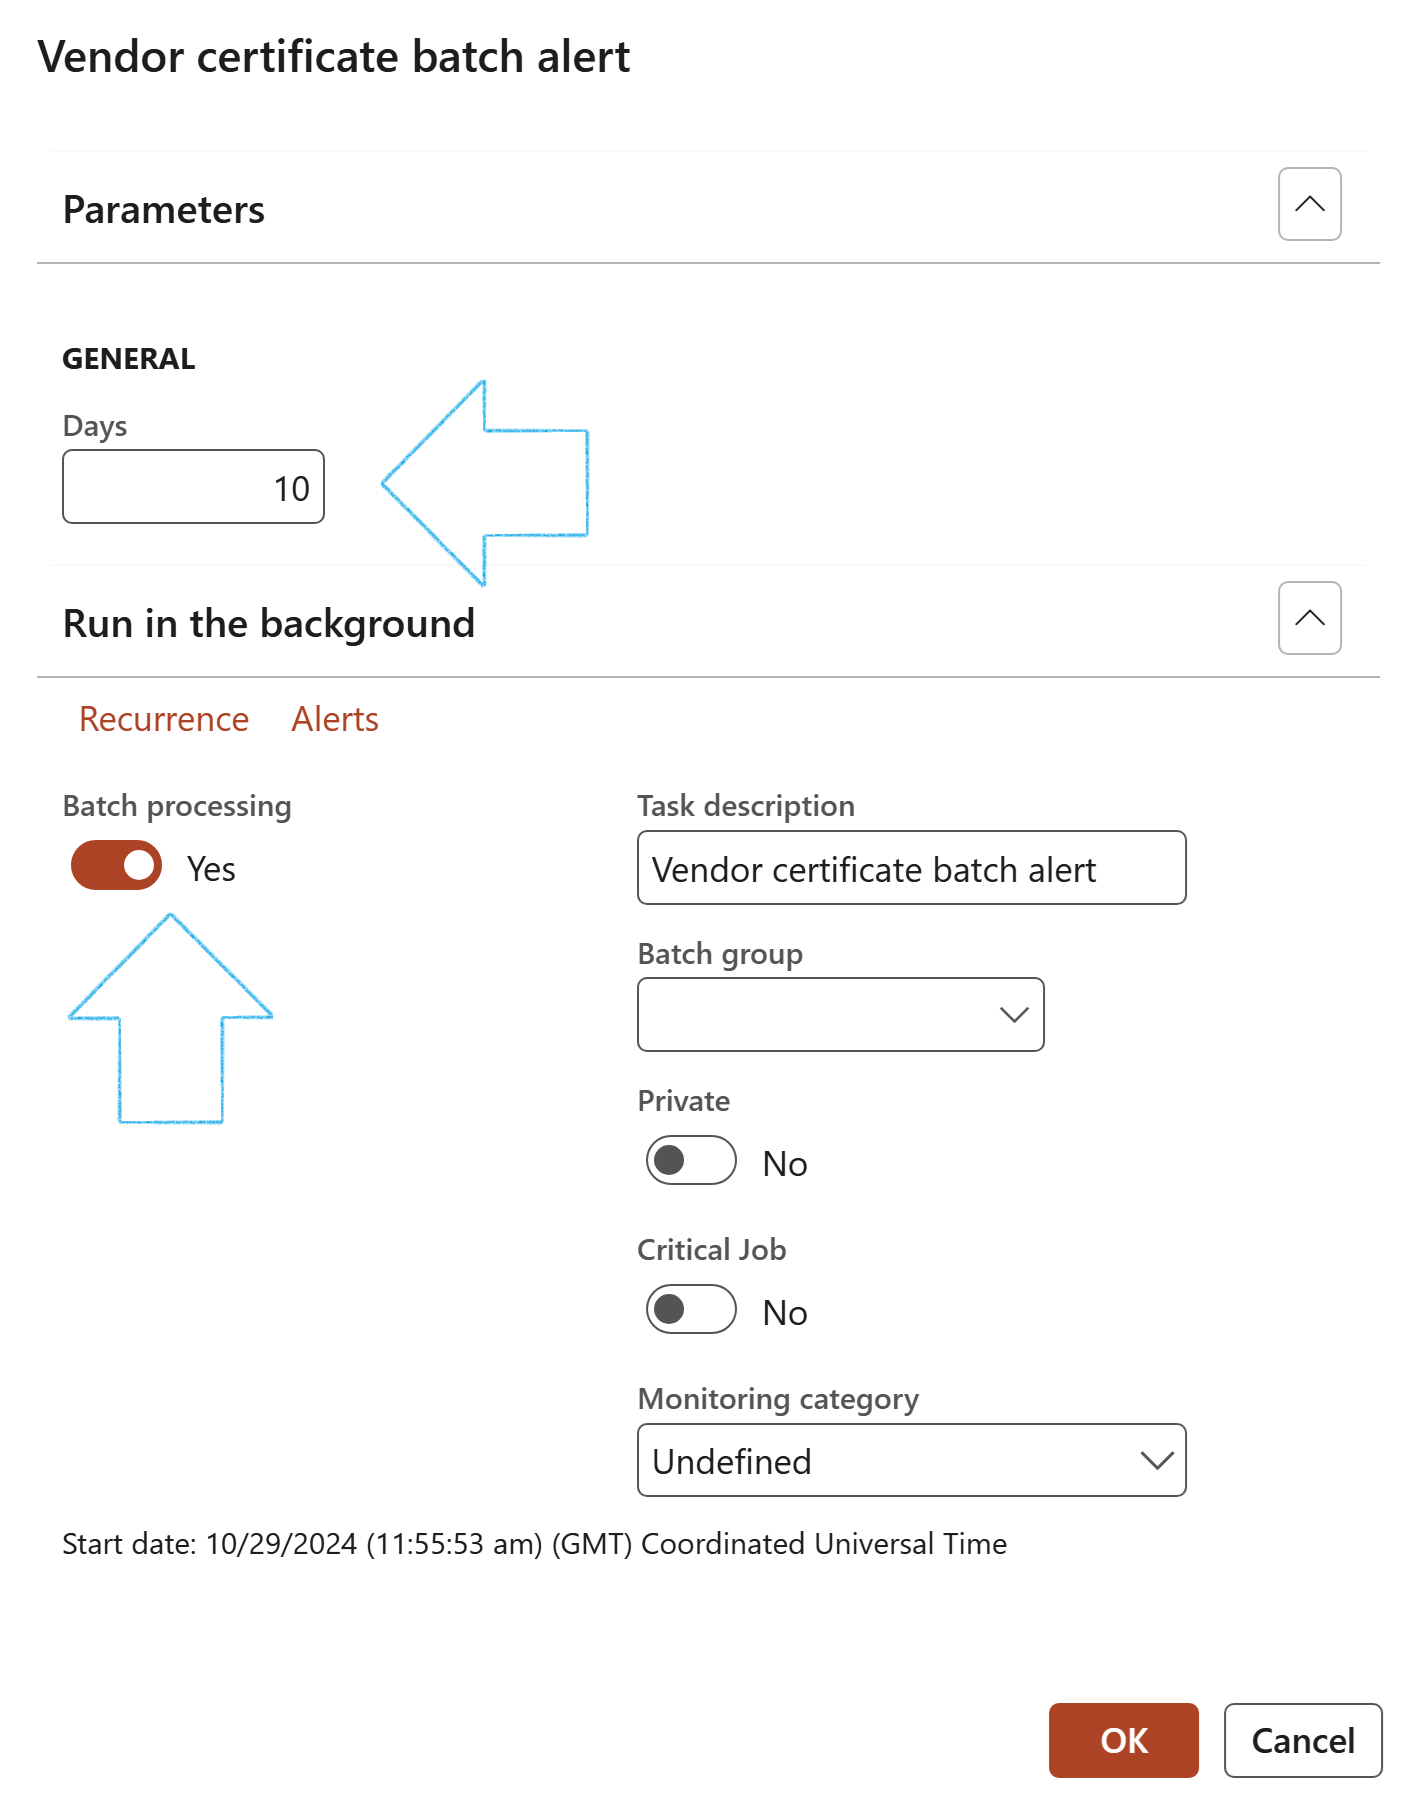
- On the Vendor certificate batch alert dialog, enter a number in the Days field
Alert to be sent as overdue (+ sign) and pre event notification (- sign). O will send a message only once for new records created. 1 or -1 for example, will send multiple times. 0 will ignore any dates
- Expand the Run in the background Fast tab
- Move the Batch processing slider to Yes
- Click on the OK button
¶ More information
¶ Step 10: Global address book
The global address book is a centralized repository for master data that must be stored for all internal and external persons and organizations that the company interacts with. The data that is associated with party records includes the party's name, address, and contact information. Other details vary depending on whether the party is a person or an organization. Each party record is assigned to a party, and each party can be associated with one or more party roles in a company. Party roles include customer, prospect, worker, user, vendor, competitor, applicant, and contact. For example, the organization party First Up Consultants, can be associated with customer, business relation, and vendor roles in the CEE company, and can also be associated with the vendor role in the CEU company.
Here are some of the benefits of this shared data:
- The data shows the relationships that people and organizations have with other areas of the company. The relationship between two organizations changes when one organization has multiple roles, such as vendor and customer. Communication between the two organizations also changes. There might be special agreements that can be negotiated to encourage a closer partnership with the other organization.
- Setup and maintenance are easier. For example, when an address changes, the update must be made in only one place. All the other associated records are updated automatically.

¶ Step 11: Release a product/item master to legal entities
This procedure walks through how to release a product or product master into one or more legal entities. The master Data Company used to create this task is MDC.
Go to: Product information management > Products > Products
- Select the required products
- On the Action pane, click on the Release products tab
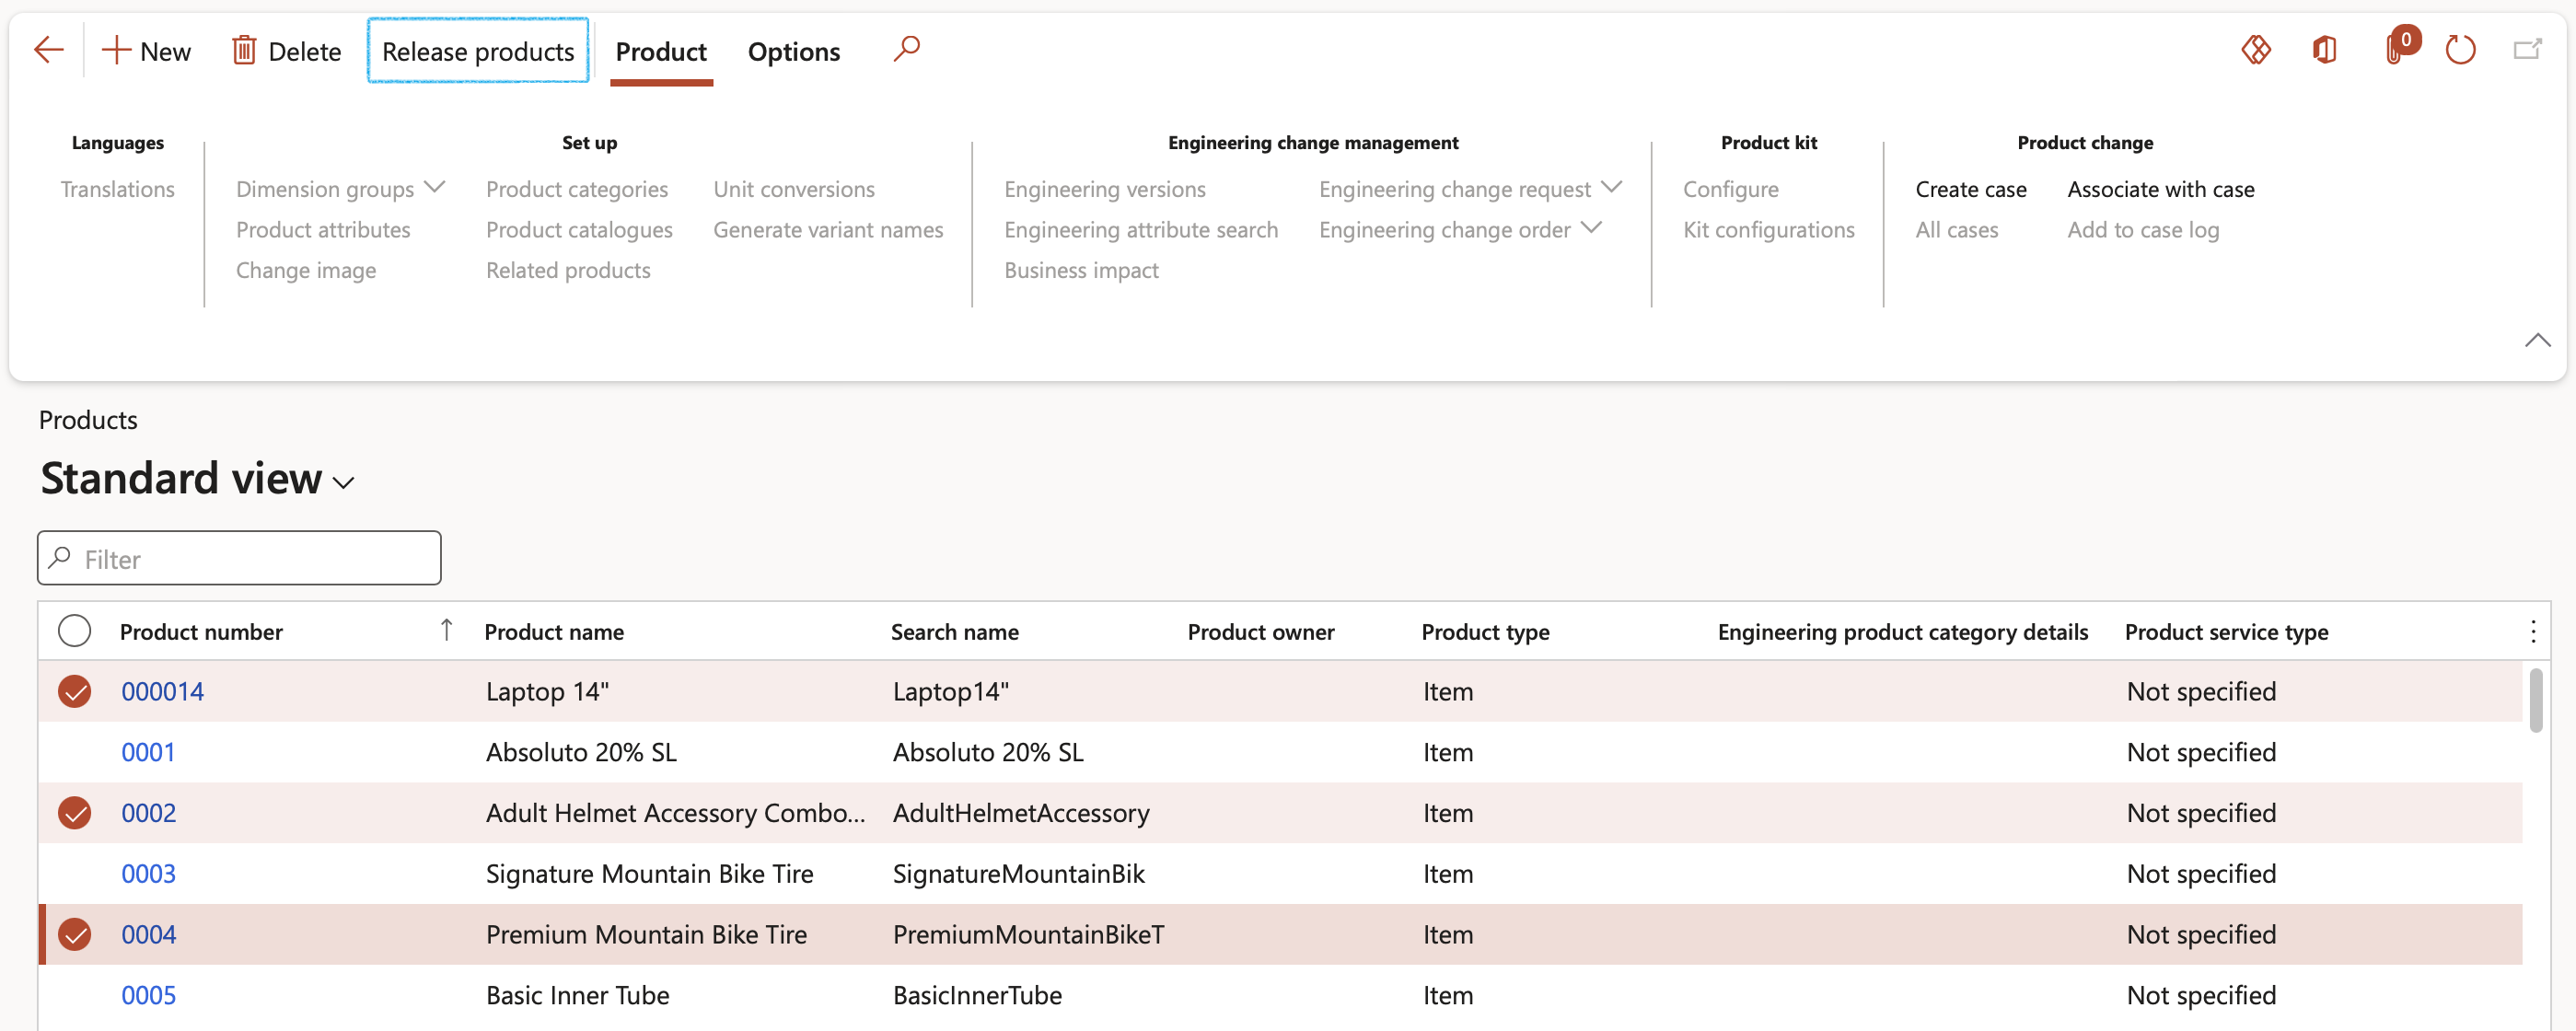
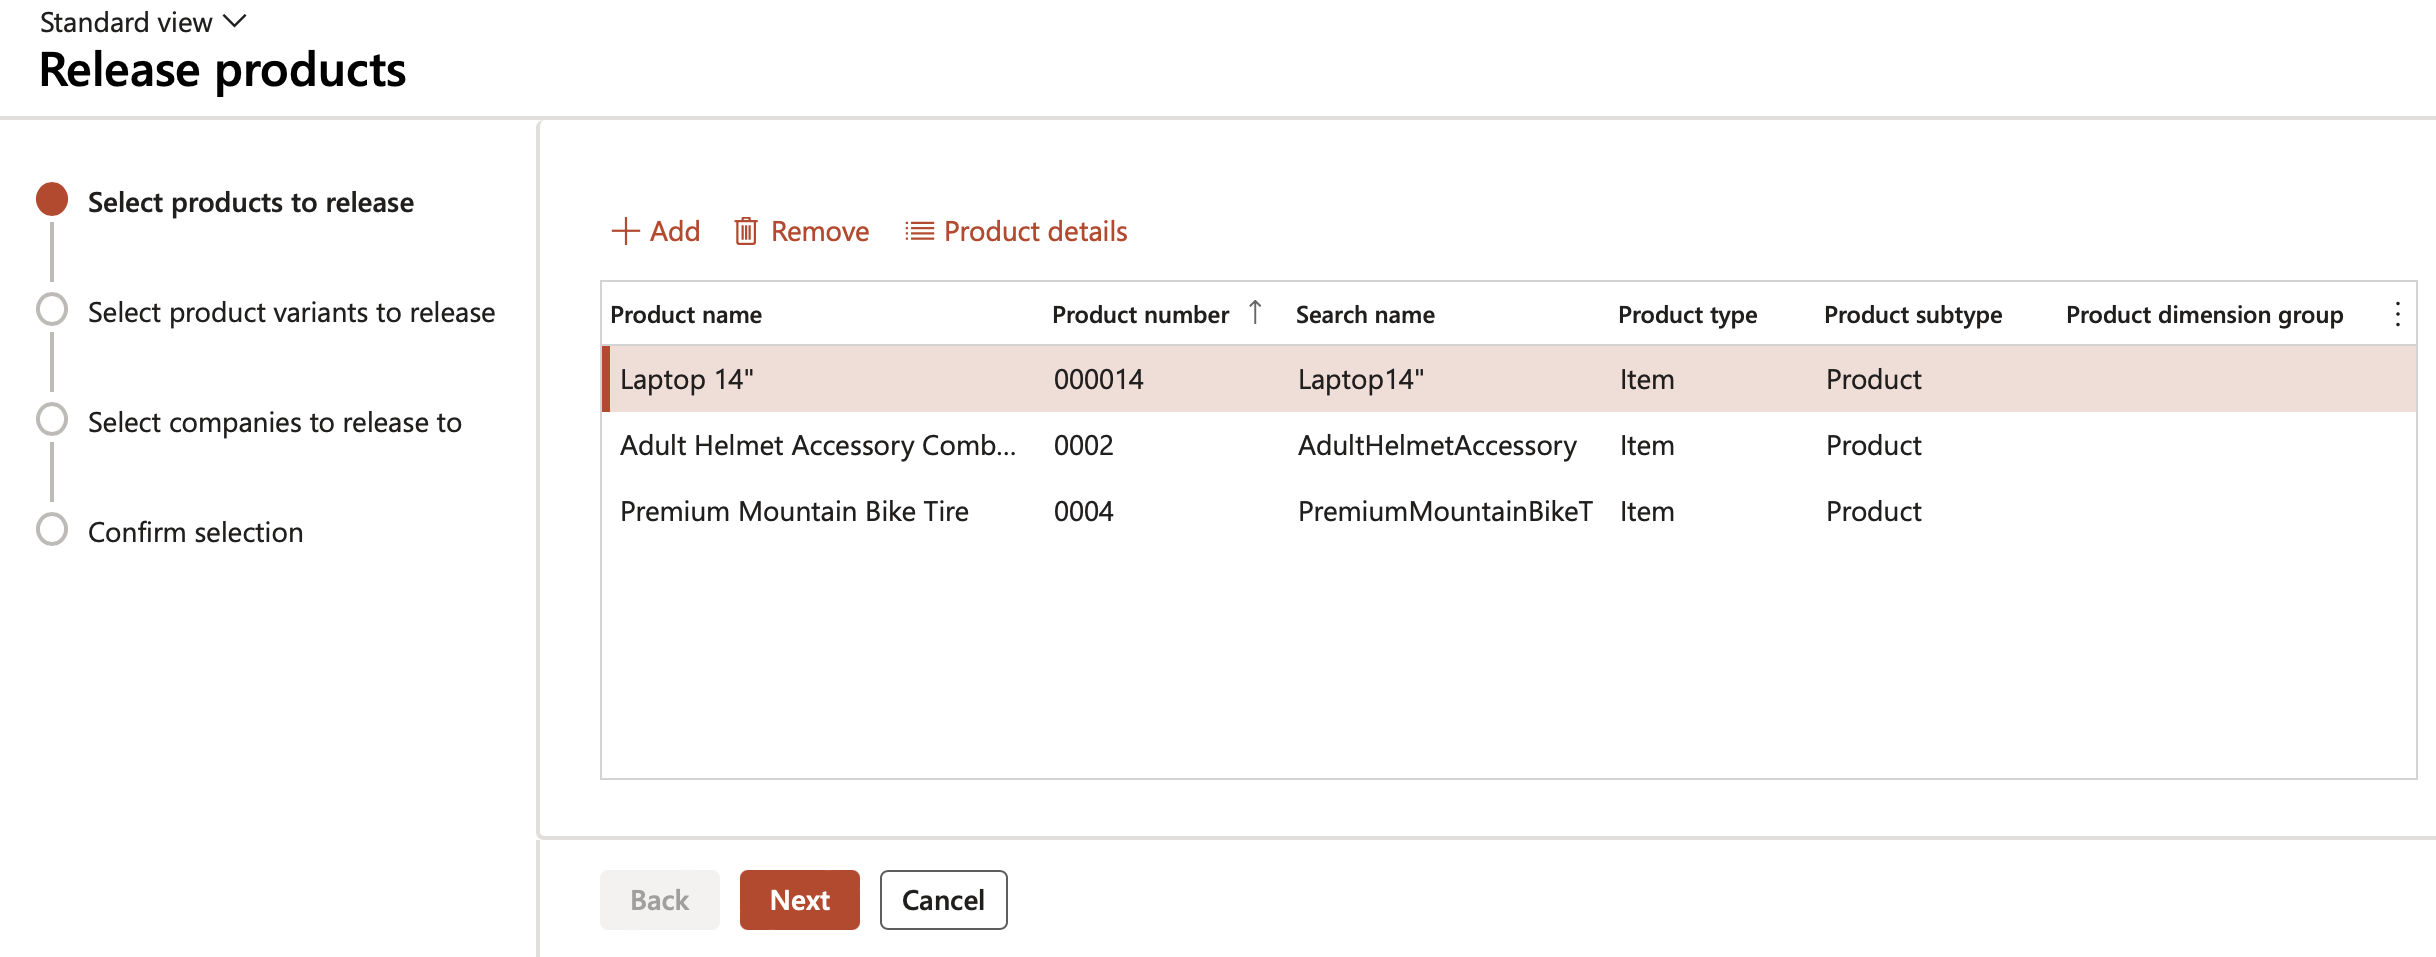
The selected products will be listed on the next form
- Click Next button
- Select the Companies to release these products to
- Click Next button
- Confirm the selection
- Click Finish button
¶ Reports
¶ Step 12: Expired vendor certificates report
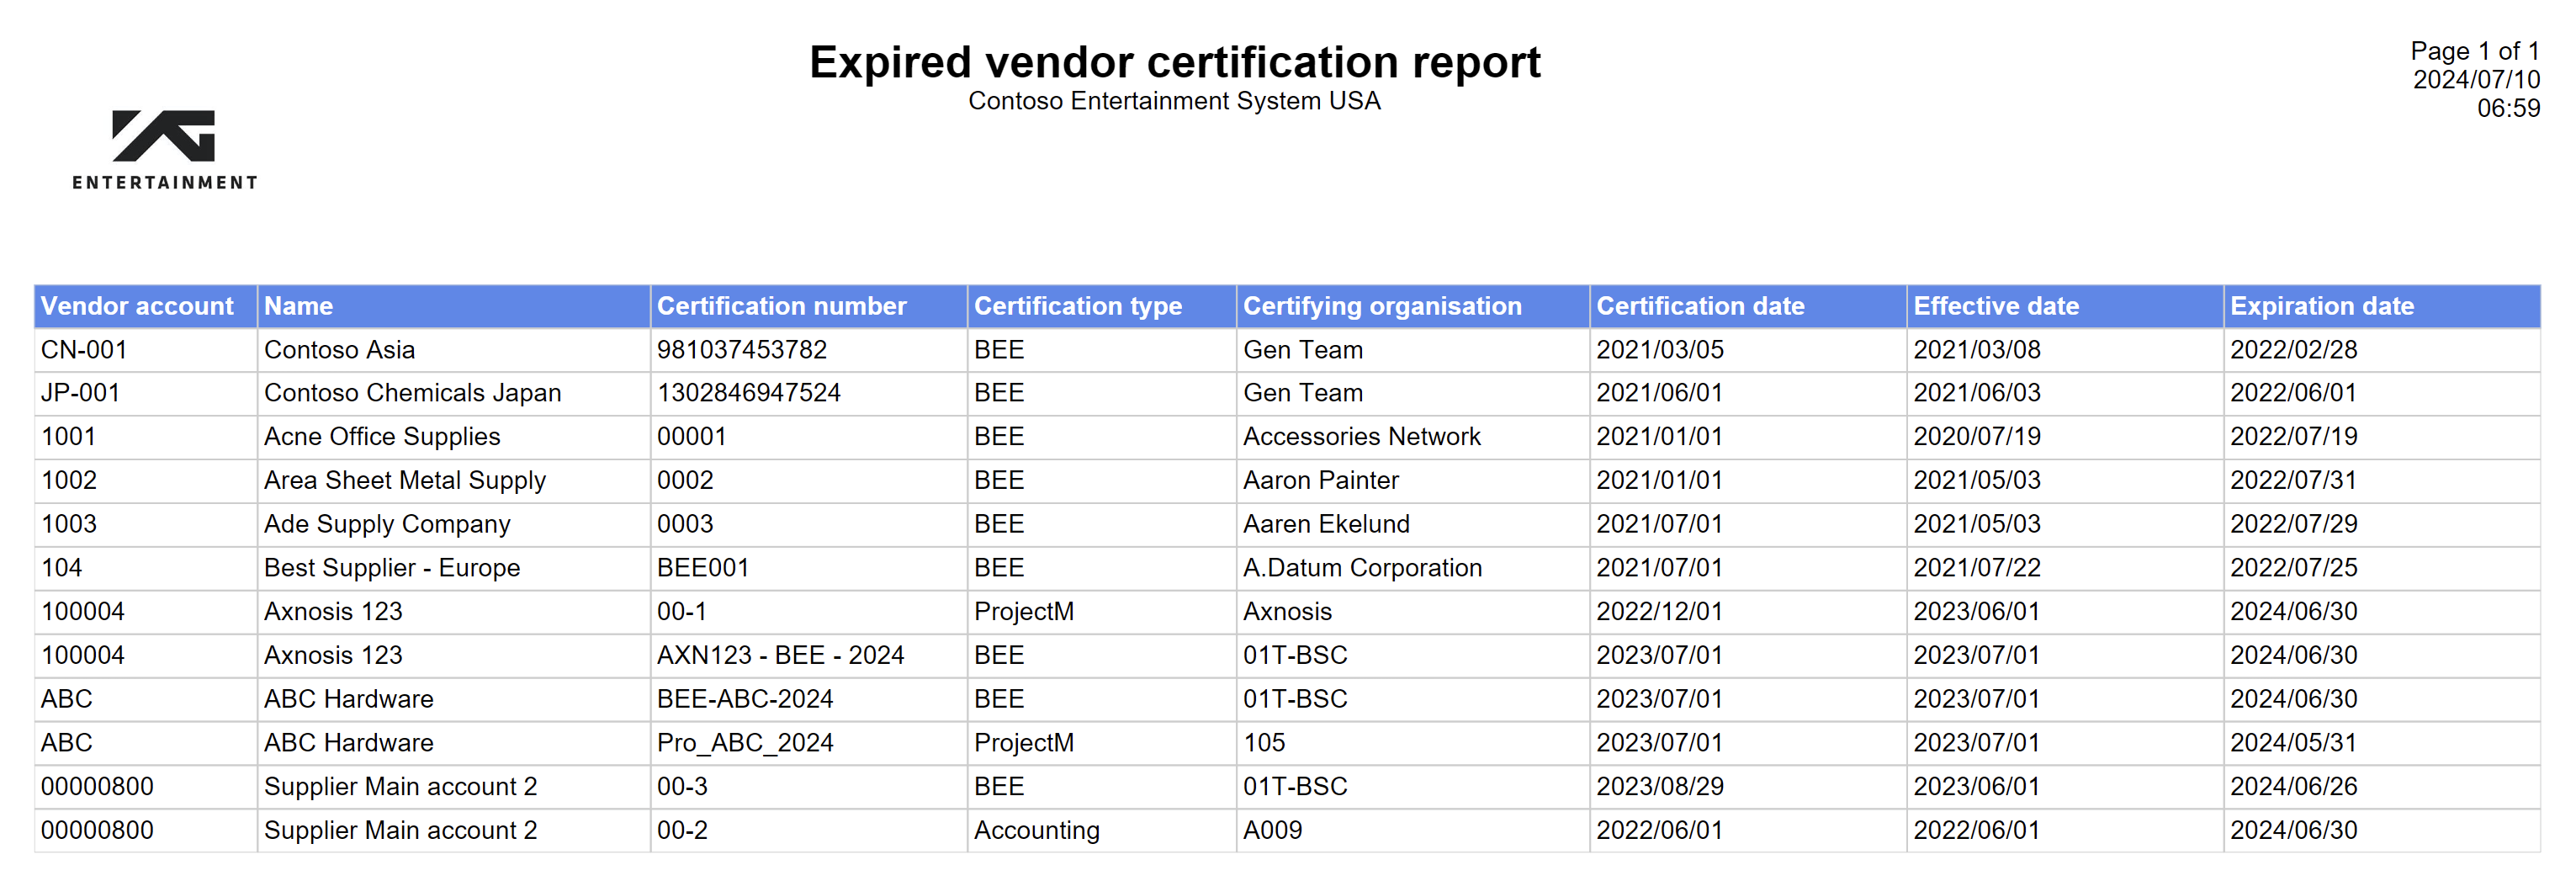
This report gives the user a list of all vendor certificates that have expired
Go to: Purchase ledger > Enquiries and reports > Vendor reports > Vendor certification enquiry
- In the Action pane, click on the Print expired certificates button
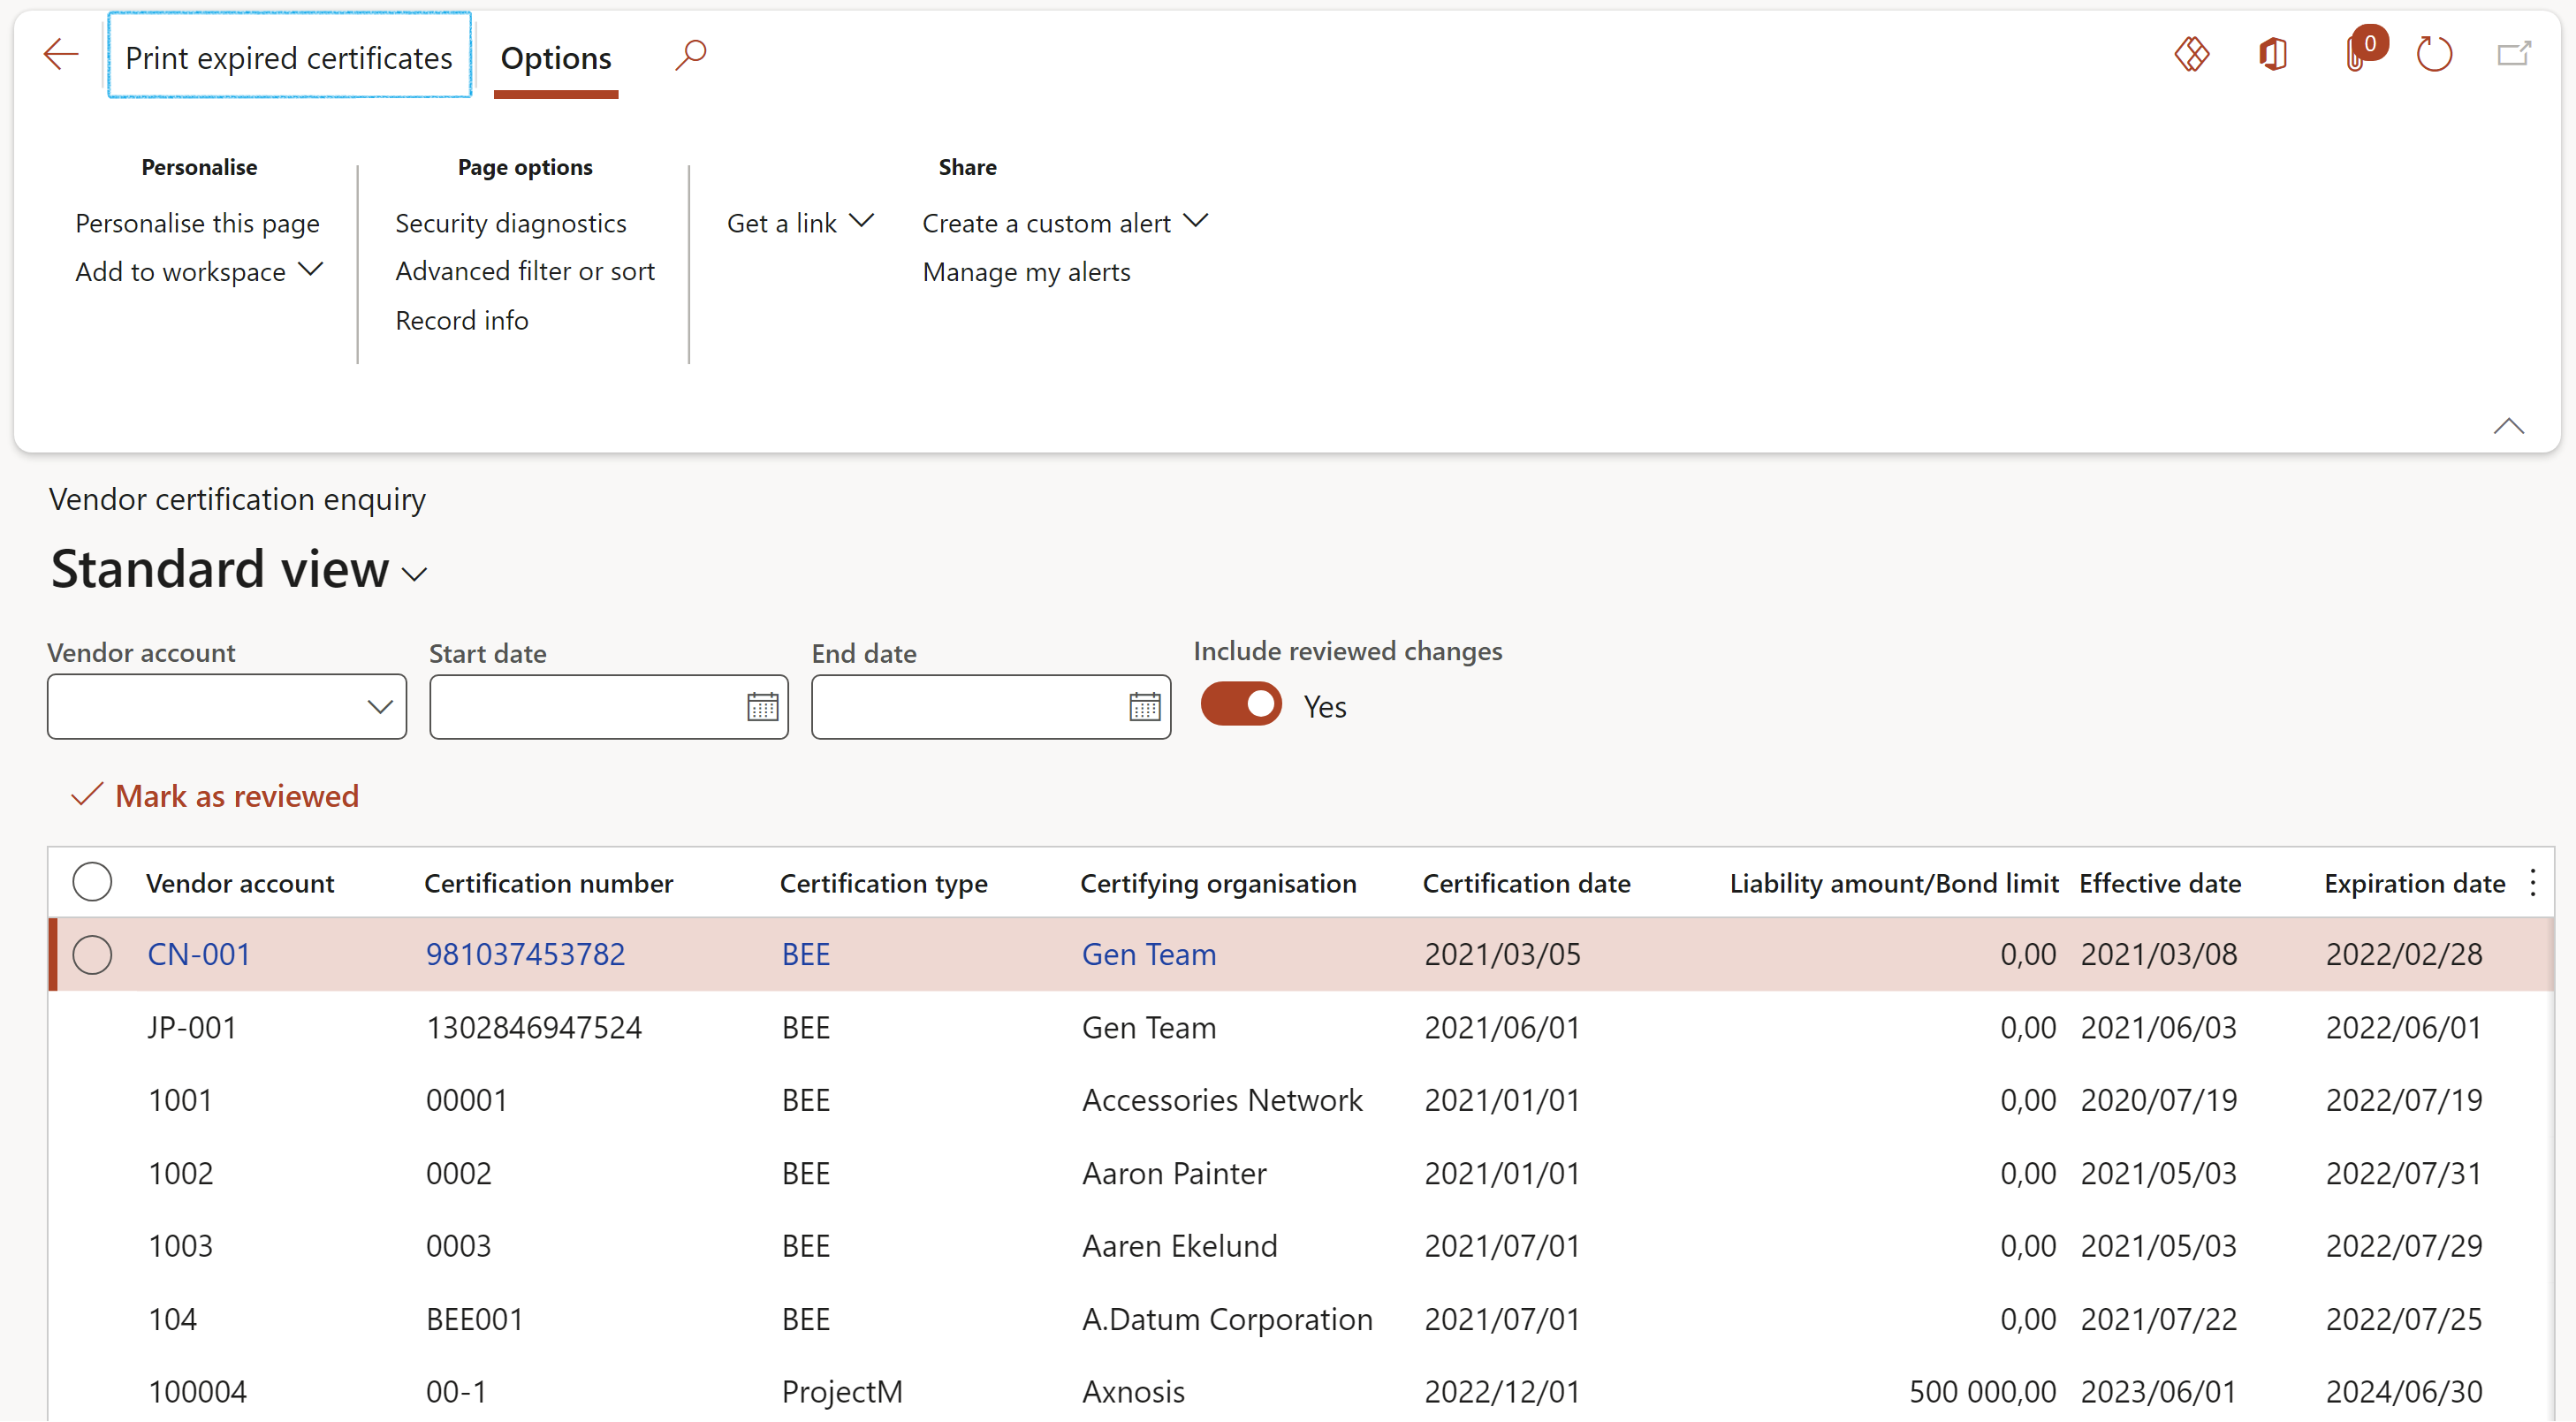
- On the Expired vendor certificated report print dialog, select the Expiry date that you want to print the report for
- Click OK button
