¶ Introduction

¶ Dynamics 365 F&O (data entities)
A data entity is an abstraction from the physical implementation of database tables. For example, in normalized tables, a lot of the data for each customer might be stored in a customer table, and then the rest might be spread across a small set of related tables. In this case, the data entity for the customer concept appears as one de-normalized view, in which each row contains all the data from the customer table and its related tables.
Synchronous integrations are relatively straightforward. Any data entity that has Is public enabled is automatically available as a service application programming interface (API) in the following URL: https://[BaseURL]/Data/<<Data Entity Public Collection Name>>.
Currently, OData protocol is used to expose endpoints where all public-enabled entities can be interacted with.
¶ Middleware (node.js)
Middleware is software that different applications use to communicate with each other. It provides functionality to connect applications intelligently and efficiently so that you can innovate faster. Middleware acts as a bridge between diverse technologies, tools, and databases so that you can integrate them seamlessly into a single system. The single system then provides a unified service to its users. We use node.js.
Middleware started as a bridge between new applications and legacy systems before it gained popularity in the 1980s. Developers initially used it to integrate new programs with earlier systems without rewriting the earlier code. Middleware has become an important communication and data management tool in distributed systems.
Our middleware is the bridge between Dynamics 365 F&O and our native mobile apps.
¶ Apps (ionic)
Our mobile apps are developed using ionic. The only cross-platform mobile SDK built exclusively for the enterprise. Ionic is a complete open-source SDK for hybrid mobile app development created by Max Lynch, Ben Sperry, and Adam Bradley of Drifty Co. in 2013. The original version was released in 2013 and built on top of AngularJS and Apache Cordova.
|
|
|
¶ Some of our native mobile apps
¶ Some examples
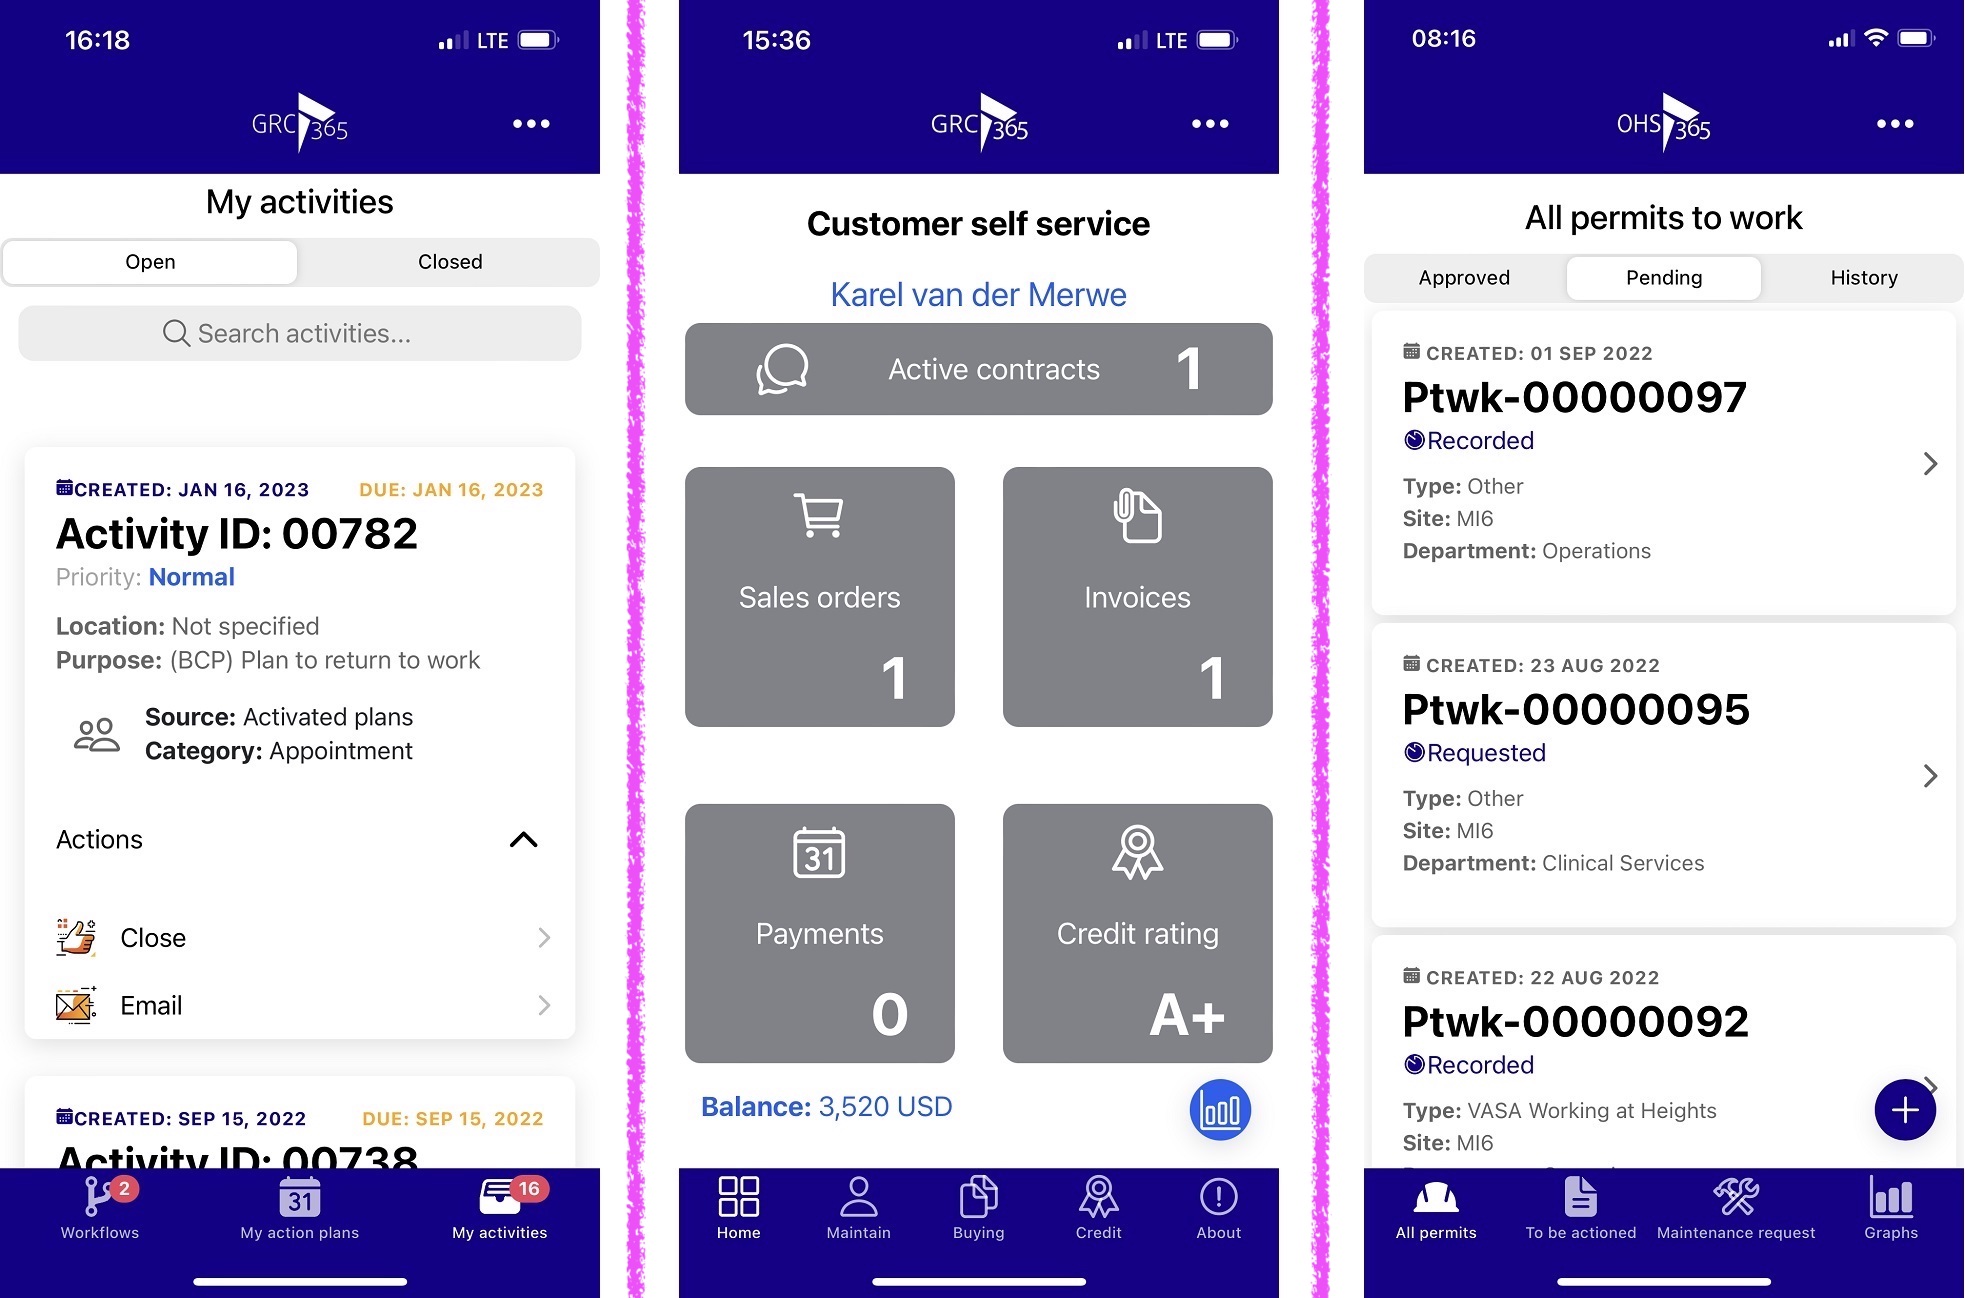
- Action manager app
- Customer self service app
- Permit to work app
¶ A few more examples
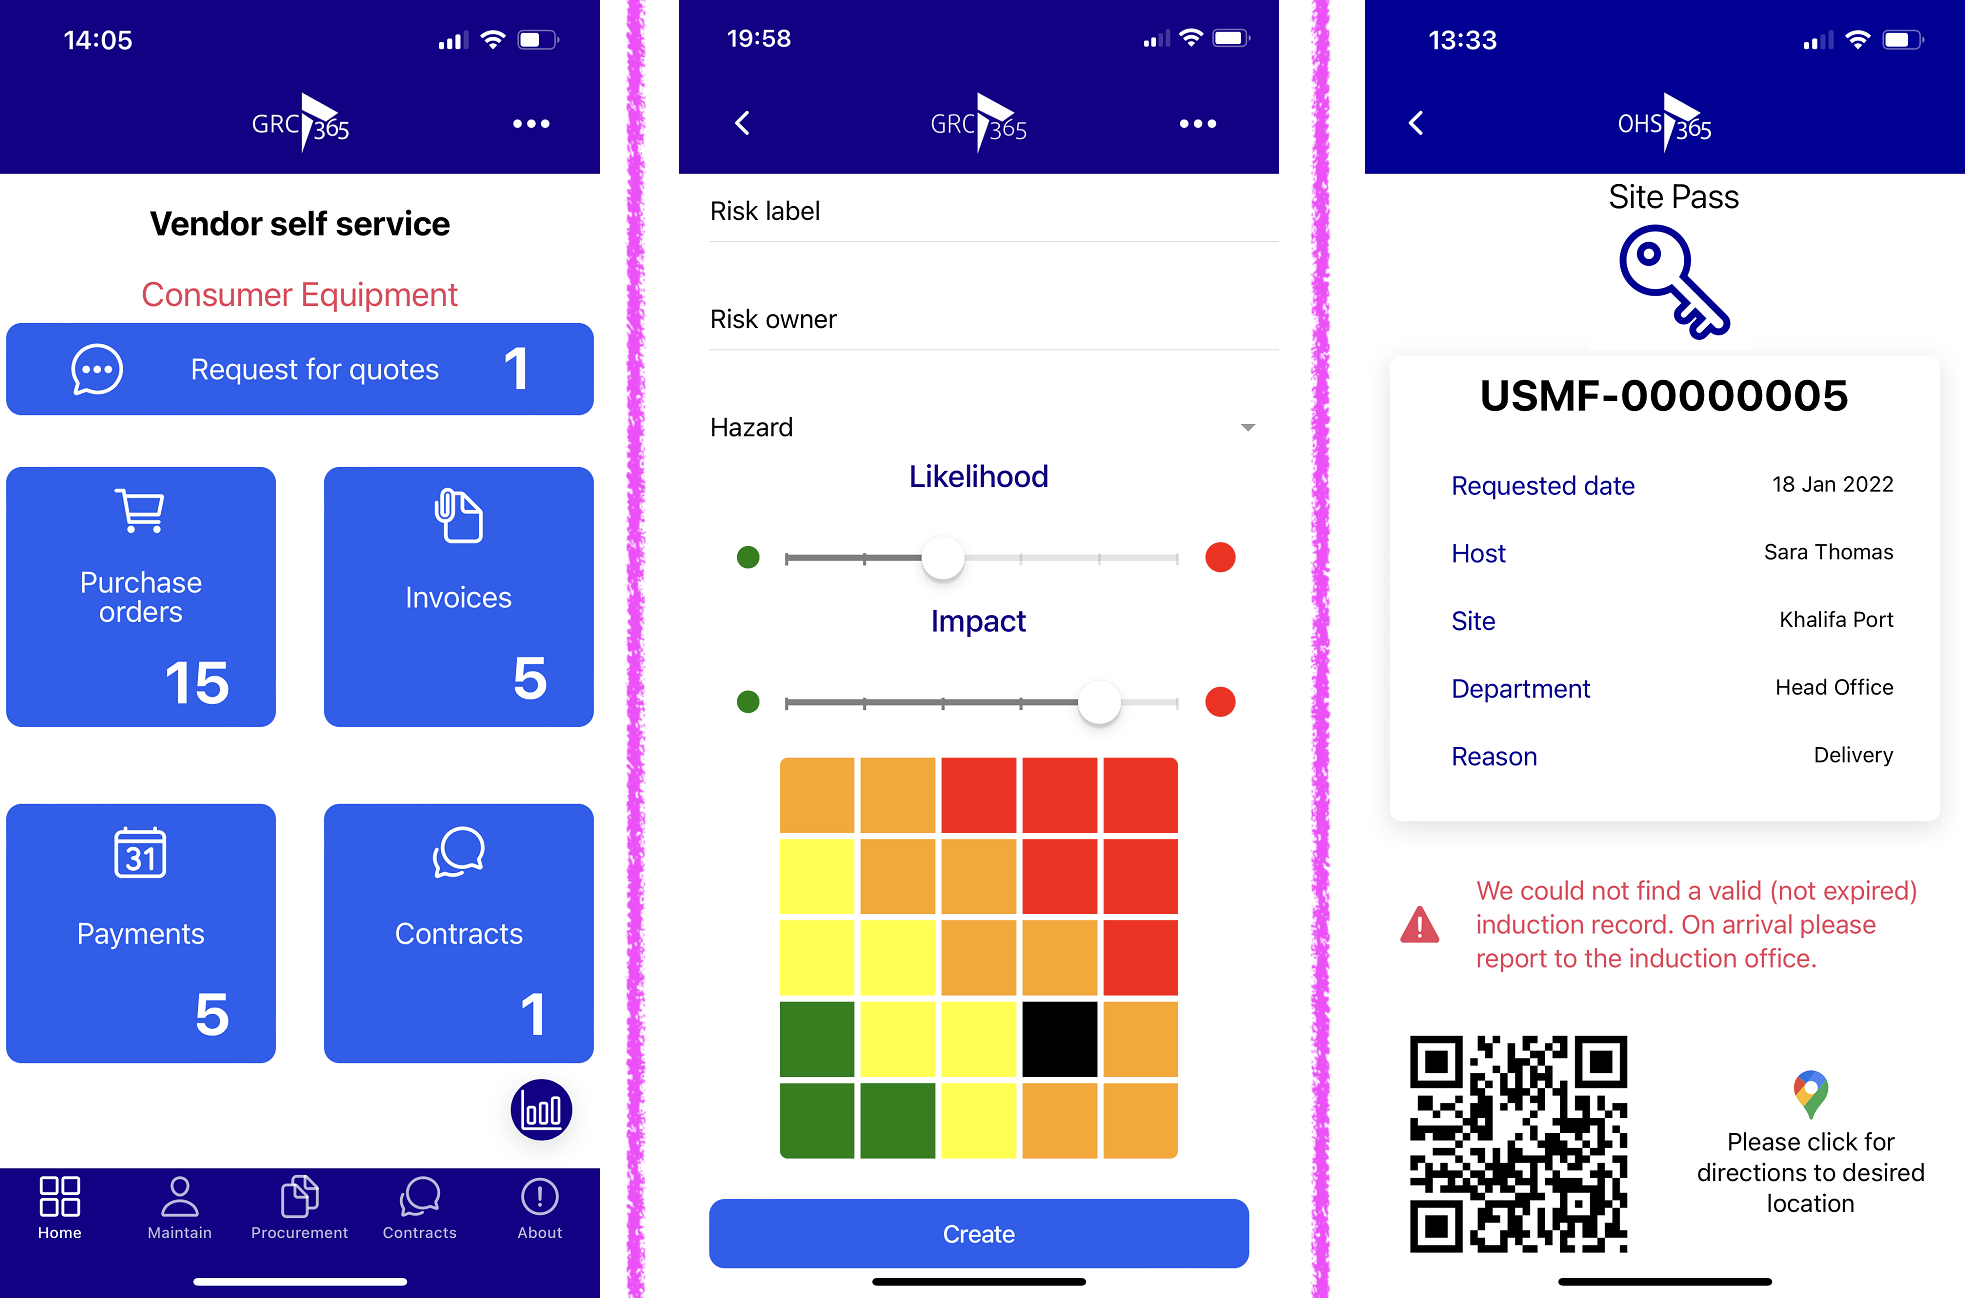
- Vendor self service app
- Risk assessment app
- Site (gate) pass app
¶ Installation guide
¶ 1. Setup to be done in Azure
Login on to: https://azure.microsoft.com/en-us/services/active-directory/ with Microsoft Azure account.
Navigate to App registration page

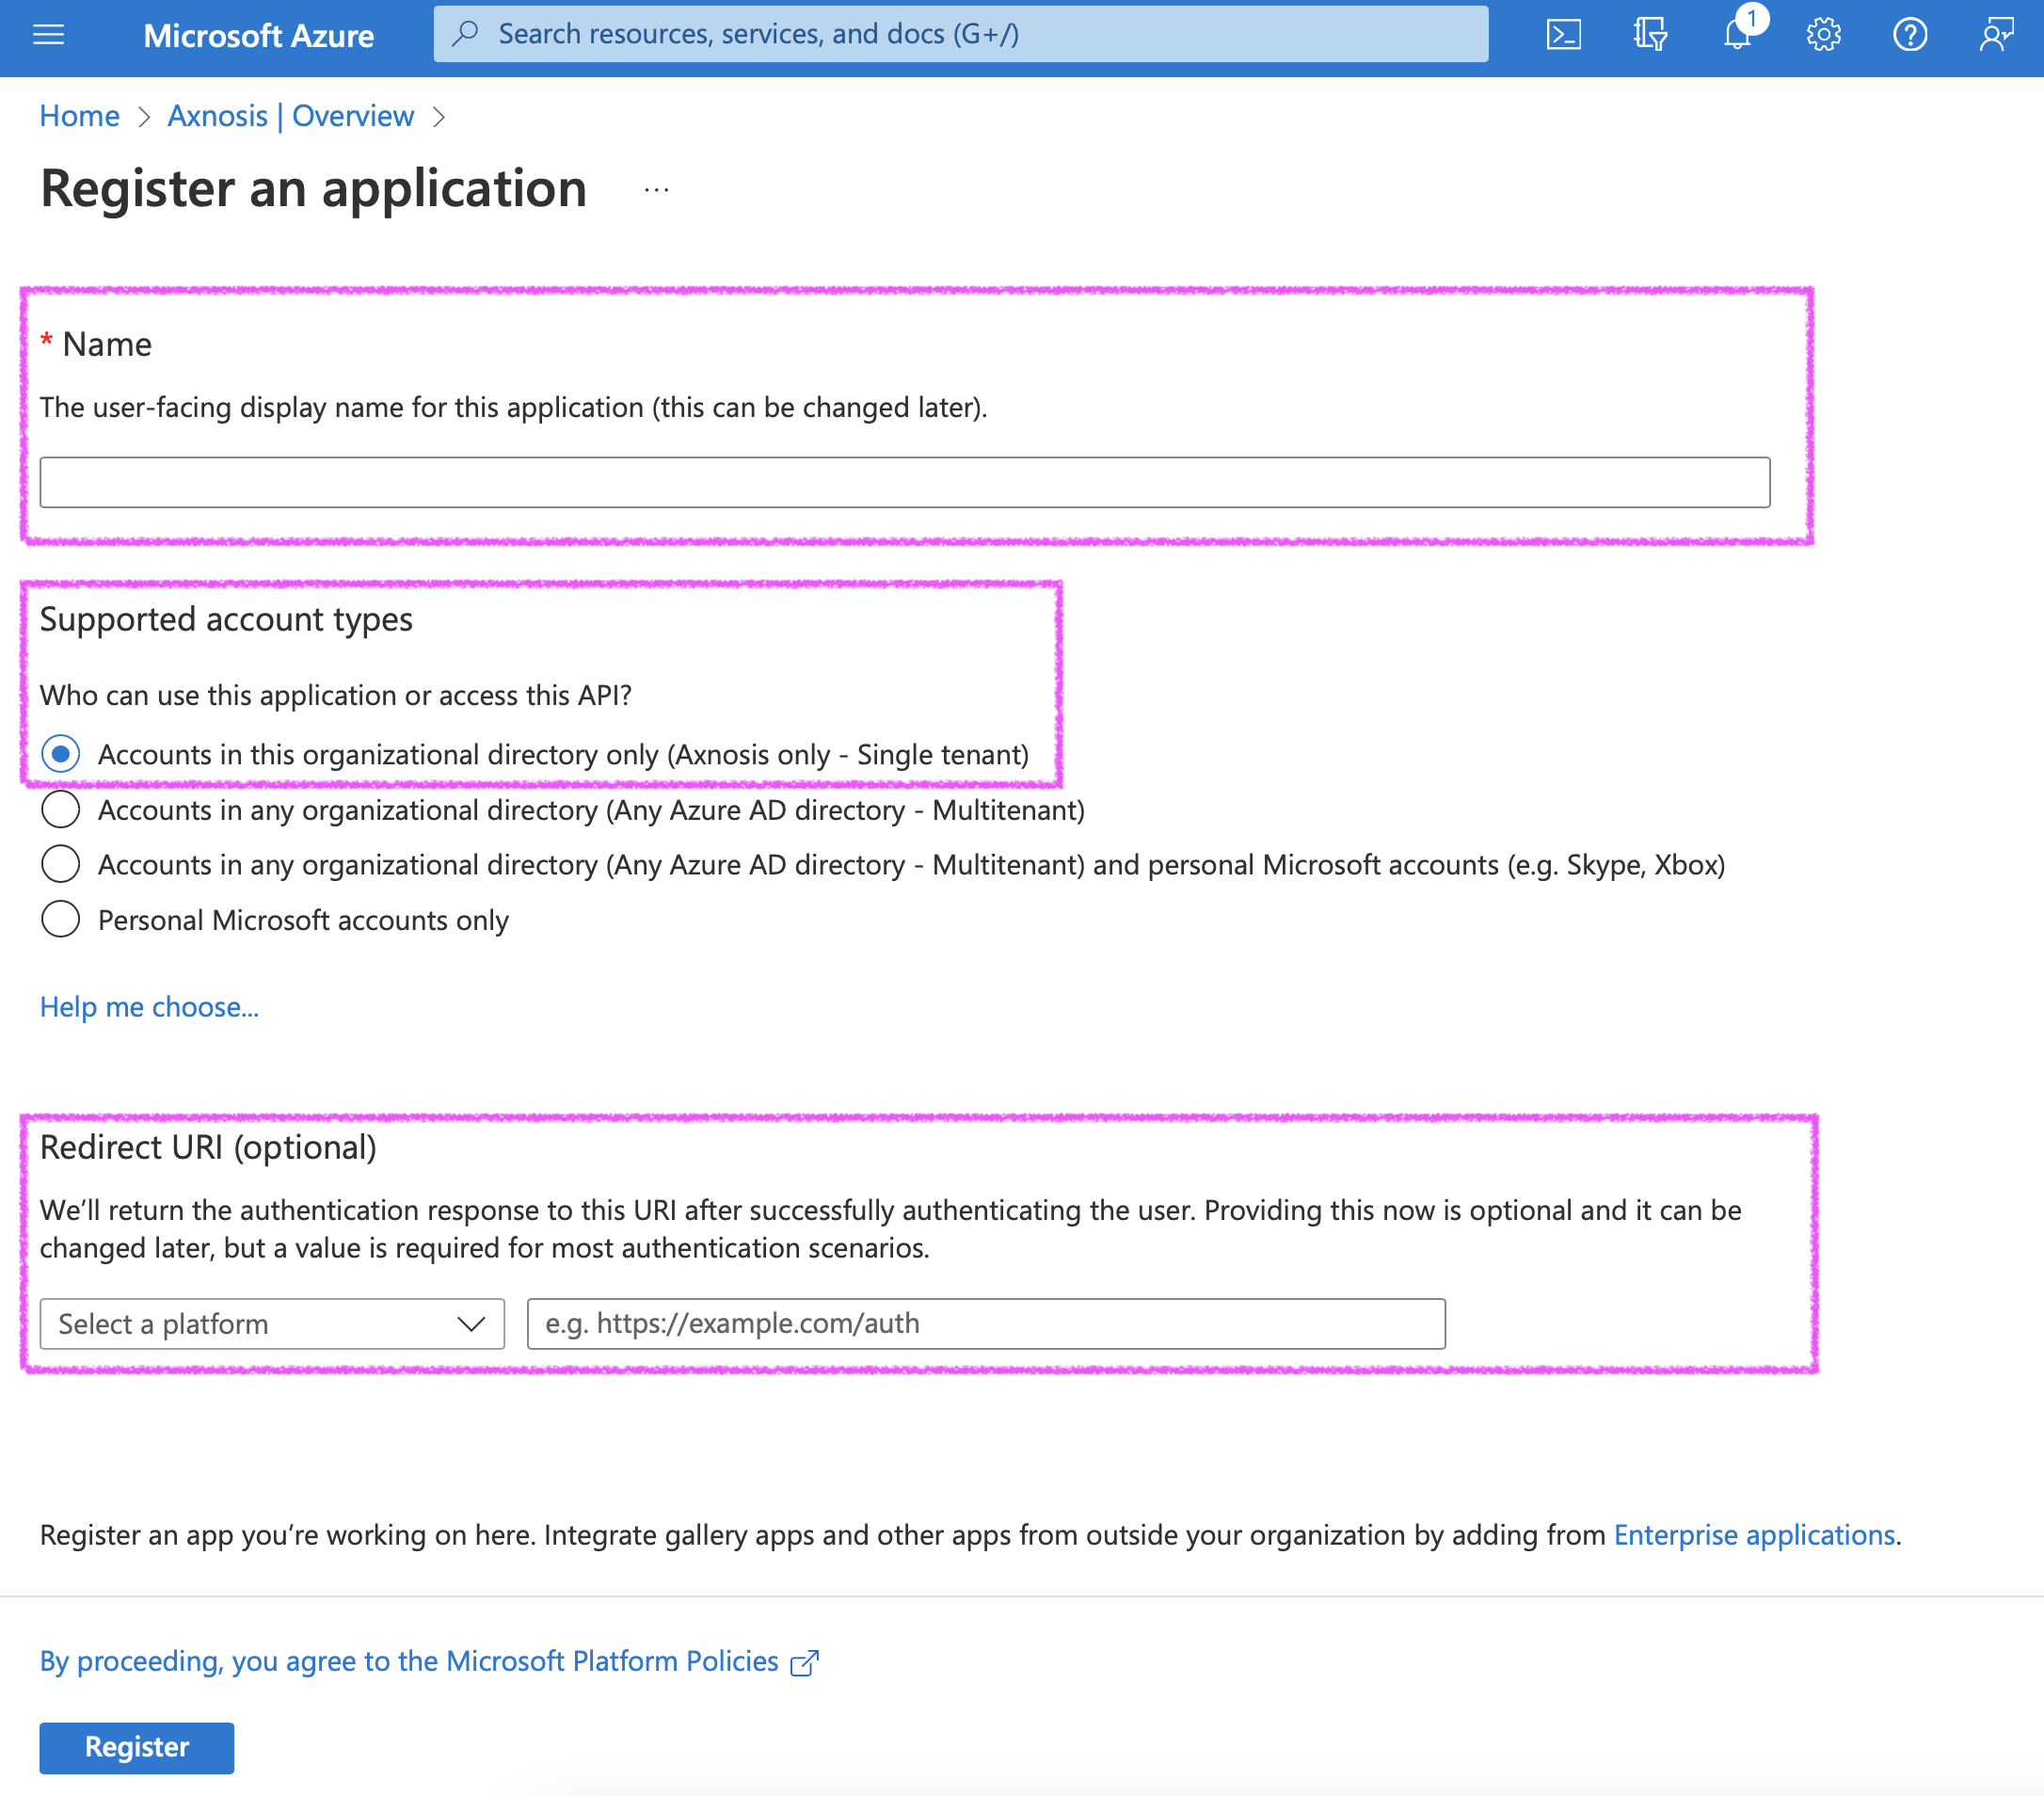
Register an application with the following information:
- Name (required)
- Set: Supported account types to Accounts in the organizational directory only (Axnosis only – Single tenant)
- Leave: Redirect URI (optional) as is, no need to set anything here
- Click on: Register to register application
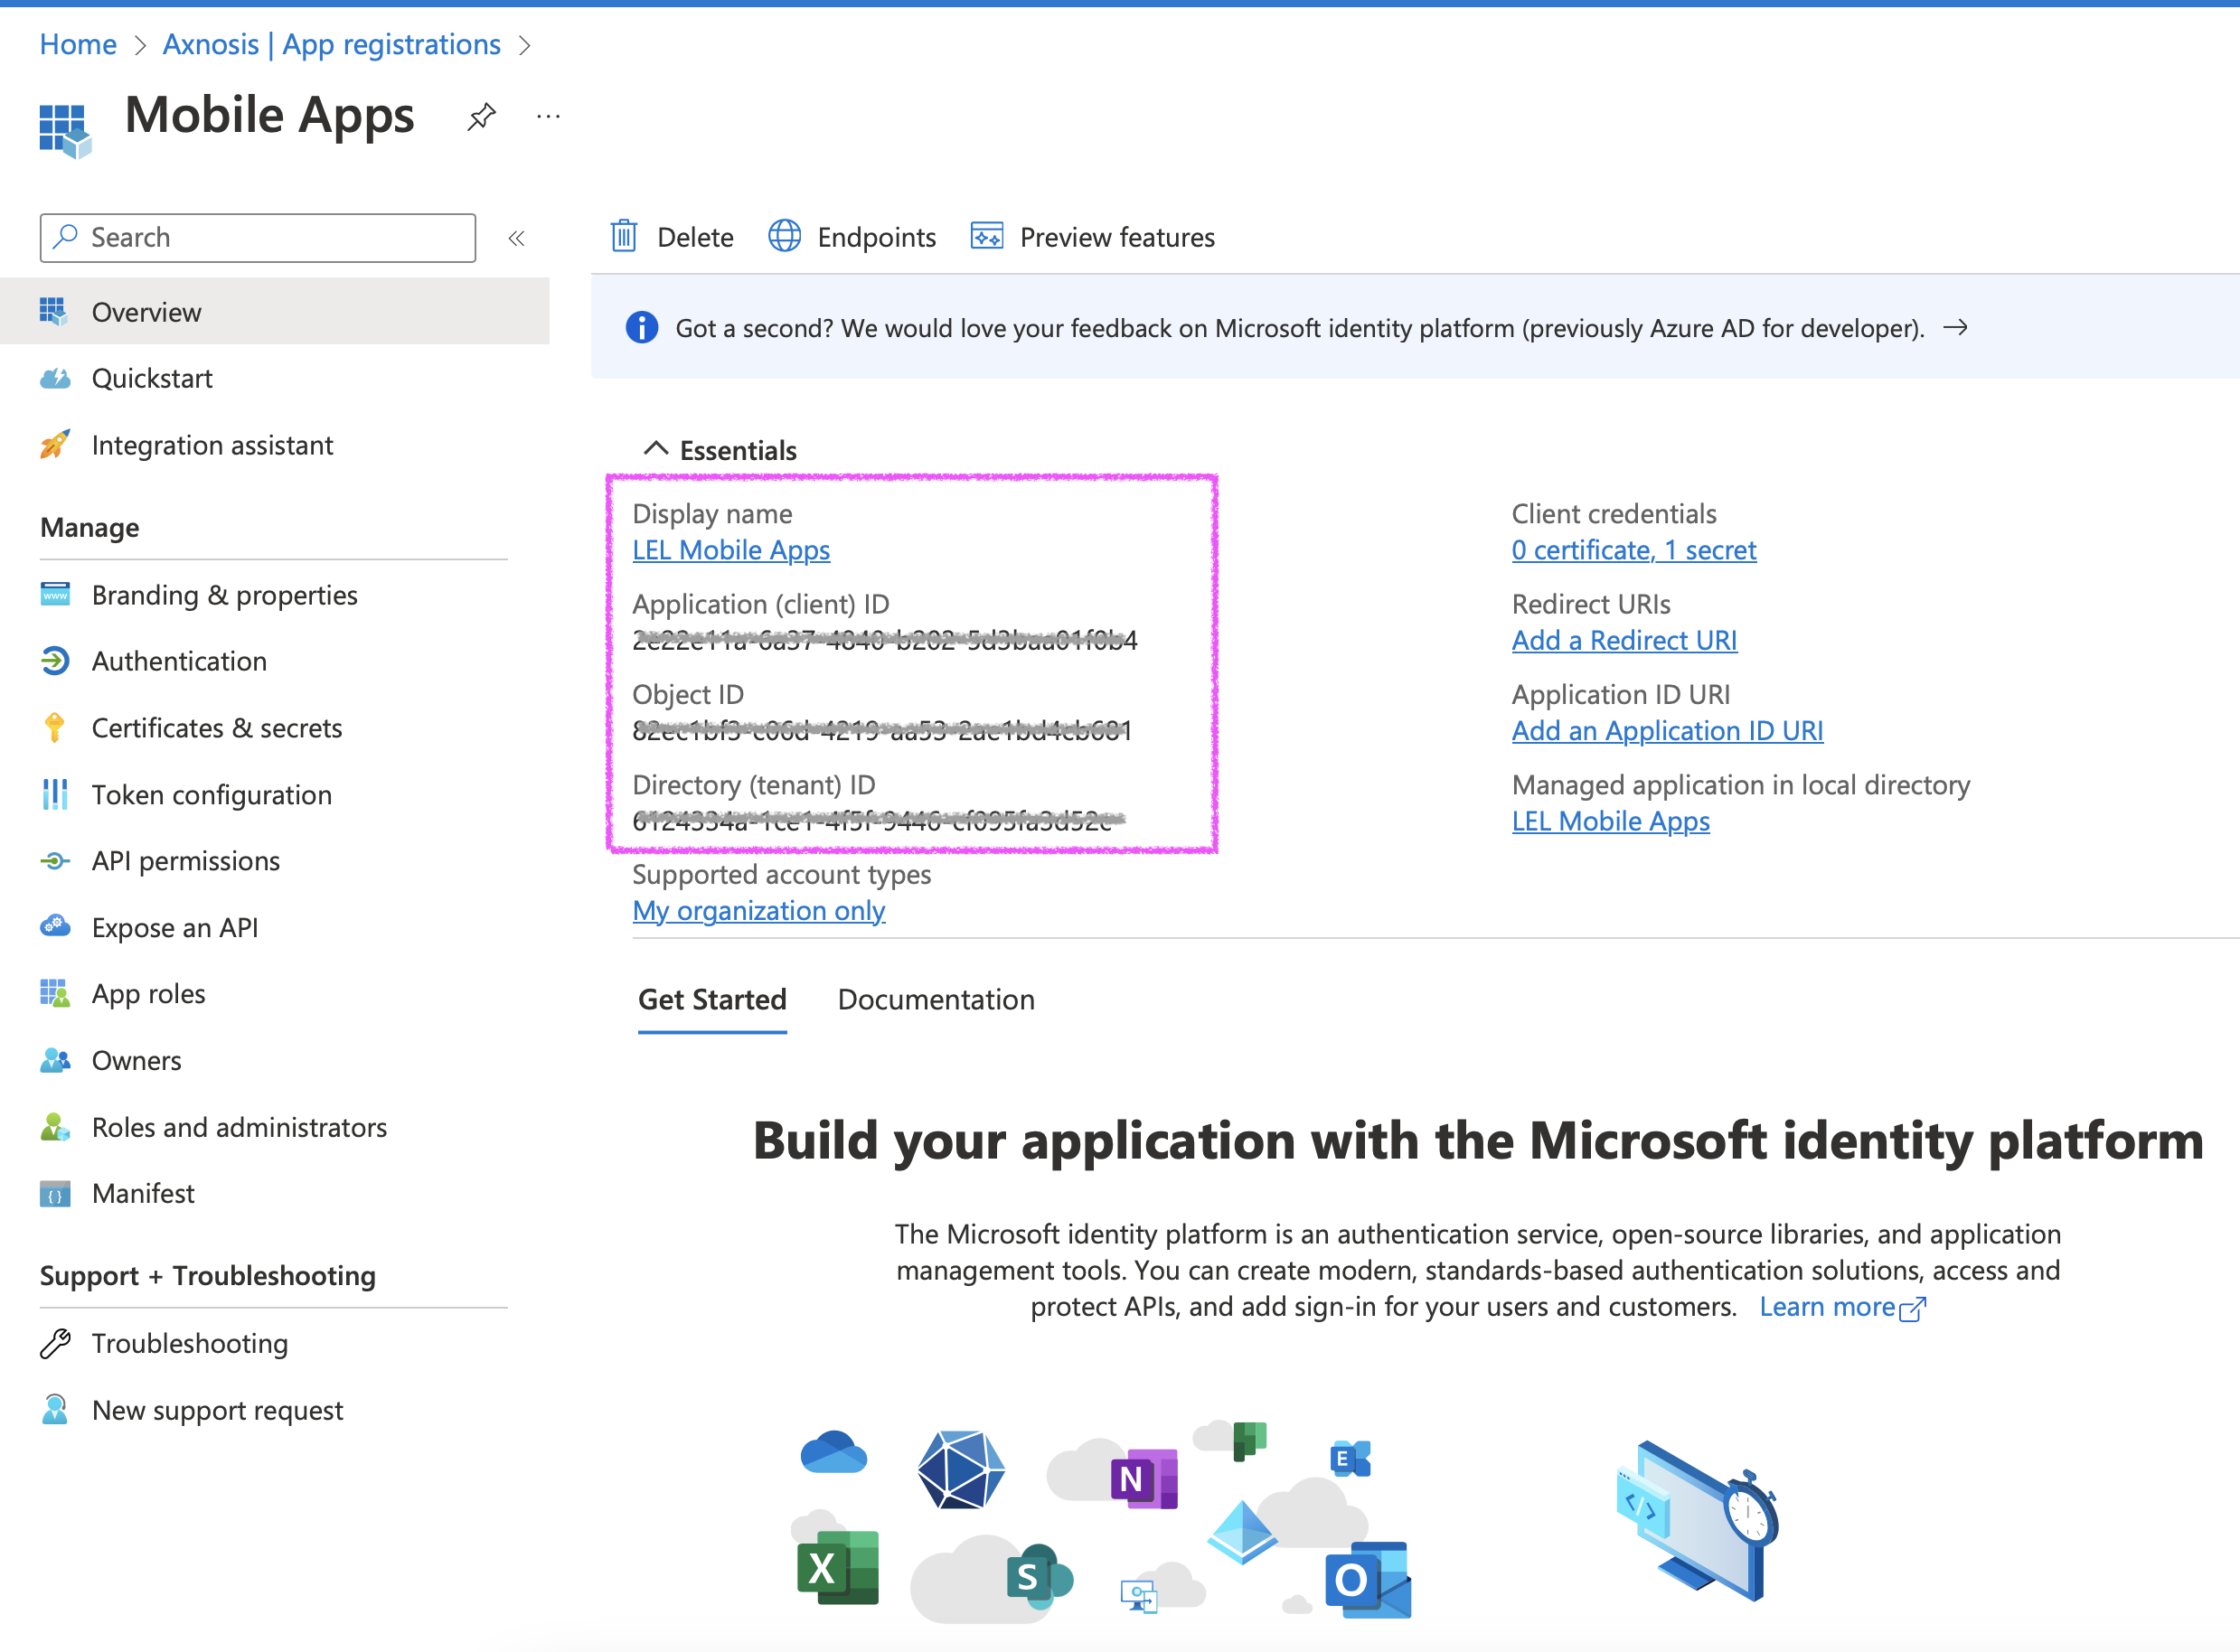
On successful registration, the user will be presented with the following details:
- Client ID
- Object ID
- Tenant ID
To generate the Client secret select the option on the side bar with the name: Certificates & secrets.
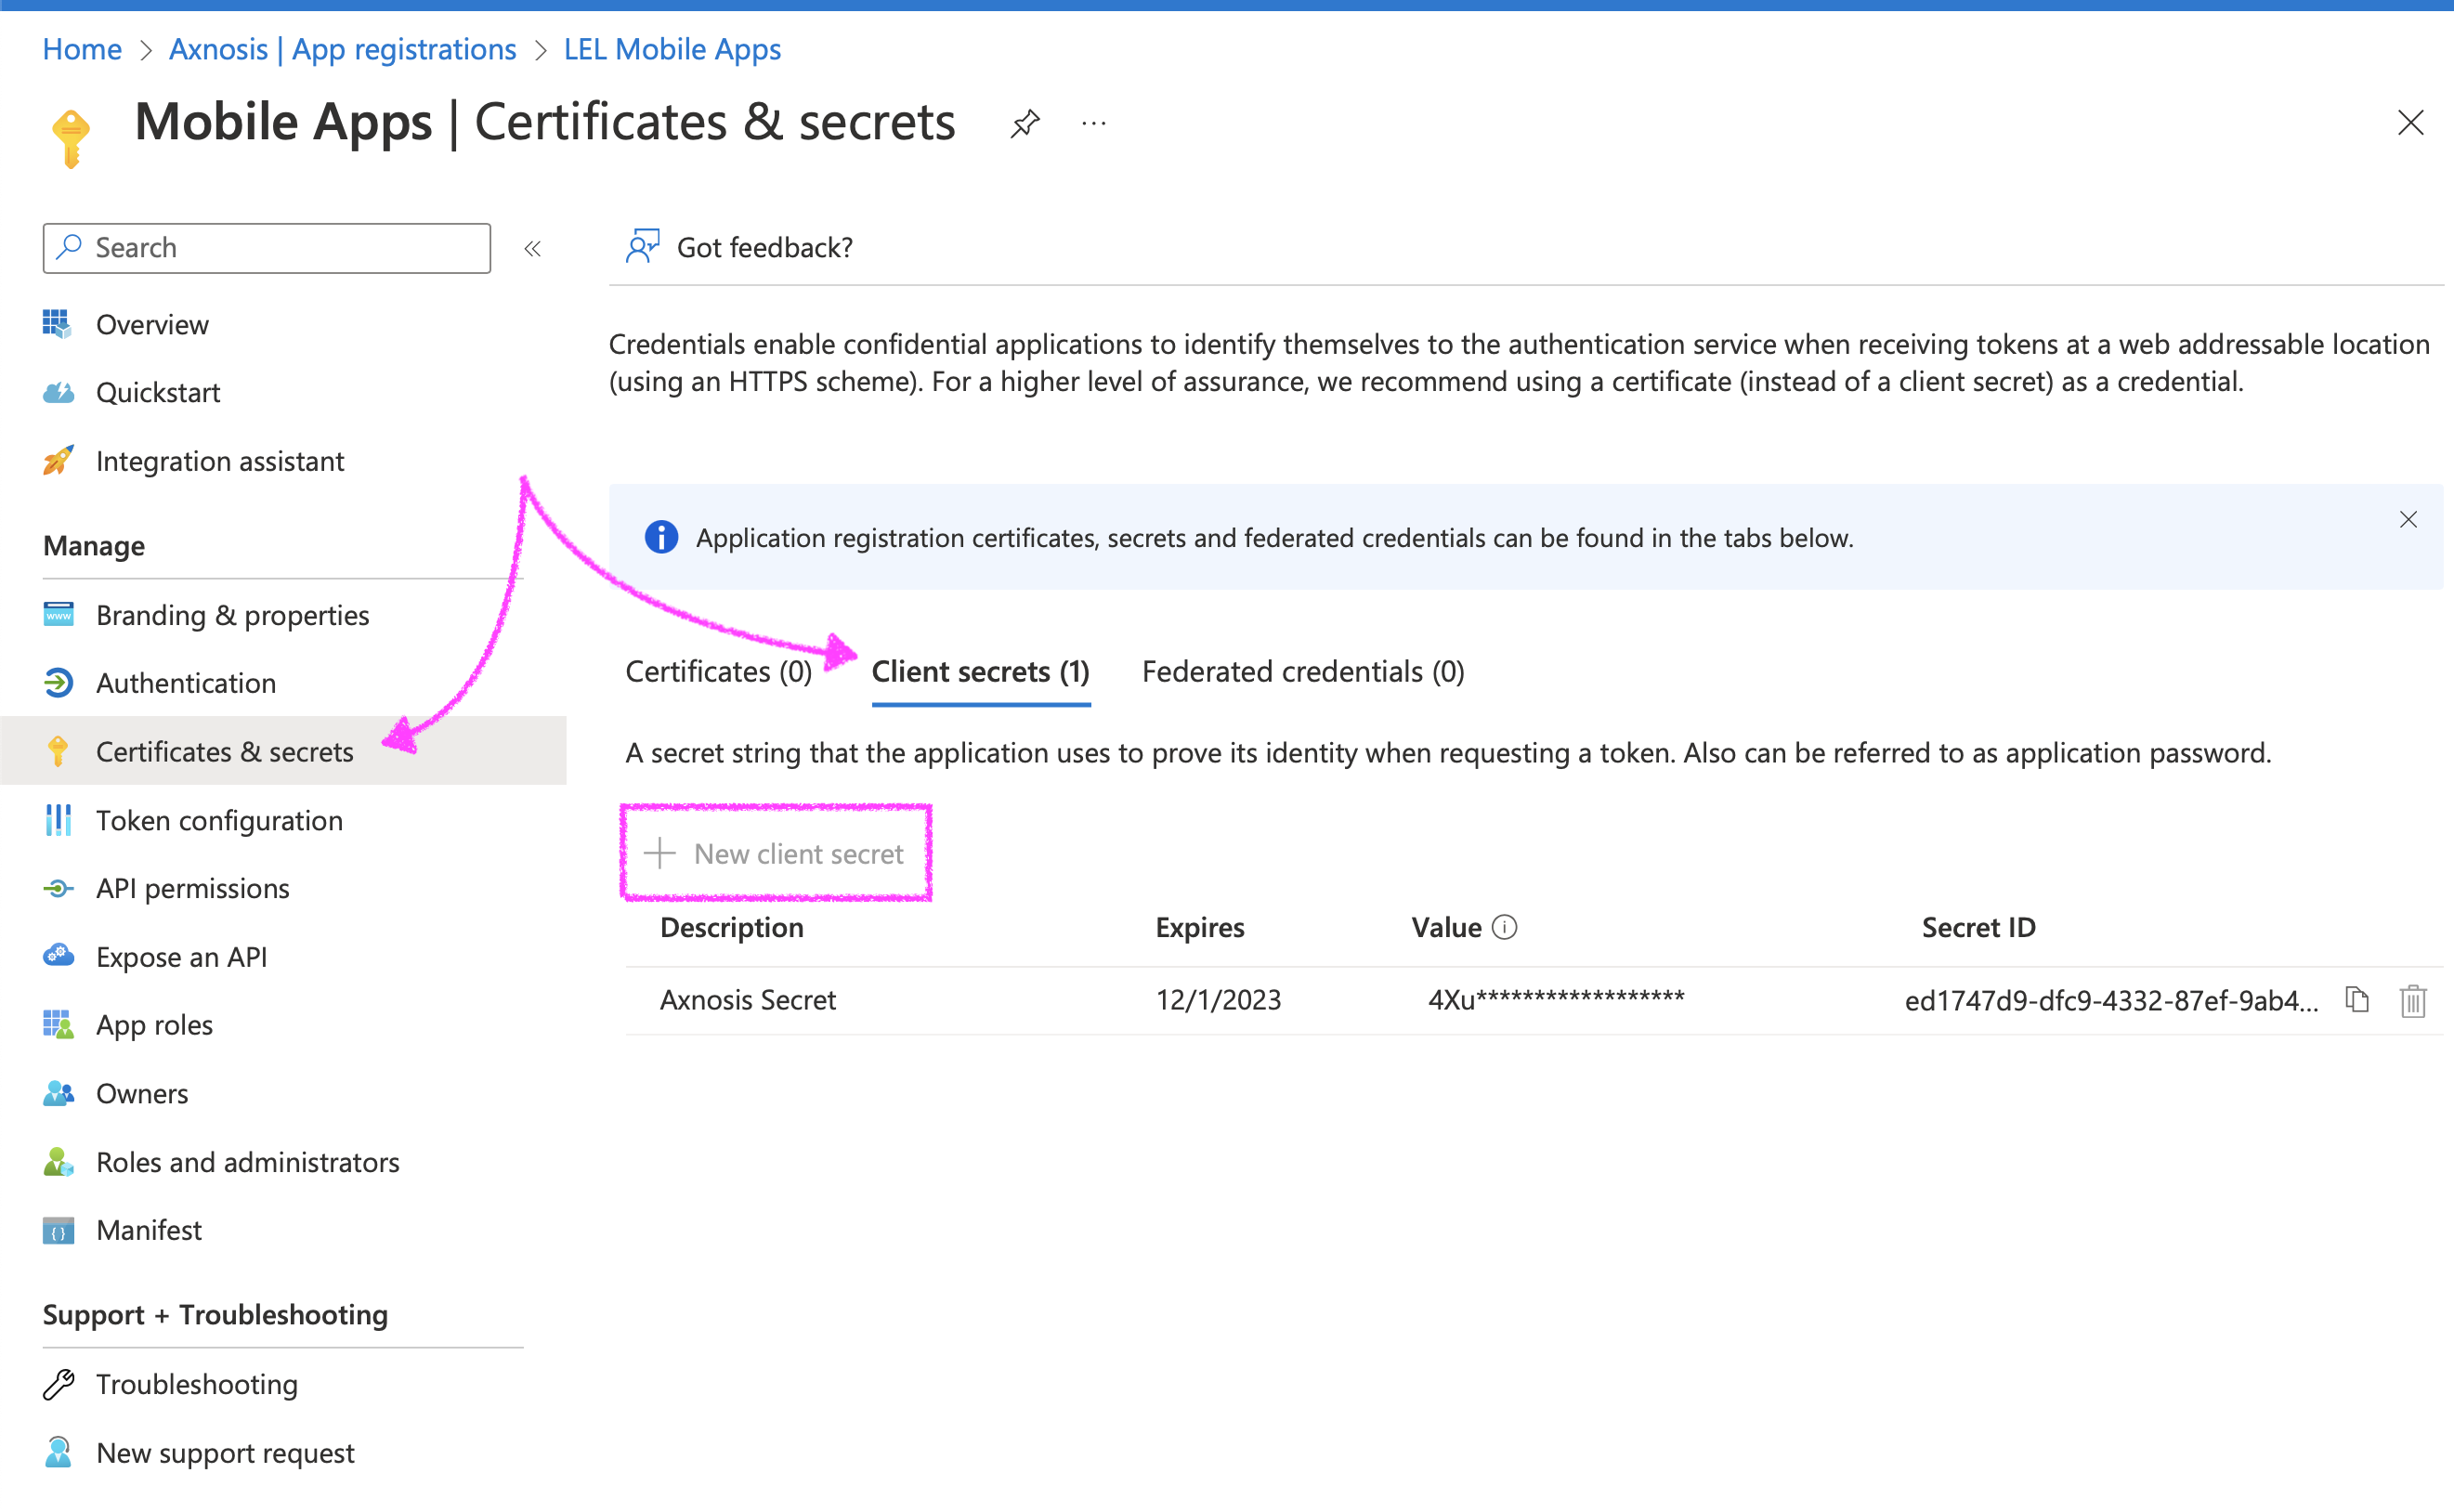
On the view that opens you will have three tabs available to you, select Client secrets.
Here you will need to add a new Client secret by clicking on the New client secret button.
A modal will open to the right-hand side of the page that will ask you to enter a description and select the expiry date of the secret. A longer expiry date/period is better because this Client secret is important to have on the middleware.
When the details have been filled in and the client secret is visible on the screen you should copy it before leaving the view.

The Client Secret will available only the one time. Please double check to make sure you have copied and saved the value.
If the client secret expires, users won't be able to log in to the system. Create a reminder to create a new client secret and update the environment 'Client Secret' value in the middleware frontend before the current one expires
All these details (Tenant ID, Client ID and Client secret) will be needed by the app developers to add to the configuration files of the application to enable the application to authenticate against the correct Azure instance.
¶ 2. Create new VM for the Middleware
Middleware, is needed for all communication between the mobile applications and Dynamics 365 F&O. The Middleware can be installed on any Internet facing Server with Node JS.
Complete the following steps to create a Azure hosted Virtual Machine.
Steps to create a new Virtual Machine:
- Login to https://portal.azure.com
- In the Search Bar, type: Virtual machines and select Virtual machines
- Click Create Virtual machine
¶ 2.1 Complete the basics
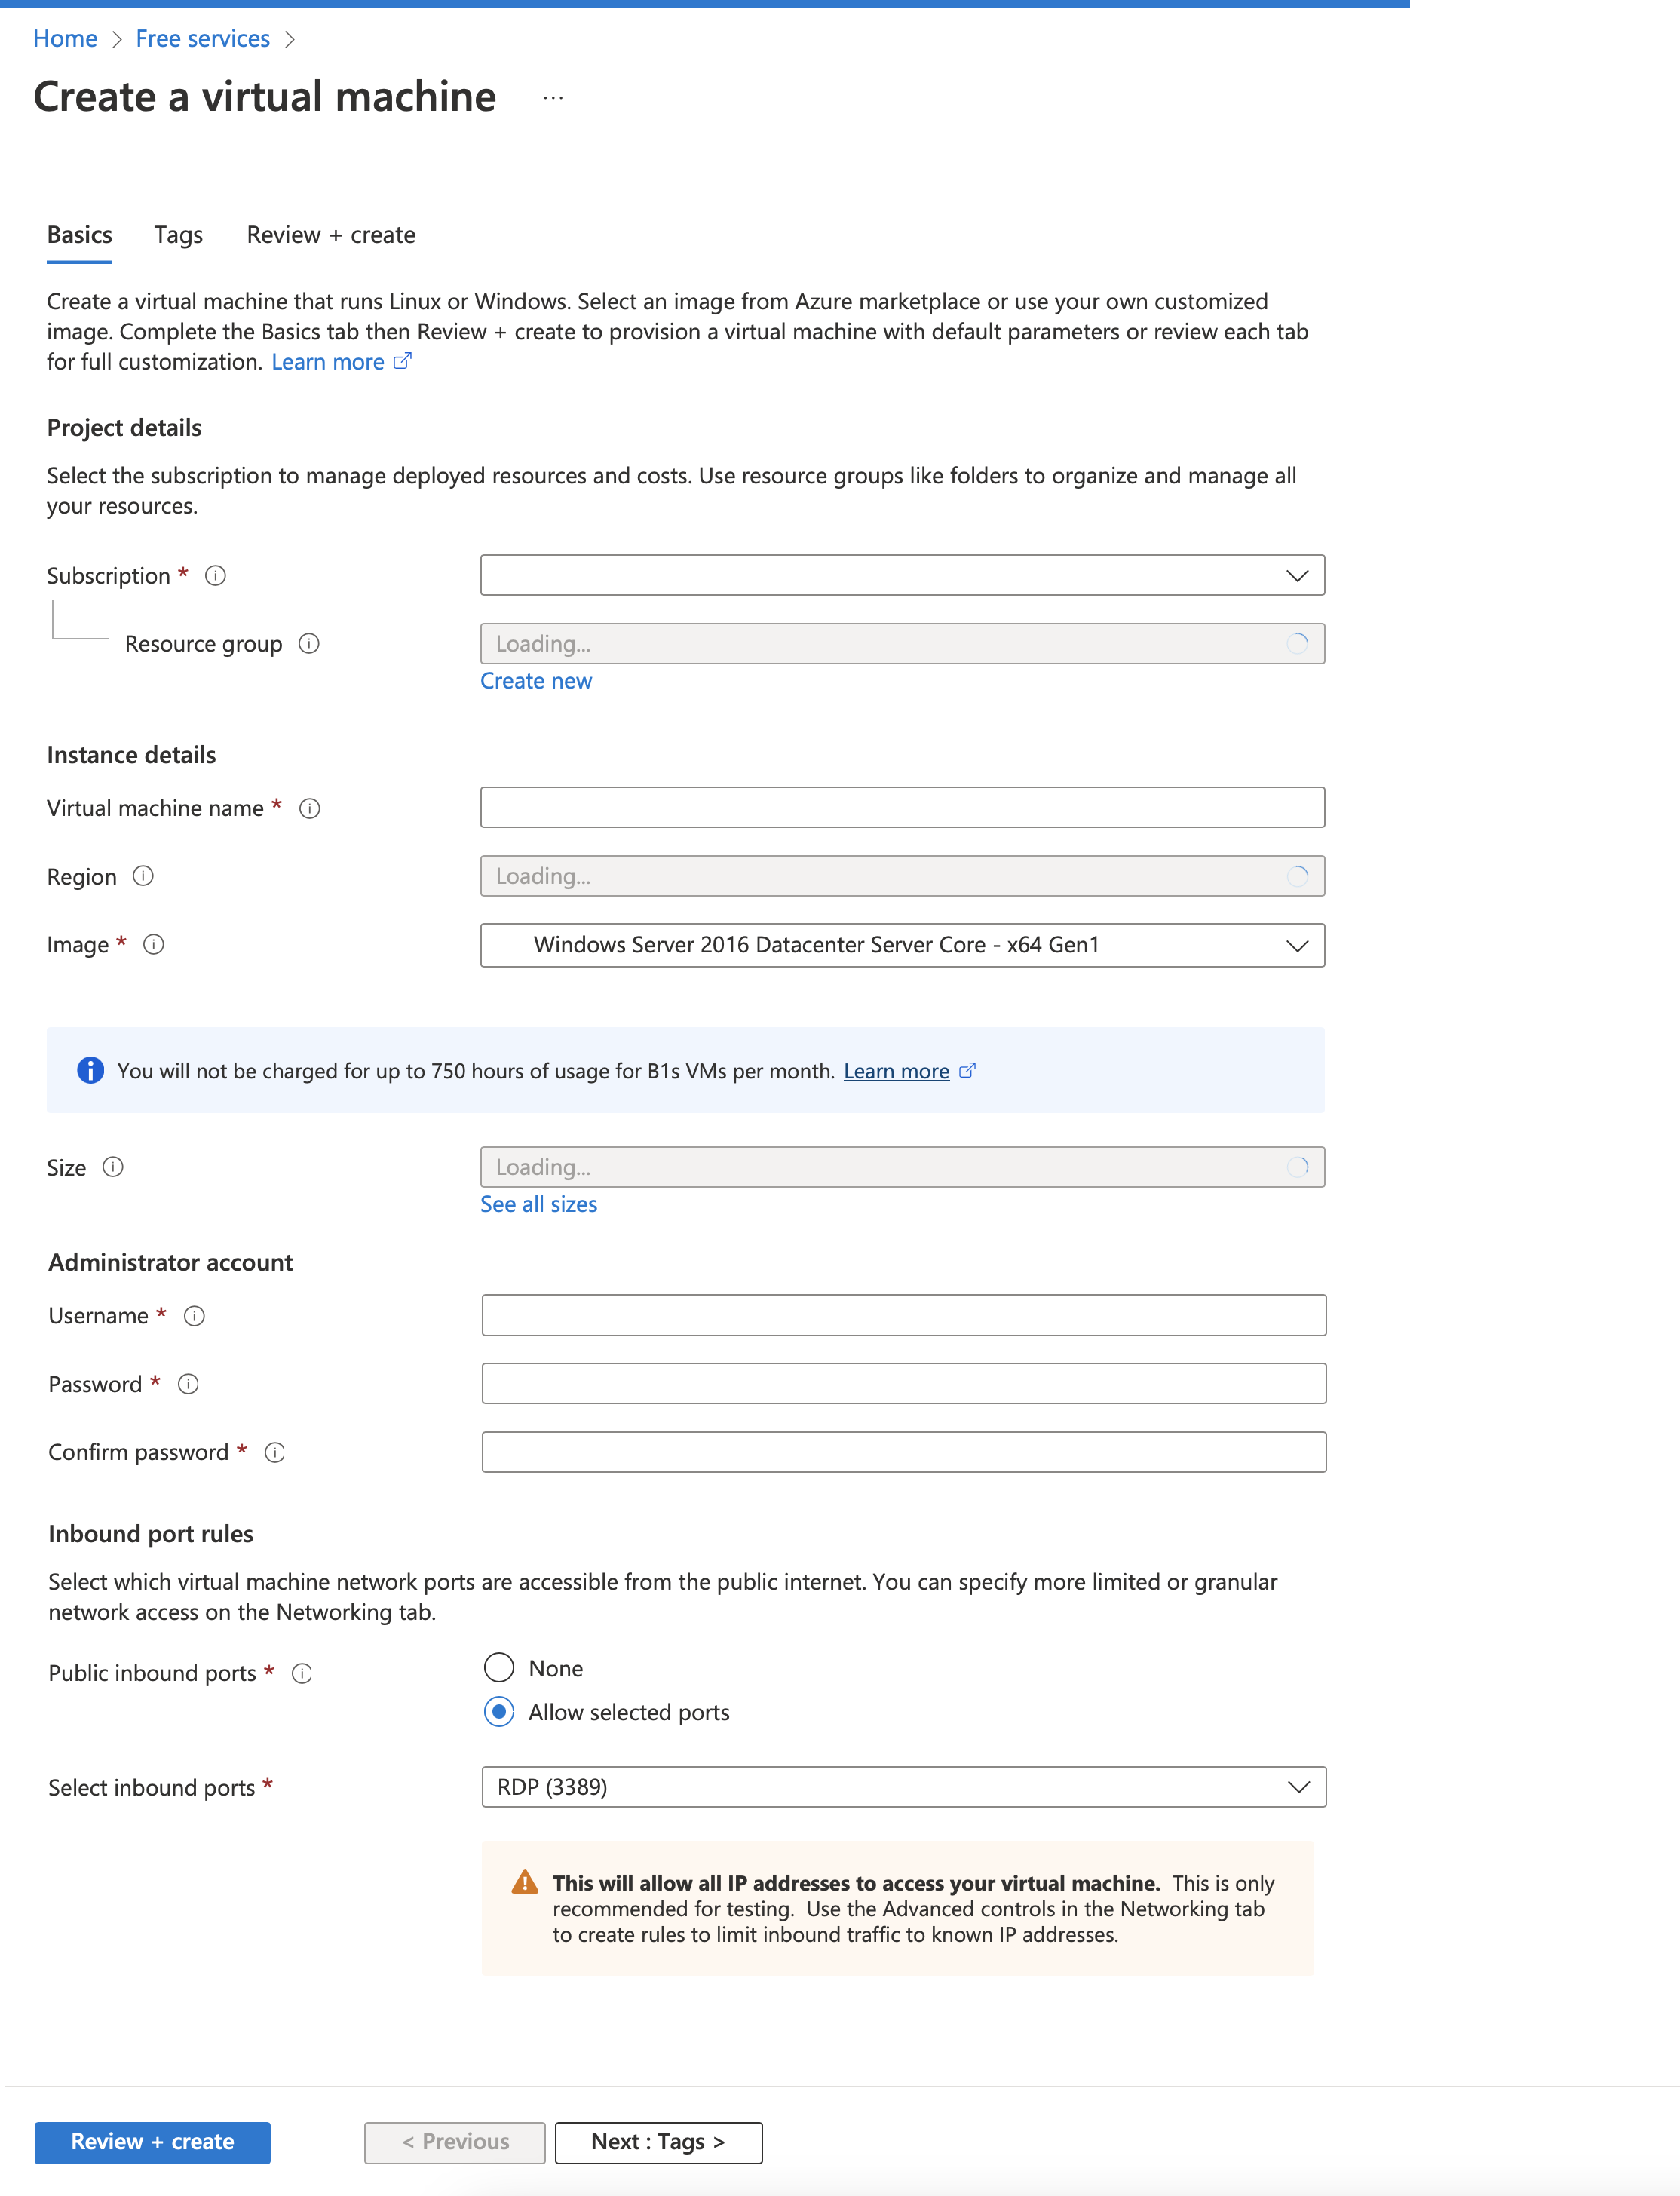
Image: Windows server 2022 Data Center: Azure Edition – Gen 2
Size: D2s_V3 – 2 vcpus 8 GB RAM, Data Disks: 4
Inbound ports: 3389 (RDP), 80 (HTTP), 443 (HTTPS)
¶ 2.2 Create the Disks
We Recommend the following minimum settings; OS disk type: Standard SSD & Encryption type: (Default) Encryption at-rest with a platform-managed key
- Data disks:
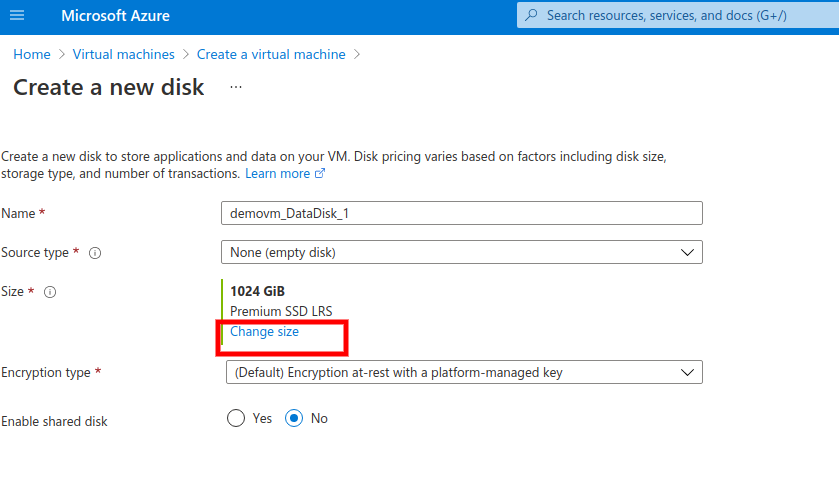
Minimum Settings:
- Source type: None (empty disk)
- Size: Standard SSD LRS 32 GB
- Encryption type (Default)
¶ 2.3 Networking
- Click Review + create to complete the process
- Once created, please retrieve and store the ip address of the server for later use when setting up the domain.
- Navigate to the newly created Virtual Machine
- Click on the Tab on the left: Networking
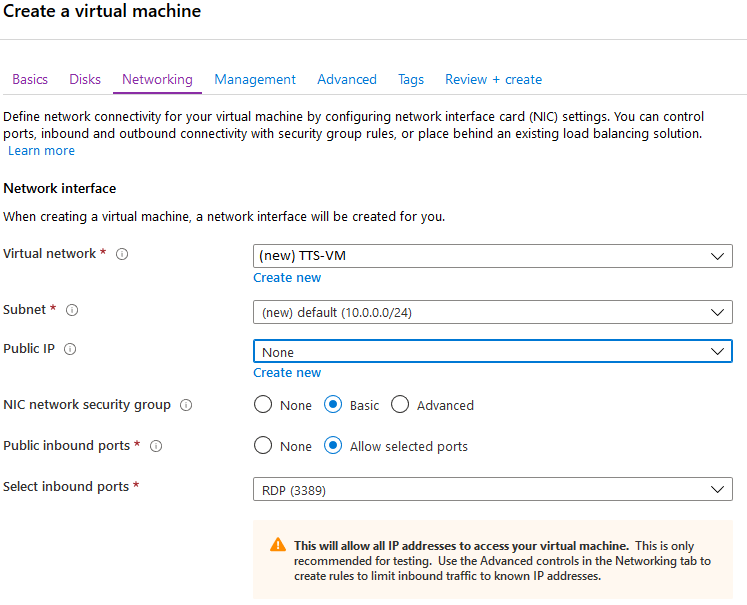
Note the IP address stated under: “NIC Public IP:”
¶ 3. Install IIS on Middleware VM
Complete the following Steps to install Internet Information Services (IIS).
- Open Server Manager
- Click Add roles and features:
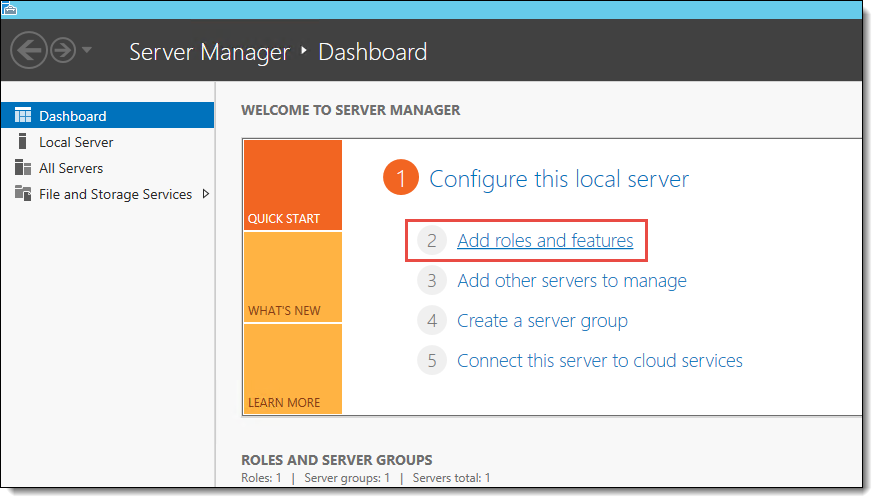
- Click Next until you reach the Server Roles Tab
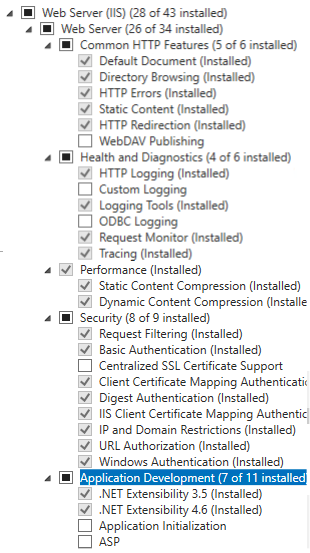
- Select the following:
¶ 4. Install node.js IIS on Middleware VM
Complete the following steps to install NodeJS onto the Virtual Machine:
- Download the latest NodeJS from the internet; https://nodejs.org/en/download/
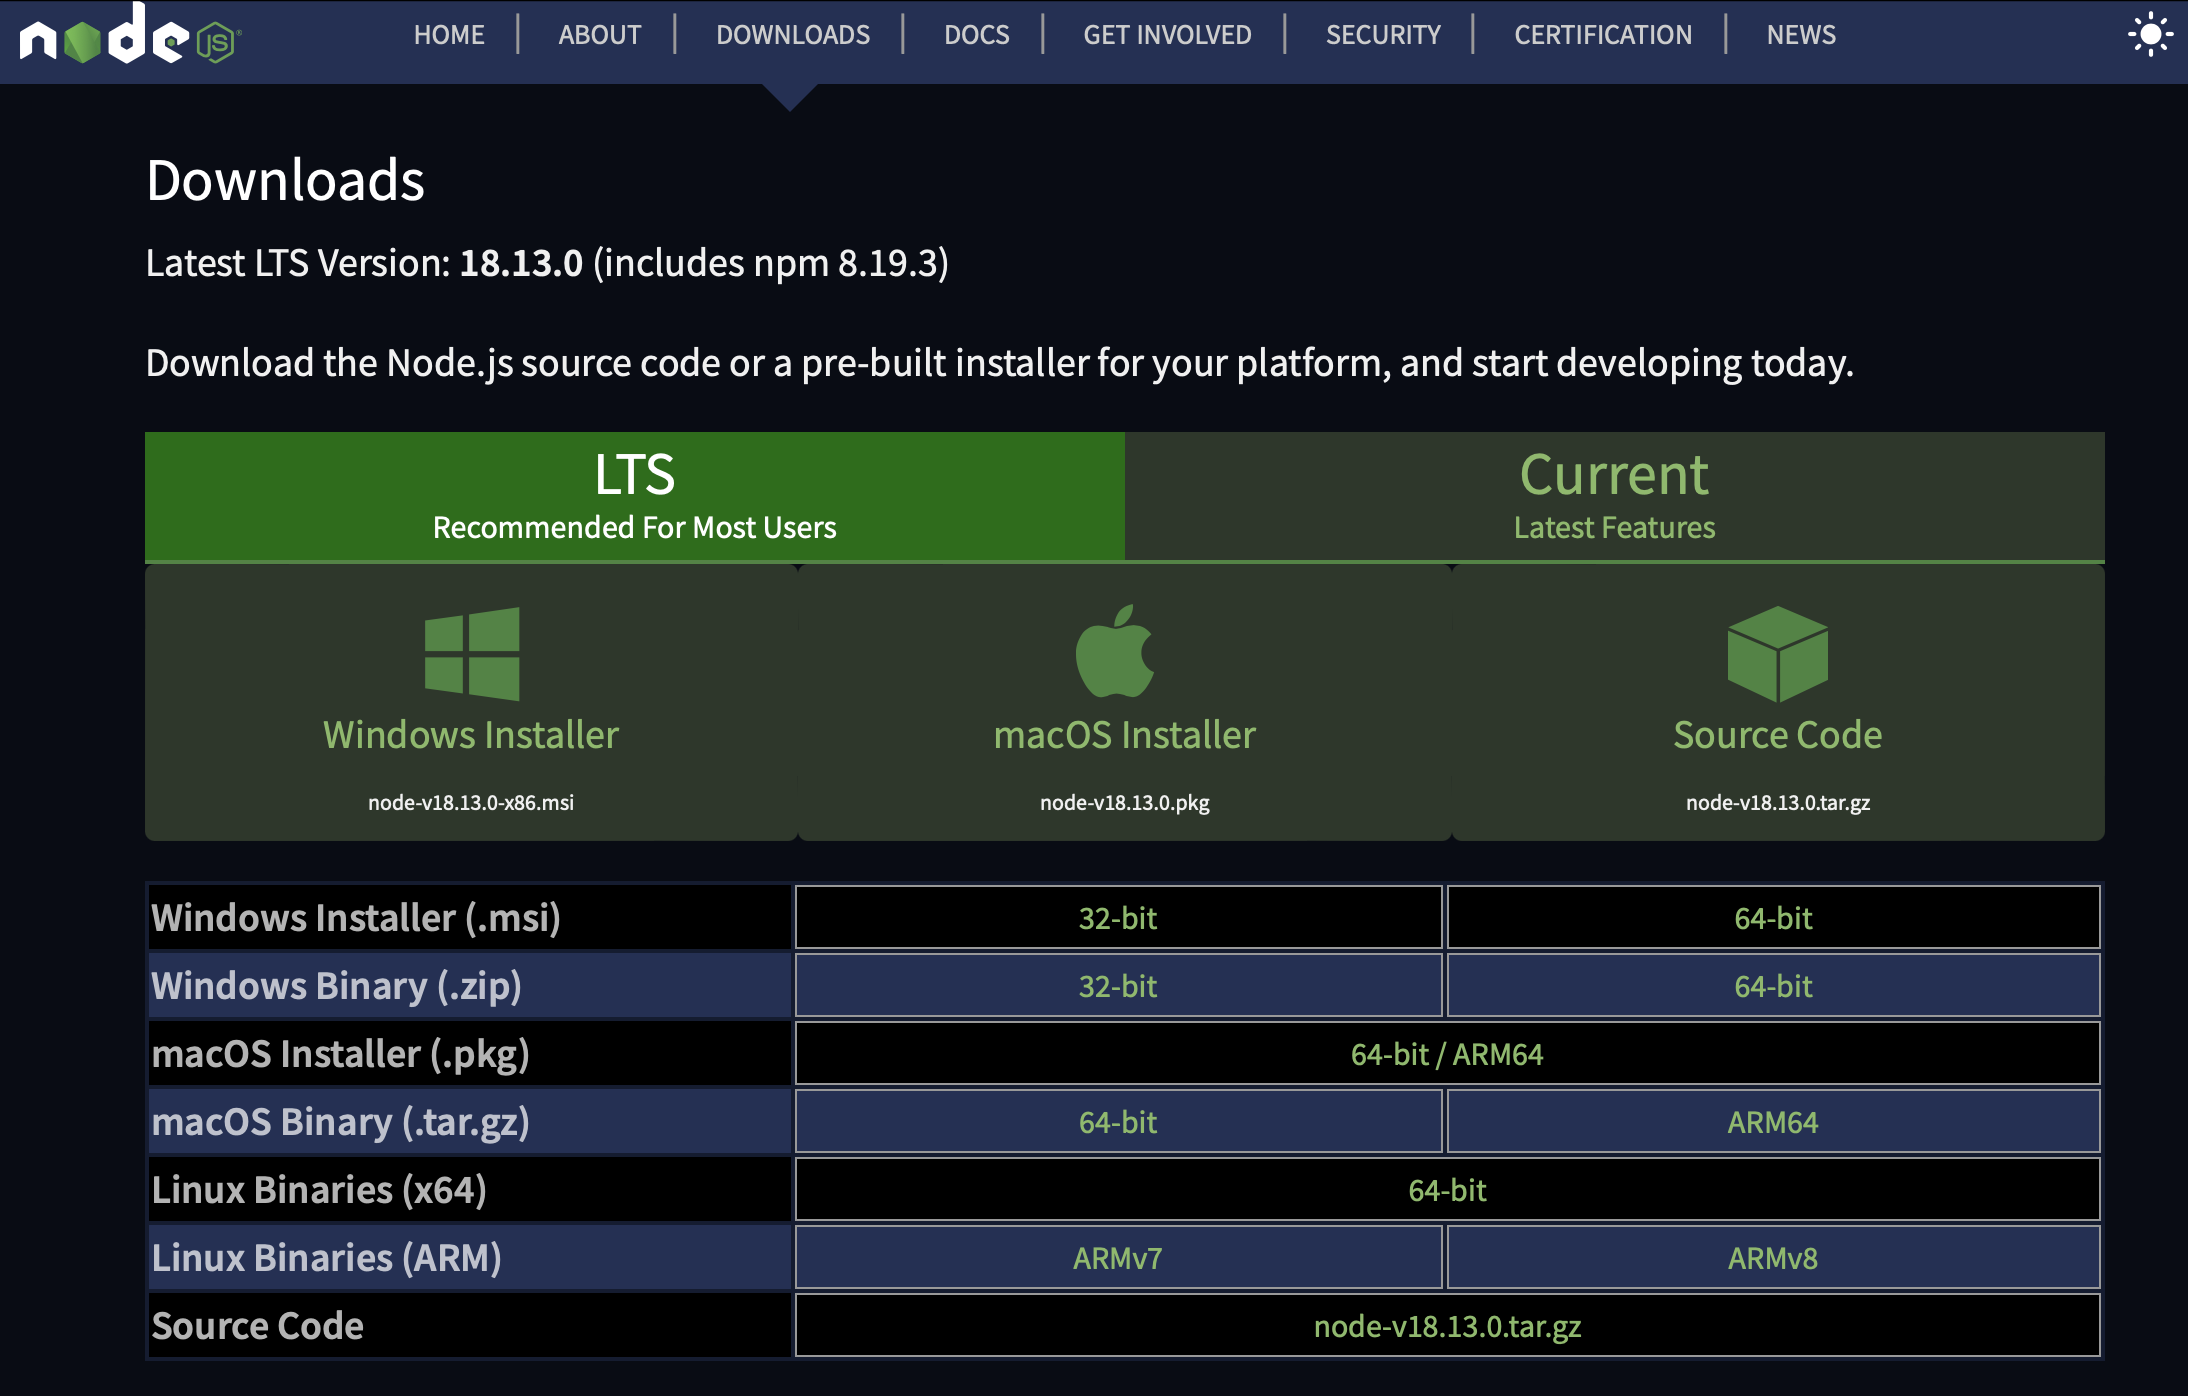
- Select the Windows Installer (.msi).
- After download, execute the .msi file.
- During the installation, use all default settings, click the Next button until the installation is completed.
¶ 5. Install latest version of Middleware
- Contact Axnosis support to install the Middleware.
¶ 6. Loopback to IIS
¶ 6.1 Setup IIS; Certificates
Please compete the following steps within IIS.
- This process is outside the scope of this document. You can either purchase a certificate, or acquire a certificate for free through your preferred website.
We have successfully used the website below to acquire a free certificate:
https://miketabor.com/how-to-install-a-lets-encrypt-ssl-cert-on-microsoft-iis/ - If you do decide to purchase a certificate the steps will include:
- Open Internet Information Services (IIS)
Select Server Certificates from the menu:
¶ 6.2 Setup IIS; Websites & UrlRewrite
Please compete the following steps within IIS.
- Open Internet Information Services (IIS)
- Navigate to the “Default Website” within IIS. You can also create a new Web site.
¶ 7. Domain name setup
As part of the setup of the Mobile Middle Ware, you need to create a new Domain Name, and Point to the new Azure Server. This setup will be different depending on your Hosting Company / Domain name Registrar.
In this example we will assume the new domain name is: middleware.YourDomain.com
The process you need to complete is:
- Login to your Registrar.
- Navigate to the Domain name Server Section (DNS)
- Create a new C-Name entry for your Domain. For example:
- Name: middleware.YourDomain.com
- IP: 123.456.78.90 – use the ip address as specified earlier in the section where we created the Virtual Machine.
- Save this setting. This can take 24 hours to update before you are able to verify this setting.
- Please verify by running the following command line:
Ping middleware.YourDomain.com
¶ Working with the Middleware
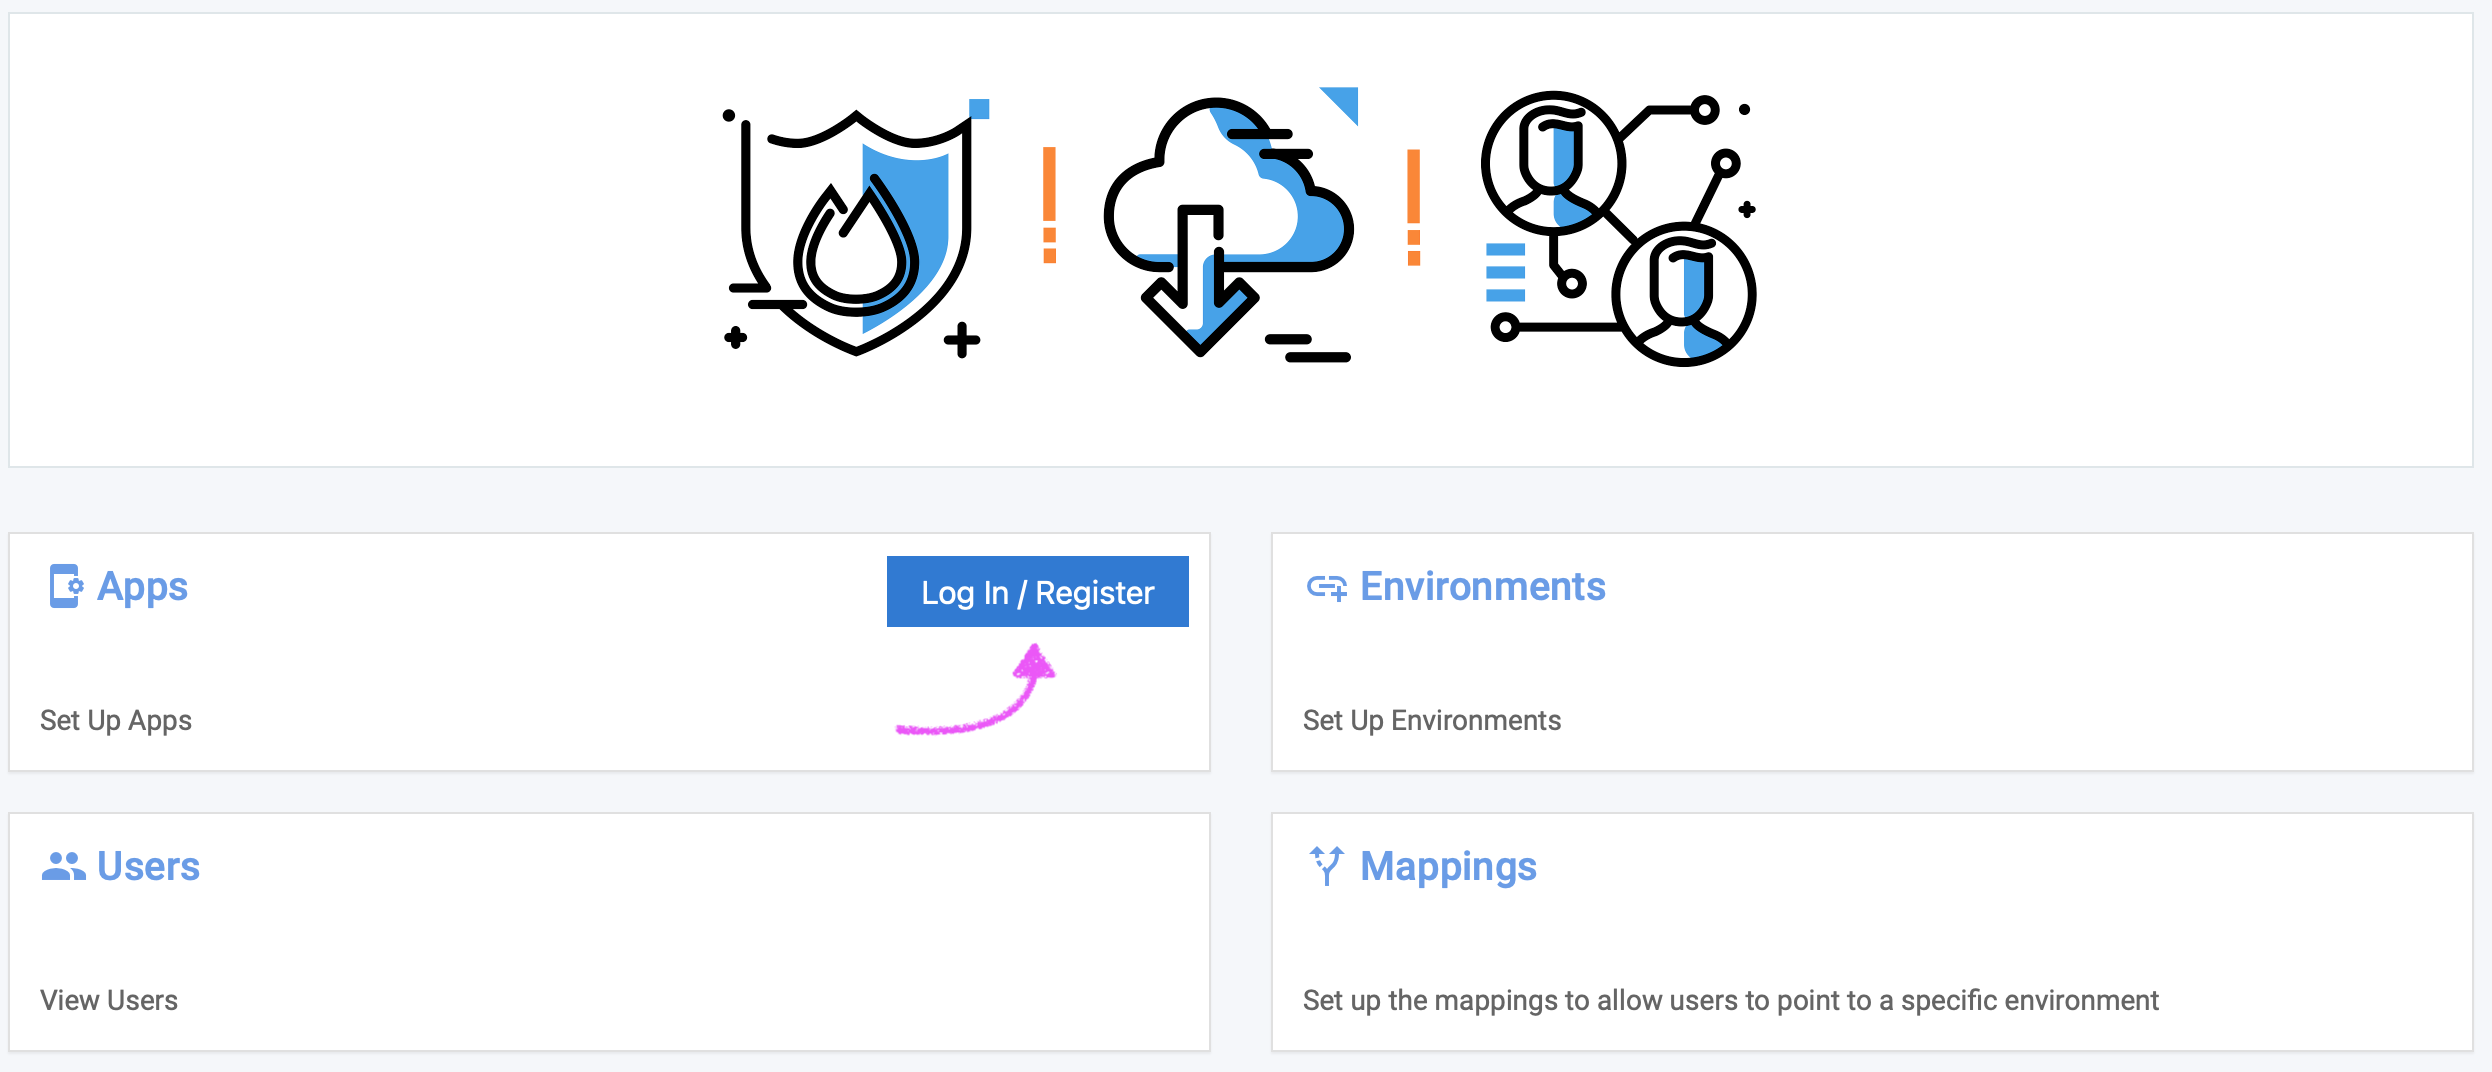
¶ 8. The Homepage
The mw.axnosis.com website will be used to “manipulate” the Dynamics Environments e.g., newgrc/newaxn, that the middleware will connect to for different apps.
When a user makes a request to the middleware, this setup will be read from to determine how to continue with the logged in user.
- Go to: https://mw.axnosis.com
- Click on the login/register tile
- Enter your Username and Password credentials
- Click on the Login button
¶ 9. Other pages
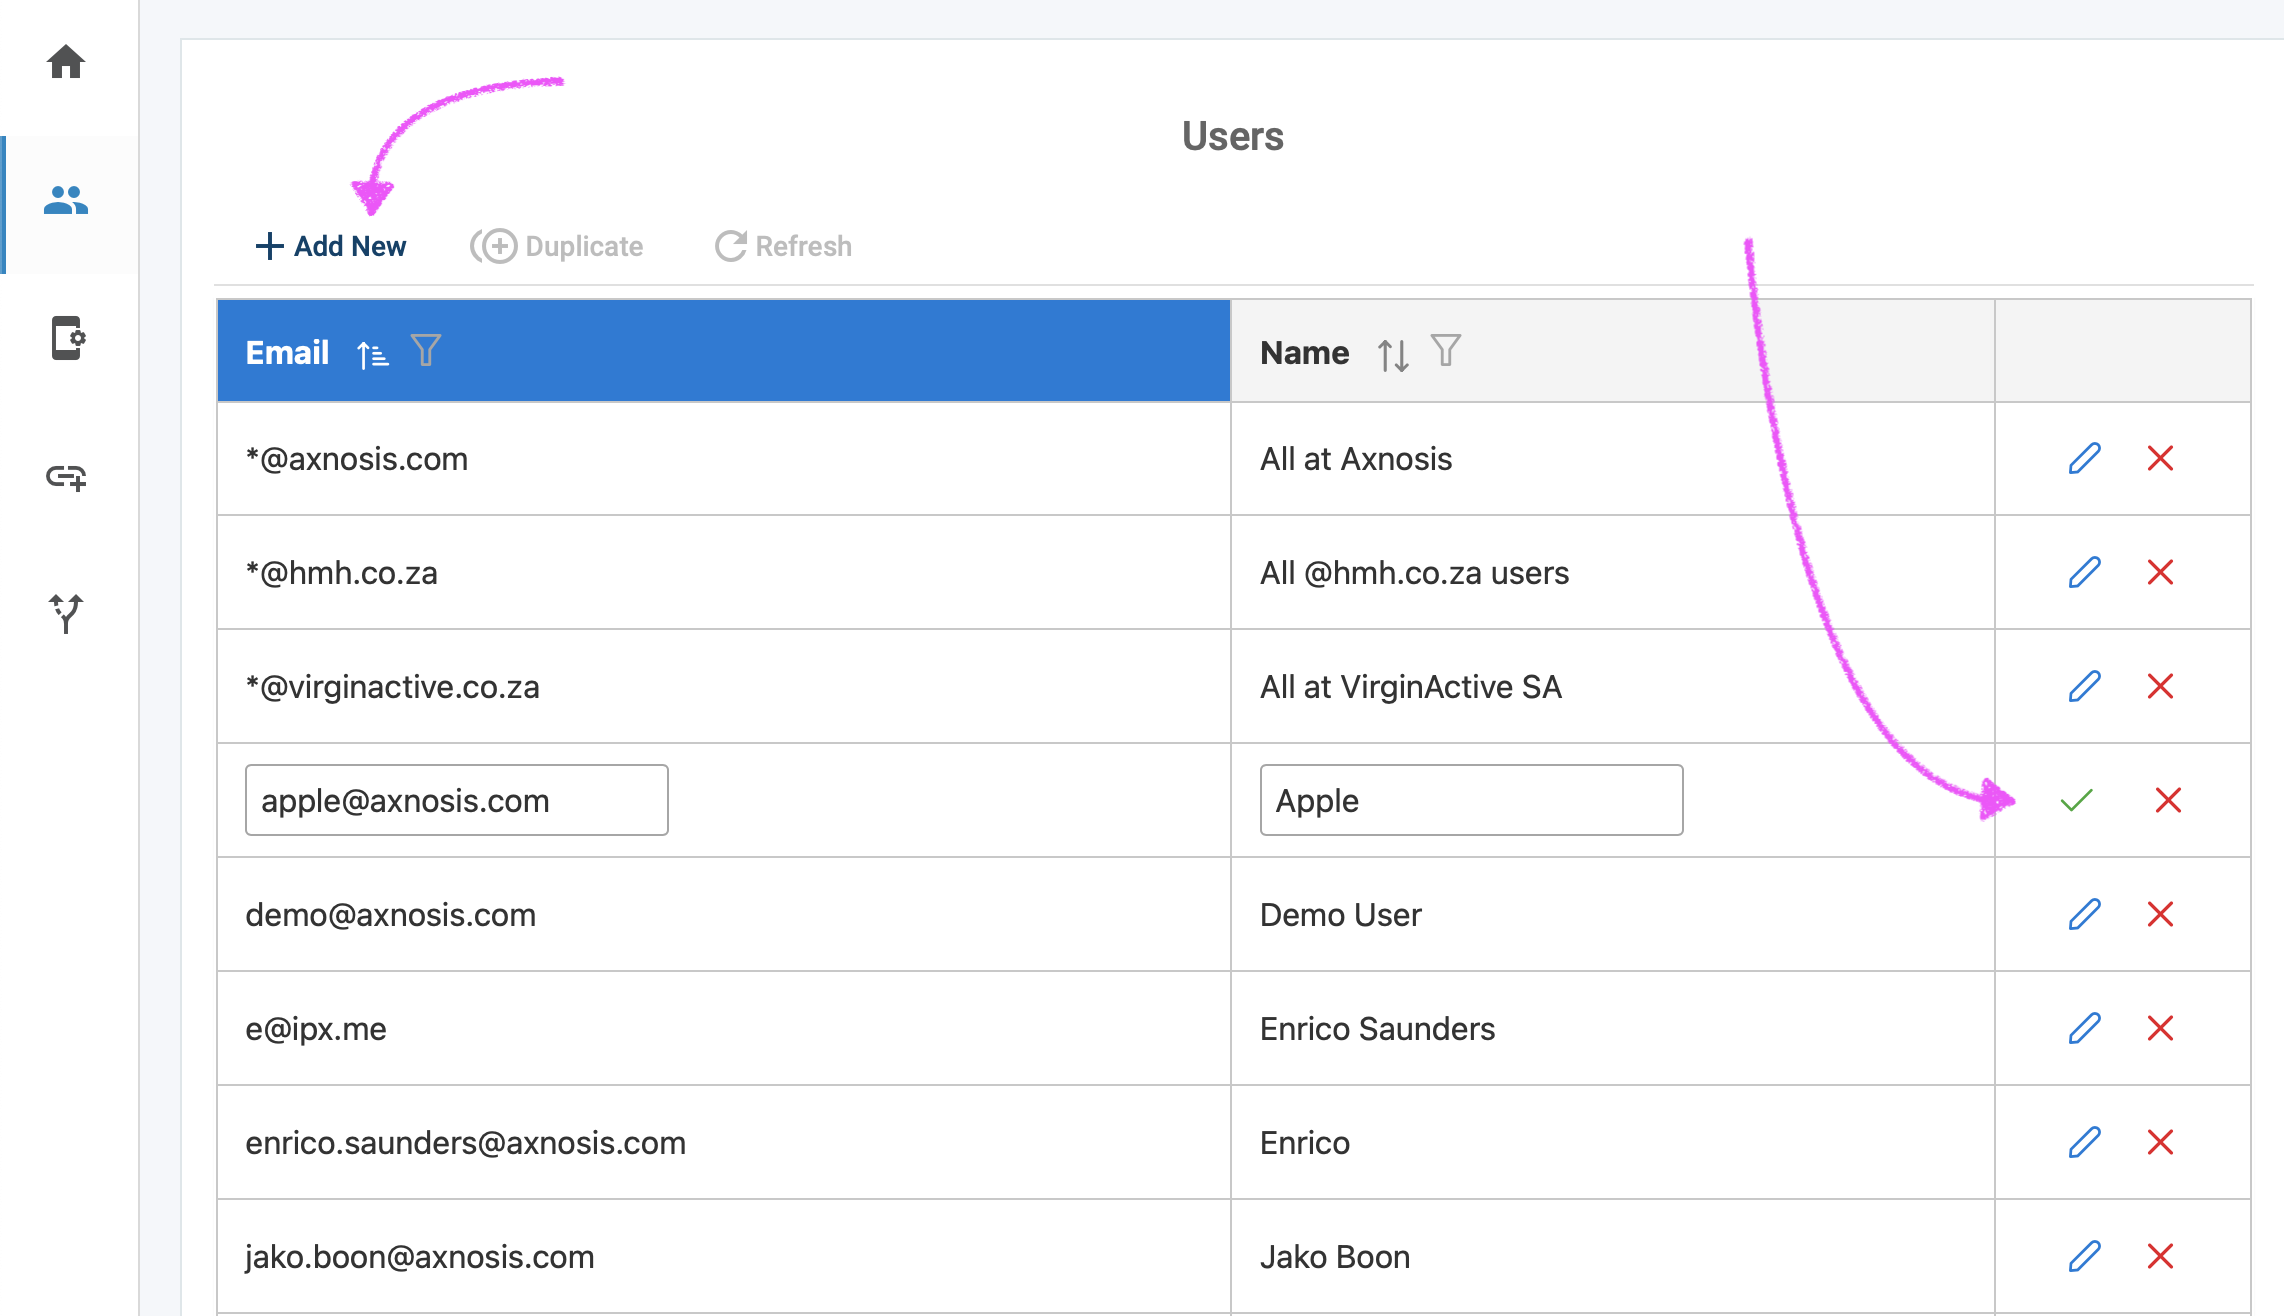
¶ 9.1 Users page
On the Users page you can add a list of users that are going to be using apps in your organization. Users added here should be added as the user that they will be logging into, e.g., morne.kapp@axnosis.com.
You will also be able to add Admin users if you are the super admin user.
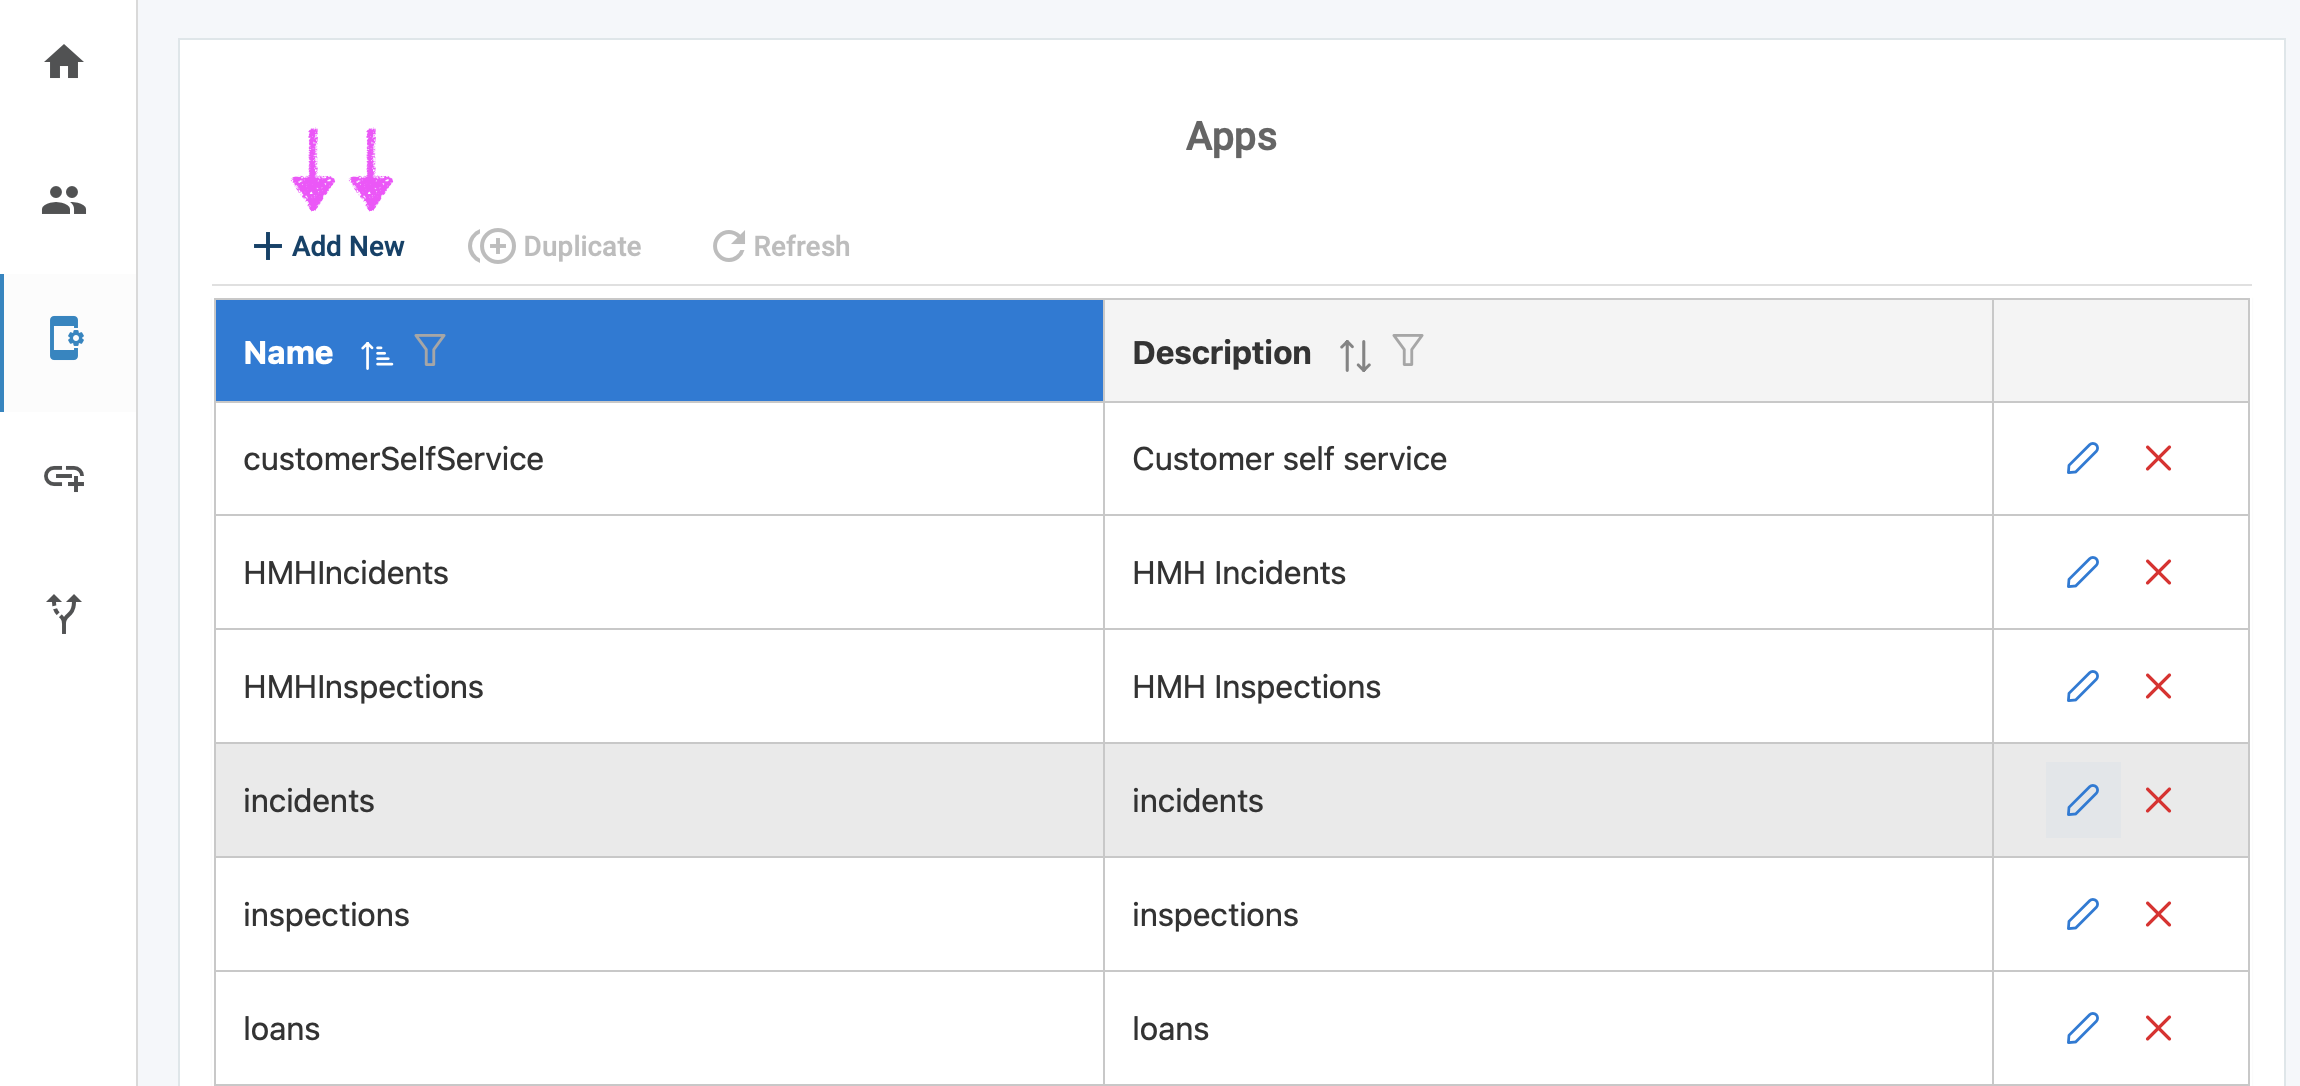
¶ 9.2 Apps page
The Apps page enables you to add a list of apps that are going to be used in your organization and that users will be logging into e.g., Incidents, Inspections.
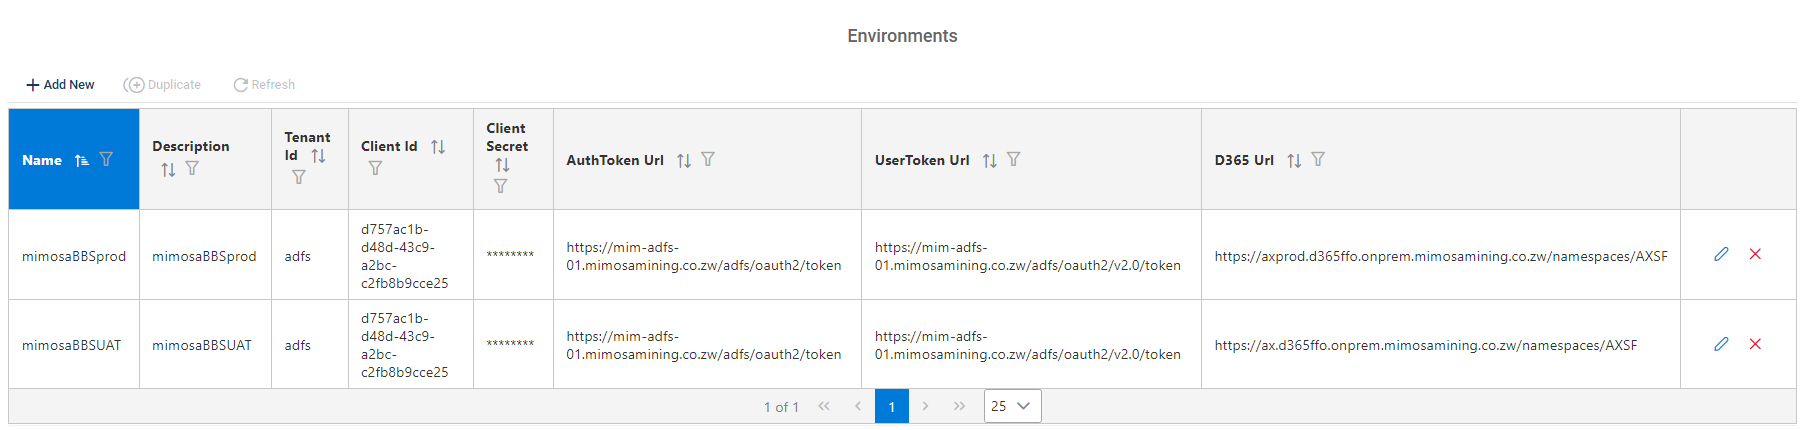
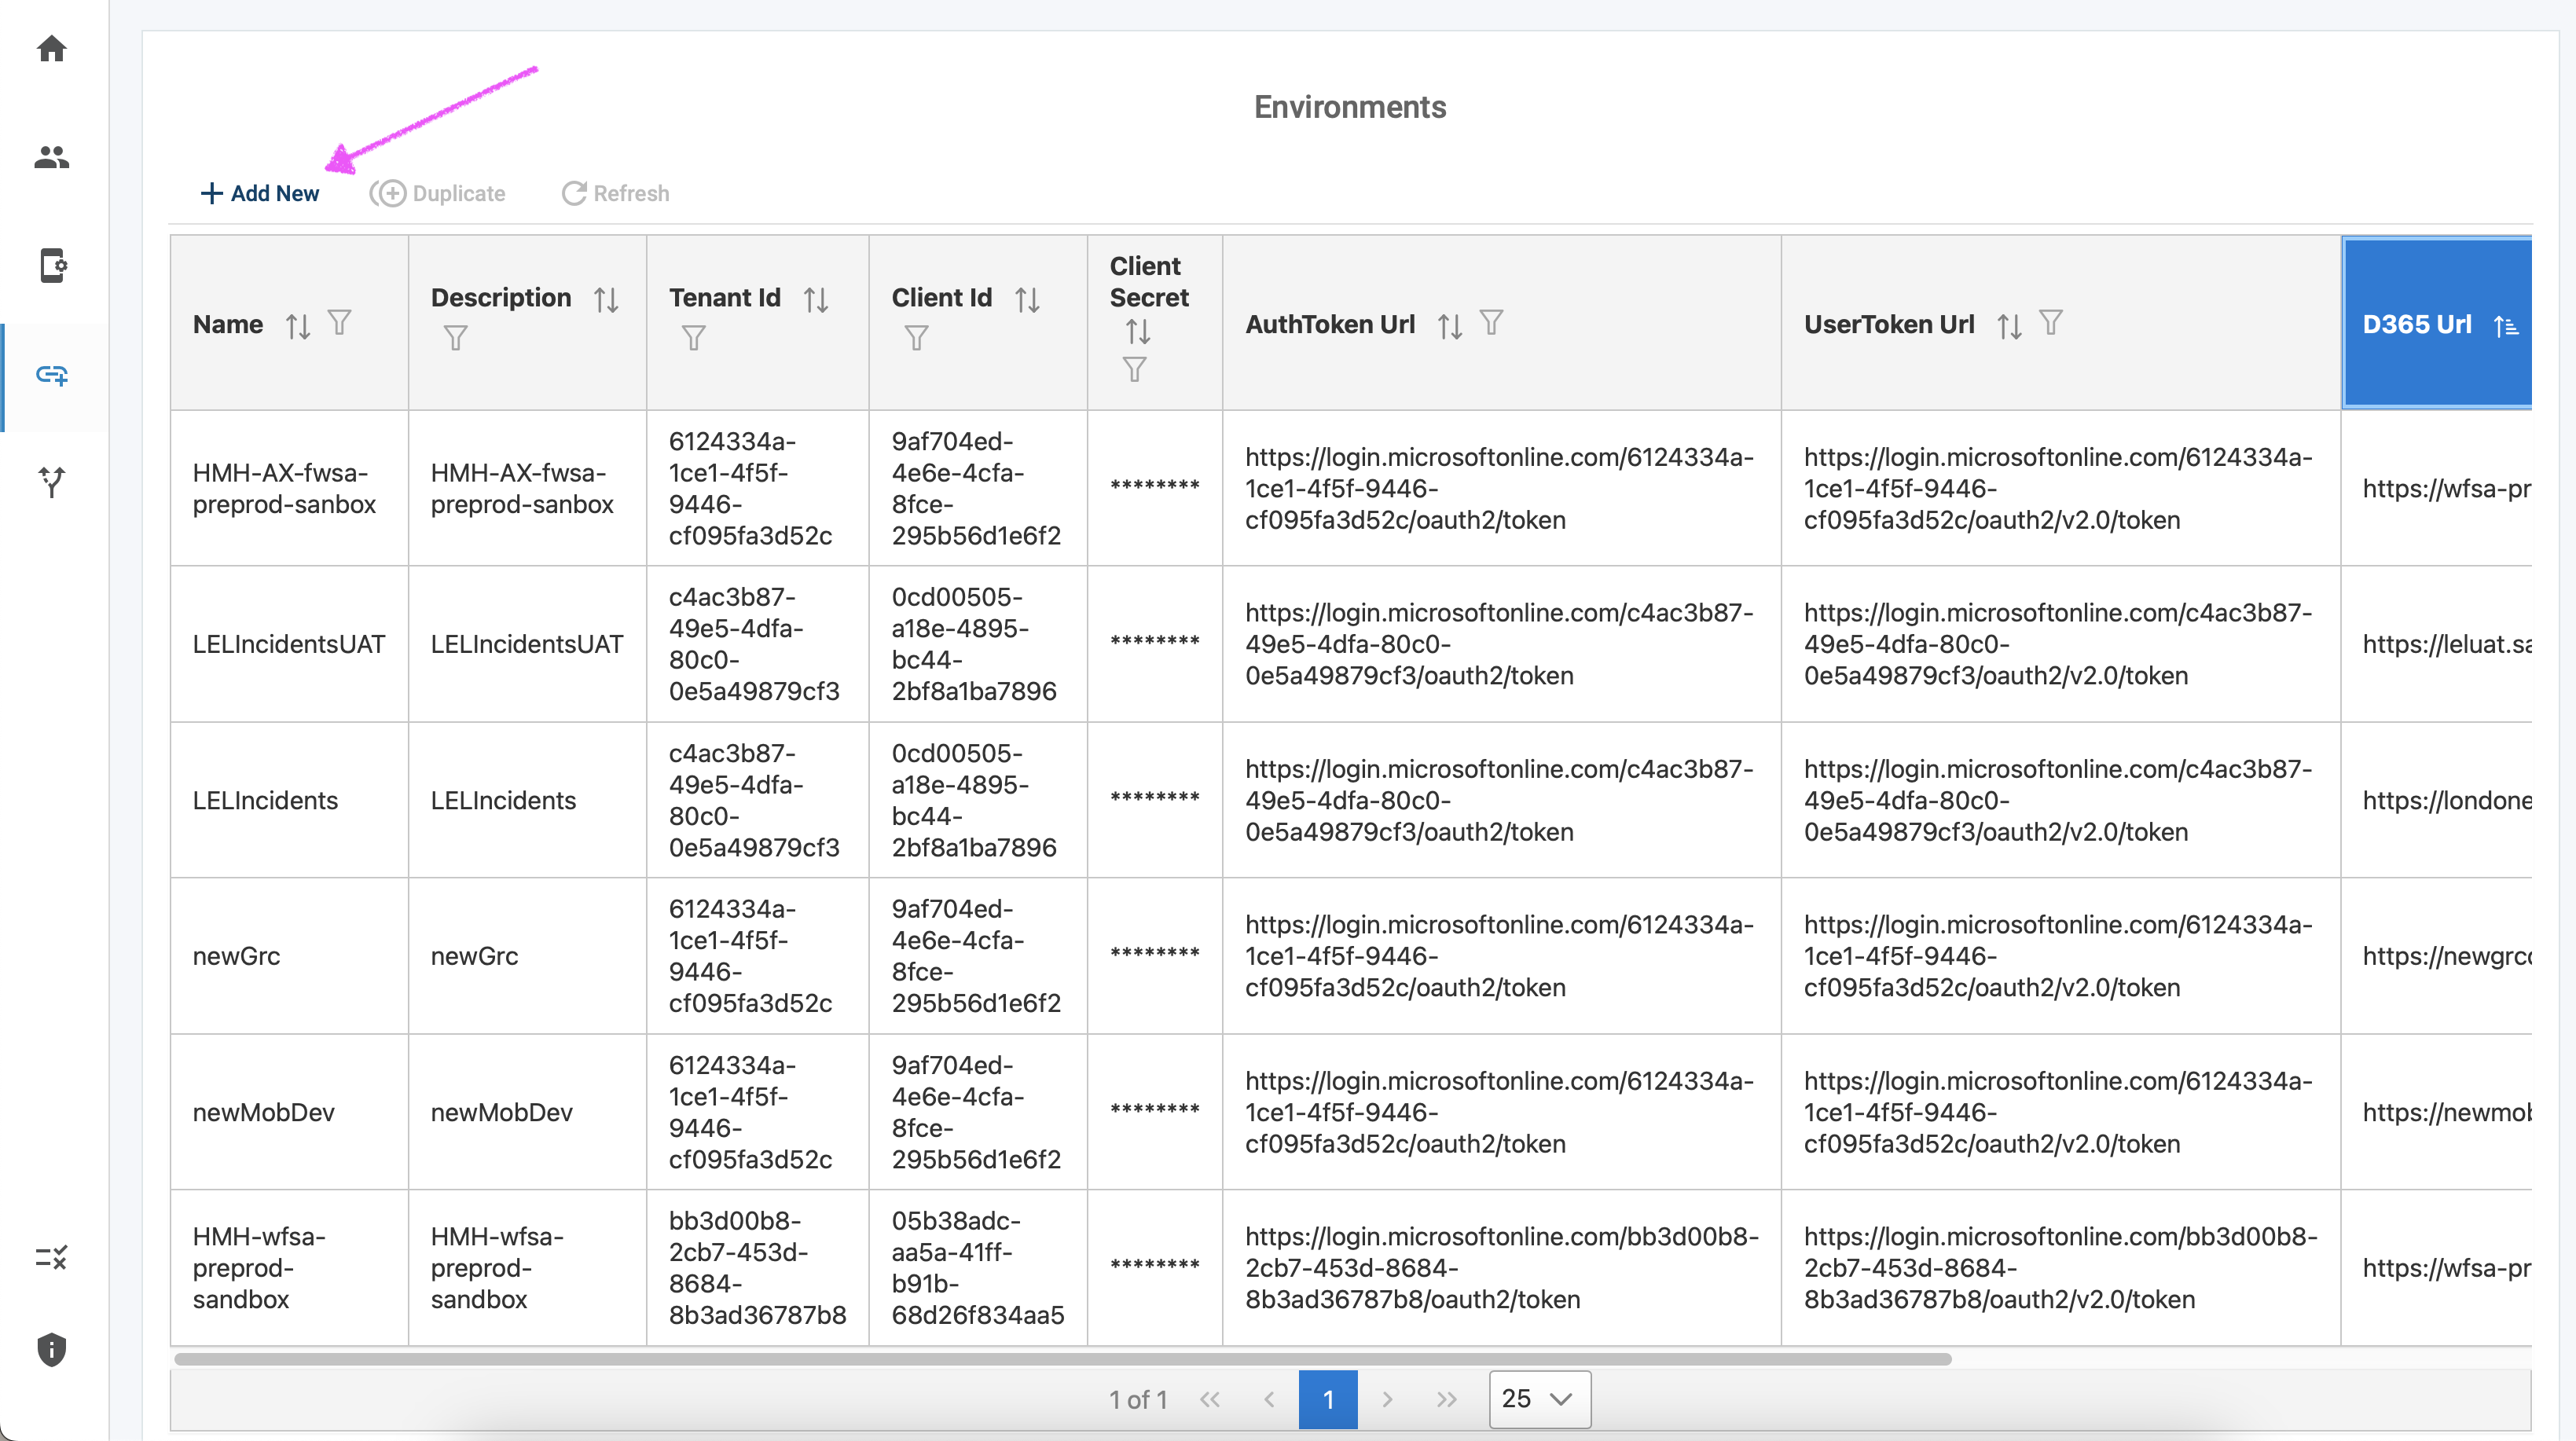
¶ 9.3 Environments page
On the URLS page, you will be able to add the dynamics endpoints that your users and apps will connect to through the middleware. You will be able to add new environments with the list of details that can be entered when a user clicks on the dropdown to see the list of inputs.
These details are very sensitive and can be found when registering your app on azure.
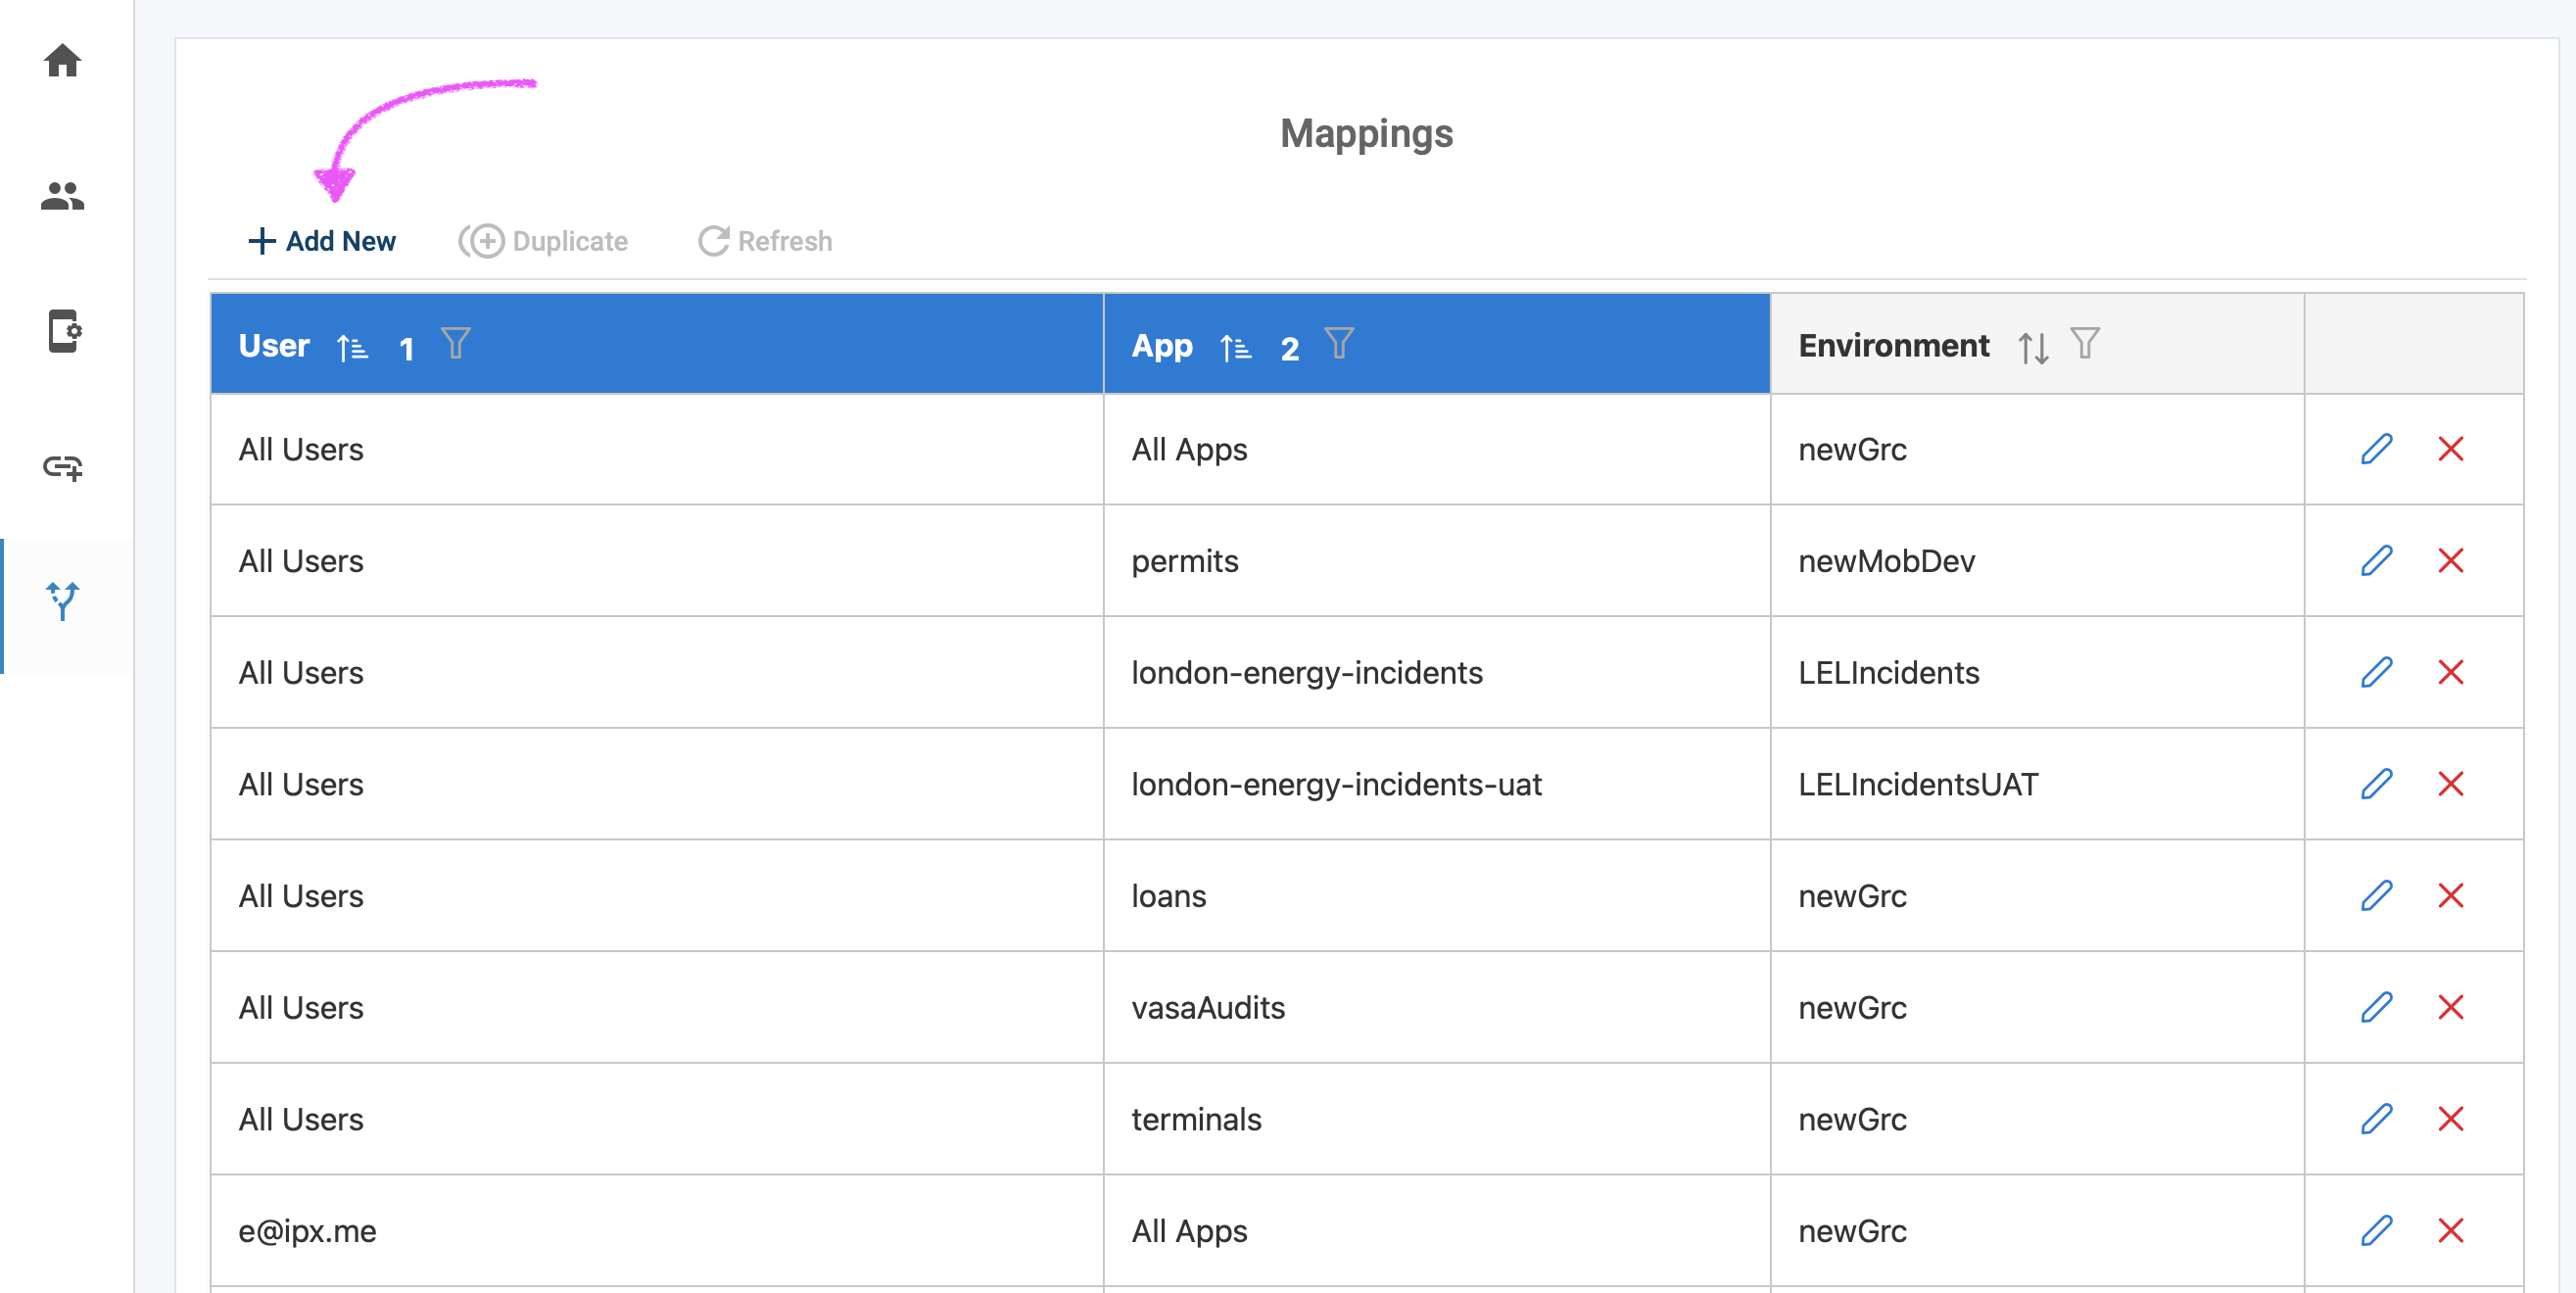
¶ 9.4 Mappings page
The Entries page enables you to combine all the data from the other pages into one entry for the middleware to read.
You will be able to set which users, using which apps, connecting to which dynamics endpoints. You can either select the 'All' option or specific values.
¶ 10. User impersonation
Some applications require non-authenticated requests. I.e., Registering a new user through the Vendor Self Service App. By specifying a D365 user with encrypted password on the middleware we can allow non-authenticated requests to be sent to the middleware and for those requests to be authenticated when it reaches the D365 endpoints.
¶ 10.1 Specify User Credentials per Environment
User credentials should be provided for each environment where User Impersonation is required.
Enter the JSON setting into the environment.d365.js file which is under the /env/ folder in the middleware application folder.
Example file; available on request from please@axnosis.com
¶ 11. PM2 Node Process Manager
We use PM2 to manage the middleware process and the log file rotation.
¶ 11.1 PM2 Installation
Install pm2 globally
- npm install pm2 -g
- Reboots handled with pm2 service: see https://github.com/jessety/pm2-installer
- Download: https://github.com/jessety/pm2-installer/archive/main.zip
- npm run configure
- npm run configure-policy
- npm run setup
- Run: 'pm2 save' while the middleware is running to serialize it for automatic restarts.
¶ 11.2 PM2 Use
Start MiddleWare:
- 'pm2 start index.js' (in the ..\middleware\mwAppApi folder)
Check Logs:
- 'pm2 logs'
Restart MiddleWare:
- 'pm2 restart [id]' (find the id for index with 'pm2 list')

¶ 11.3 PM2 Troubleshooting
If the pm2 command does not restart an old service successfully, you should delete the service and start it from scratch:
- 'pm2 delete [id]'
- 'pm2 start index.js' (in the ..\middleware\mwAppApi folder)
¶ Authentication
¶ 12. Cloud
The setup and configuration above assumes cloud setup. All the settings and configuration are cloud specific and should be completed as specified.
¶ 13. On-prem
When using an on-premise Active Directory (ADFS) for authentication, it is not necessary to set up the App Registration as described above. The client secret is not required and can be left blank. The following settings should be used in the Environment configuration:
- TenantId: adfs
- AuthToken Url: https://[adfs-server-name]/adfs/oauth2/token
- UserToken Url: https://[adfs-server-name]/adfs/oauth2/v2.0/token
¶ Rotating Client Secrets
To prevent being locked out of your environment, it is critical to update the Client Secret before it expires.
¶ Steps for updating your Client Secret
- Azure Portal
- App Registration
- Certificates and Secrets
- Create a new Client Secret
- Copy the new Client Secret Value to the Client Secret to all your Middleware Environments
Note that only the Client Secret field needs to be updated.